GREENWORKSTOOLS.COM GREENWORKSCOMMERCIAL.COM
25
2021-03-18
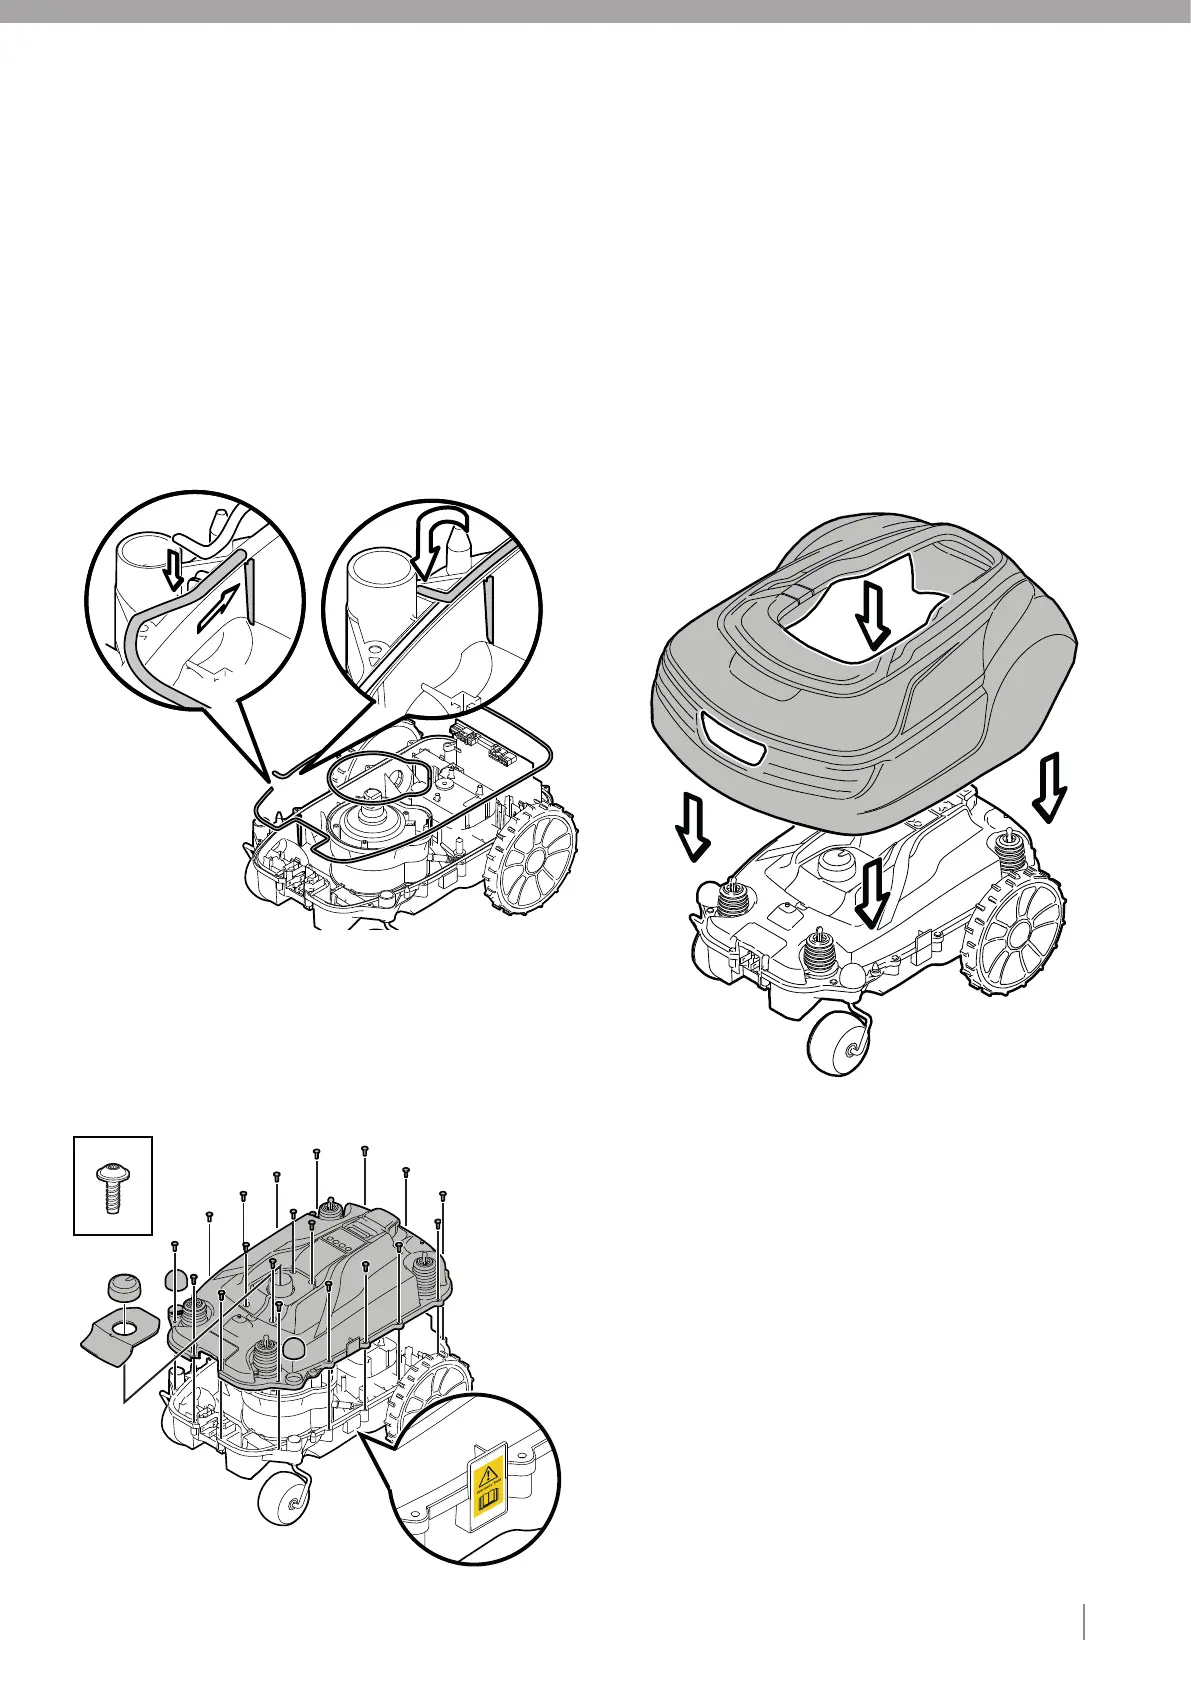
4.20. ASSEMBLING THE CHASSIS
Note: Make sure parts are clean and that no cables will be pinched.
Note: Always use new sealing strips before reassembling the
chassis halves.
1 Fit the sealing strip to the lower chassis by laying one end of the
2 sealing strip in line with the marking on the chassis.
2 Continue laying the sealing strip counter-clockwise around the
2 lower chassis.
Note: Do not stretch the sealing strip.
3 Lay the other end of the sealing strip above the first end and then
2 out of the channel.
Note: To obtain a proper seal, it is important that the ends of
the sealing strips be laid on top of each other and not next to
each other.
4 Insert the sealing strip into the channel in the blade motor housing.
5 Connect the communication board cable from the upper chassis.
2 to the main board.
6 Fit the upper chassis to the lower chassis. Check that the
0 communication board cable and other cables are not pinched
0 between the chassis halves.
X19
7 Insert 19 type 1 fasteners and tighten cross-wise to the correct
0 torque (see section 3).
8 Snap the height scale plate onto the upper chassis.
9 Snap the height adjustment knob onto the height adjustment nut.
10 Push the two rubber caps onto the front of the upper chassis.
11 Attach the new warranty seal to the left-hand side of the joined
0 chassis halves.
Note: The warranty seal must be included and unbroken for
the warranty to be valid.
4.21. ASSEMBLING THE BODY
Press the body onto the top of the chassis snap-on connectors, one
corner at a time.
 Loading...