Model G0458Z (Mfd. Since 7/19)
-39-
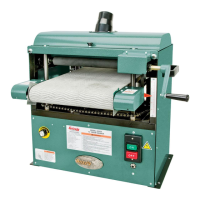
To adjust front pressure roller:
1. DISCONNECT MACHINE FROM POWER!
2.
Loosen hex nut securing adjustment cap
screws on both ends of rear pressure roller
shown in Figure 50.
3.
Rotate cap screw clockwise to raise pressure
roller, or counterclockwise loosen cap screw
to lower pressure roller.
Figure 50. Front pressure roller adjustments and
pressure roller overview.
Pressure Roller
Adjustment
Cap Screw
Hex Nut
Pressure
Roller
Pivot Bar
4. Adjust rear pressure roller until it is equal to,
or up to 0.004" (0.1mm) lower than height of
the drum.
3.
Rotate cap screw clockwise to raise the pres-
sure roller, or counterclockwise to lower pres-
sure roller.
4. Adjust rear pressure roller until it is equal to
or up to 0.004" (0.1mm) lower than height of
the drum.
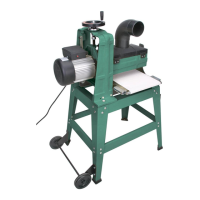
Pressure Roller
Pivot Bars
Pressure Roller
This sander is equipped with a universal motor
that uses two carbon brushes to transmit elec-
trical current inside the motor. These brushes
are considered to be regular "wear items" or
"consumables" that will need to be replaced dur-
ing the life of the motor. The frequency of required
replacement is often related to how much the
motor is used and how hard it is pushed.
Replace the carbon brushes (part number:
P0458Z042-1) at the same time when the motor no
longer reaches full power, or when the brushes mea-
sure less than
1
⁄4" long (new brushes are
5
⁄8" long).
Tools Needed: Qty
Standard Screwdriver #2 ....................................1
To inspect and replace motor brushes:
1. DISCONNECT MACHINE FROM POWER!
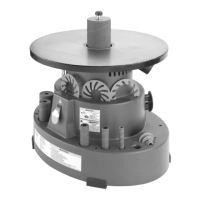
2.
Remove brush caps and worn brushes (see
Figure 1) from conveyor belt motor.
Replacing Brushes
3. Replace both motor brushes and install brush
caps.
Figure 1. Location of motor cover cap screws.
Brush
(1 of 2)
Conveyor
Belt Motor
Brush
Caps
Conveyor
Belt Motor
 Loading...