-26-
Model T33903/T33904 (Mfd. Since 07/23)
Installing/Removing
Arbor
Usually, once the chuck and arbor have been
properly mounted together, they are considered
semi-permanent connections. If you would like to
install a different chuck, we recommend getting a
new arbor for that chuck.
Spindle Socket
Arbor Tang
Installing Arbor in Spindle
Items Needed Qty
Phillips Head Screwdriver #2 ............................ 1
Open-End Wrench 7mm
.................................... 1
Acetone or Lacquer Thinner
.............. As Needed
Rubber Mallet
.................................................... 1
Scan this code to see a video of this installa-
tion process!
7. Strike face of chuck from below with rubber-
faced mallet to seat arbor in spindle.
8. Check seat by gently pulling down on chuck.
9. Install chuck guard, then tighten screw and
hex nut from Step 2 to secure.
Tip: Use table to hold guard in place while
you tighten fasteners.
To install arbor in spindle:
1. DISCONNECT MACHINE FROM POWER!
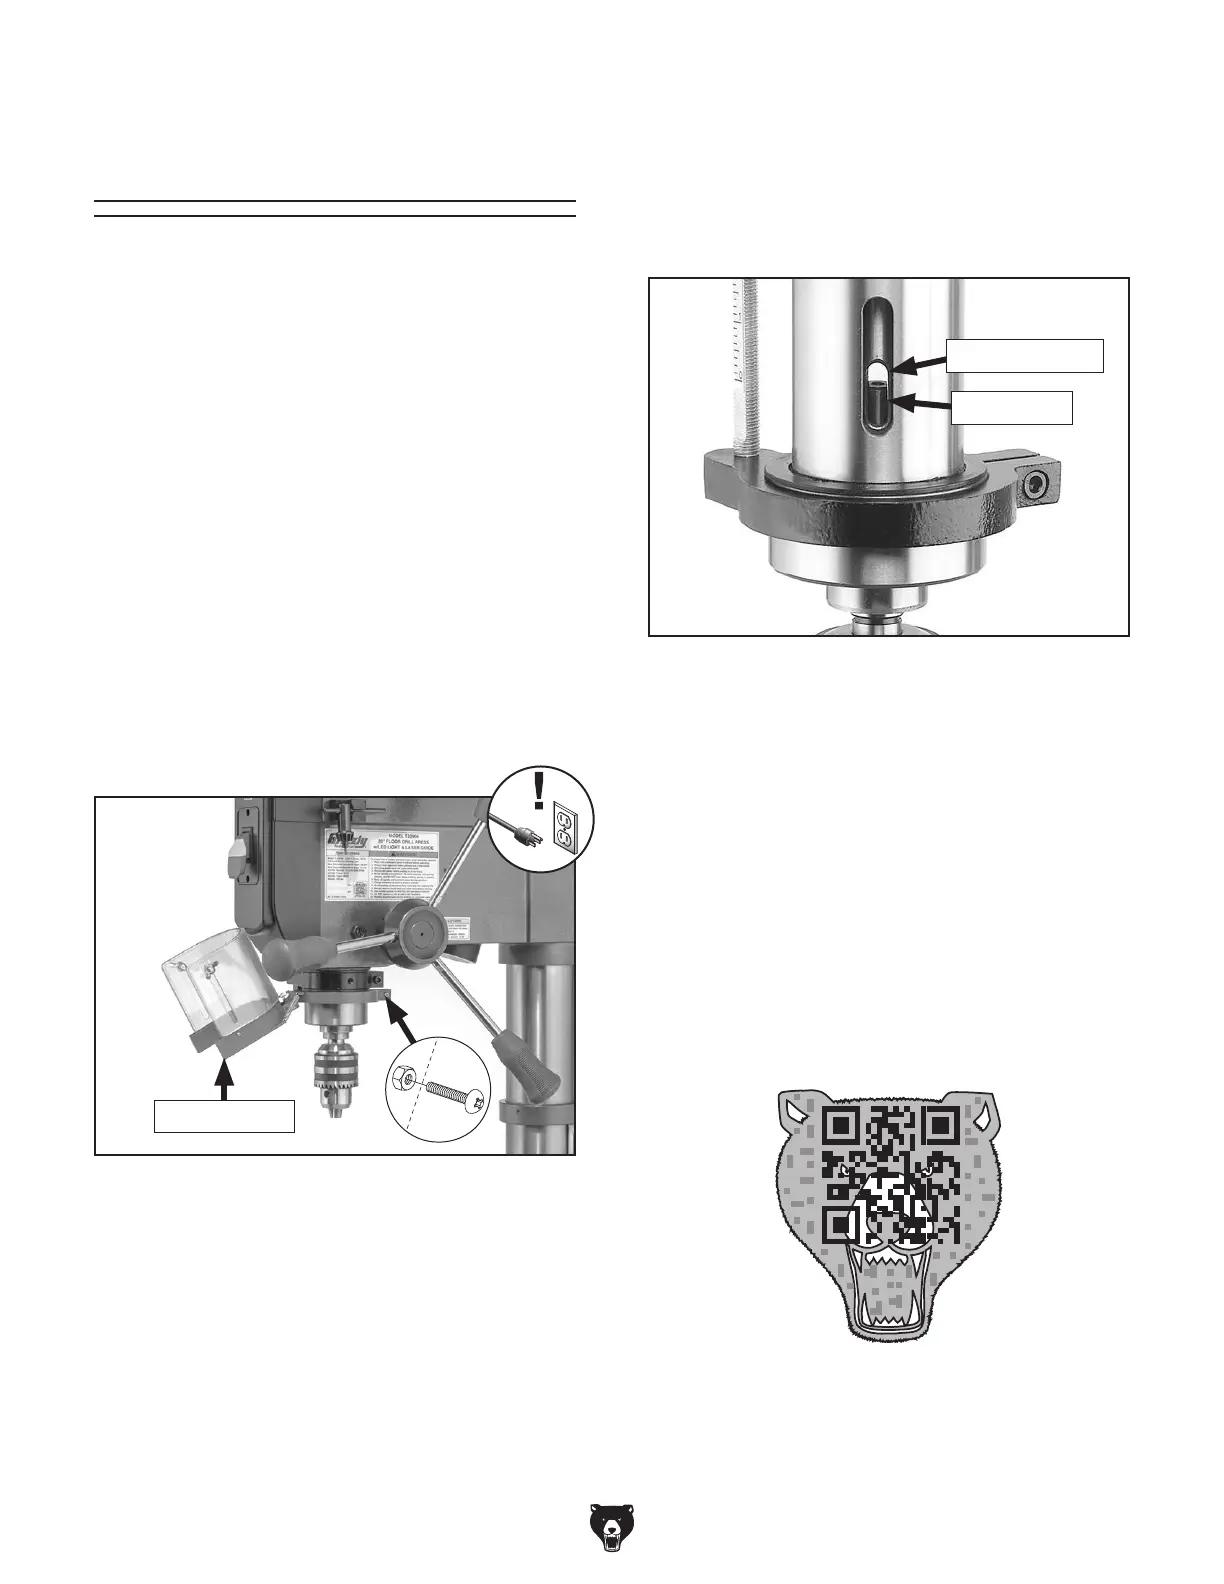
2. Loosen screw and hex nut shown in Figure
26 to slide chuck guard off of quill and
remove.
3. Join chuck and arbor (refer to Joining Drill
Chuck & Arbor on Page 22).
4. Rotate chuck on arbor until chuck jaws retract
into drill chuck body.
Figure 26. Location of chuck guard fasteners.
5. Use acetone or lacquer thinner to clean mat-
ing surfaces of arbor and spindle socket.
6. Slide arbor into spindle socket while slowly
rotating chuck to line up tang on arbor with
slot in socket (see Figure 27).
Chuck Guard
Figure 27. Example of arbor tang aligned with
spindle socket.


 To Next Page