Model T33903/T33904 (Mfd. Since 07/23)
-41-
Adjusting Return
Spring Tension
2. Wipe any oil off spring cover so it does not slip
in your fingers in following steps (see Figure
57).
3. Hold spring cover against side of headstock
so cover stays splined with locking screw,
then loosen cap screw and cover nut
approximately
1
⁄4" each (see Figure 57).
IMPORTANT: Hold spring cover tightly dur-
ing Step 4, or force of spring will cause cover
to spin out of your hands.
4. Wearing gloves, pull spring cover outward
just enough to disengage spring cover notch
from locking screw (see Figure 57).
5. Rotate cover counterclockwise to increase
tension, or clockwise to reduce spring tension.
6. Engage next available spring cover notch
with locking screw (see Figure 58) and hold
spring cover tightly to side of headstock.
If return spring should come
loose from spring cover and
rapidly unwind, laceration
or impact injuries could
occur. Always wear heavy
leather gloves and safety
glasses when adjusting
return spring tension.
Items Needed Qty
Heavy Leather Gloves ..................................1 Pr.
Safety Glasses
.............................................1 Pr.
Shop Rags
......................................... As Needed
Hex Wrench 5mm
.............................................. 1
7. Tighten cover nut and cap screw.
8.
Check tension adjustment by downfeeding
spindle. Spindle should return quickly when
downward pressure is released.
— If spindle does not retract quickly, repeat
Steps 3–7, and re-check tension until
return speed is adequate.
The spring tension for automatic quill recoil has
been pre-set at the factory. In most cases, it will
never need to be re-adjusted during the life of the
machine. However, if the quill stops automatically
recoiling, the spring may need to be adjusted for
additional tension. If it does need adjustment, the
spring housing is located on the left side of the
headstock (see Figure 57).
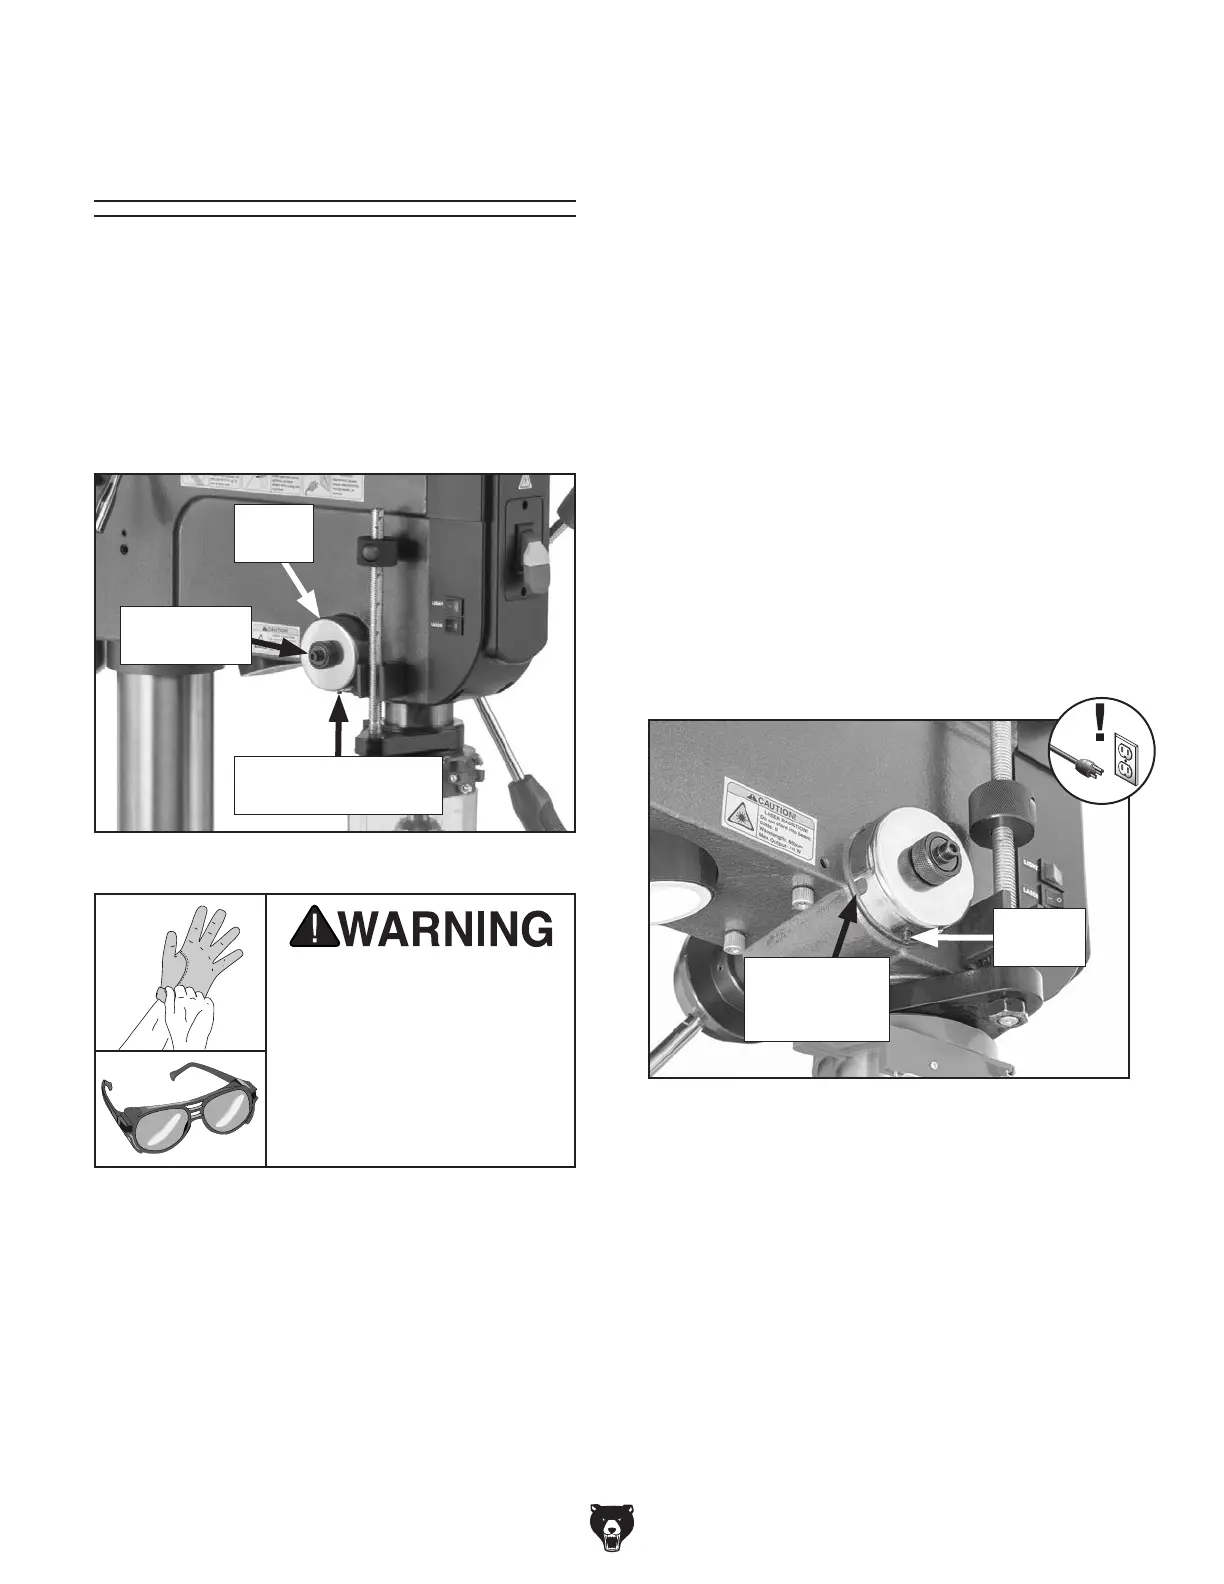
Figure 57. Spring adjustment components.
Figure 58. Location of spring cover notches and
locking screw.
To adjust spring tension:
1. DISCONNECT MACHINE FROM POWER!
Spring
Cover
Cap Screw
& Cover Nut
Spring Cover Notch
& Locking Screw
Spring Cover
Notch
(1 of 6)
Locking
Screw
 Loading...