-42-
Model T33903/T33904 (Mfd. Since 07/23)
Aligning Pulleys
To align pulleys:
1. DISCONNECT MACHINE FROM POWER!
2. Open belt cover.
3.
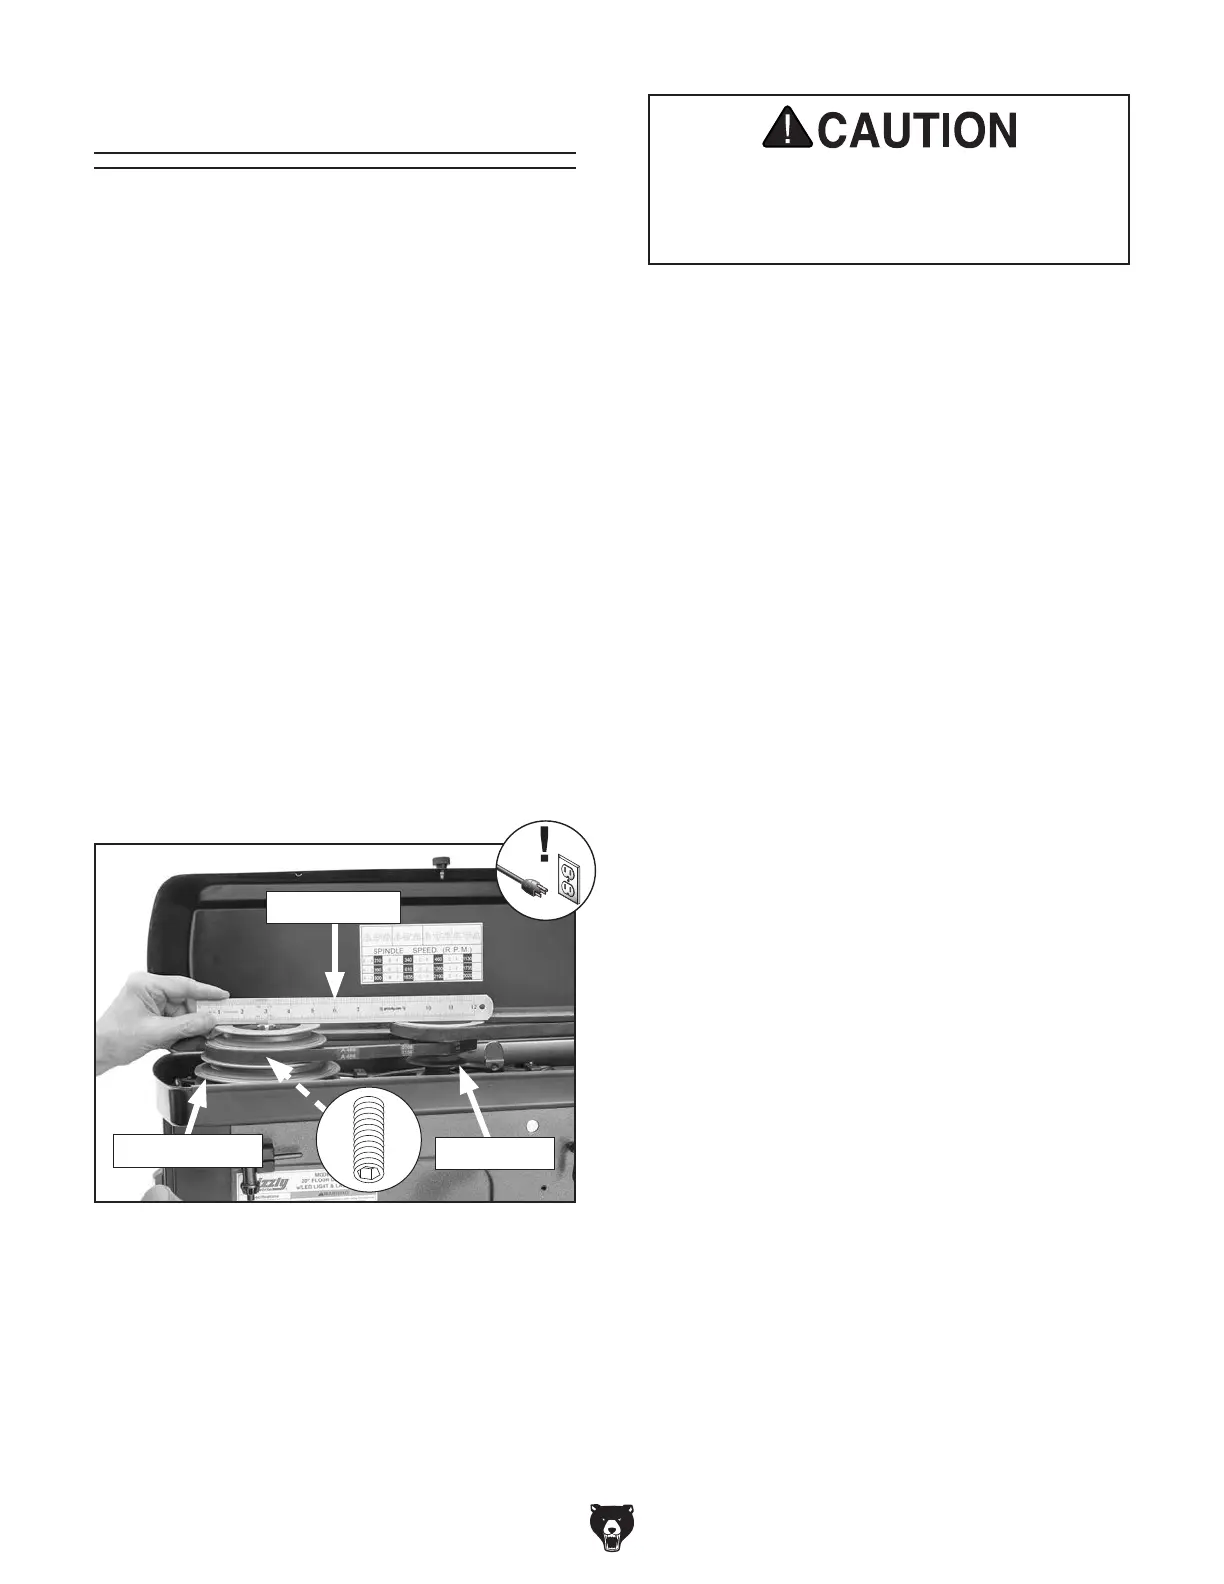
Place straightedge against spindle and idler
pulleys (see Figure 59) and check that they
are aligned. There should be no space any-
where between straightedge or pulleys.
Pulley alignment is an important factor in power
transmission and belt life. The pulleys should
be parallel to each other and in the same plane
(coplanar) for optimum performance.
The spindle and motor pulleys can be adjusted by
loosening the set screws that secure them to their
respective shafts.
Tools Needed Qty
Open-End Wrenches 14mm .............................. 2
Hex Wrenches 3, 4mm
................................ 1 Ea.
Straightedge 12"
................................................ 1
Use care when handling V-belts as they
could pinch your fingers. They may also
get hot after extended use so wait to han-
dle if drill has been in use.
Figure 59. Checking pulley alignment.
Spindle Pulley
Idler Pulley
Straightedge
4. Remove V-belts (refer to Changing Spindle
Speed on Page 29 for instructions on
releasing V-belt tension).
— If V-belt is cracked, torn, excessively worn,
or damaged, replace it.
5.
Loosen set screw on spindle pulley, adjust
pulley on shaft until it aligns with idler pulley,
then tighten set screw (see Figure 59).
6.
Place straightedge against idler and motor
pulleys and check that they are aligned.
— If pulleys are aligned, proceed to Step 9.
— If pulleys are not aligned, proceed to
Step 7.
7.
If you have not already done so, remove
V-belts (refer to Changing Spindle Speed
on Page 29 for instructions on releasing
V-belt tension).
— If V-belt is cracked, torn, excessively worn,
or damaged, replace it.
8.
Loosen set screw on motor pulley and adjust
pulley on shaft until it aligns with idler pulley,
then tighten set screw.
9. If V-belt were removed, install V-belts for
desired spindle speed. Refer to Changing
Spindle Speed on Page 29 for more
information.
10. Close belt cover.
— If pulleys are aligned, proceed to Step 6.
— If pulleys are not aligned, proceed to
Step 4.


 To Next Page