26
Timer functions
You can set a connected video recorder to record a programme.
A total of 8 recording timers are available.
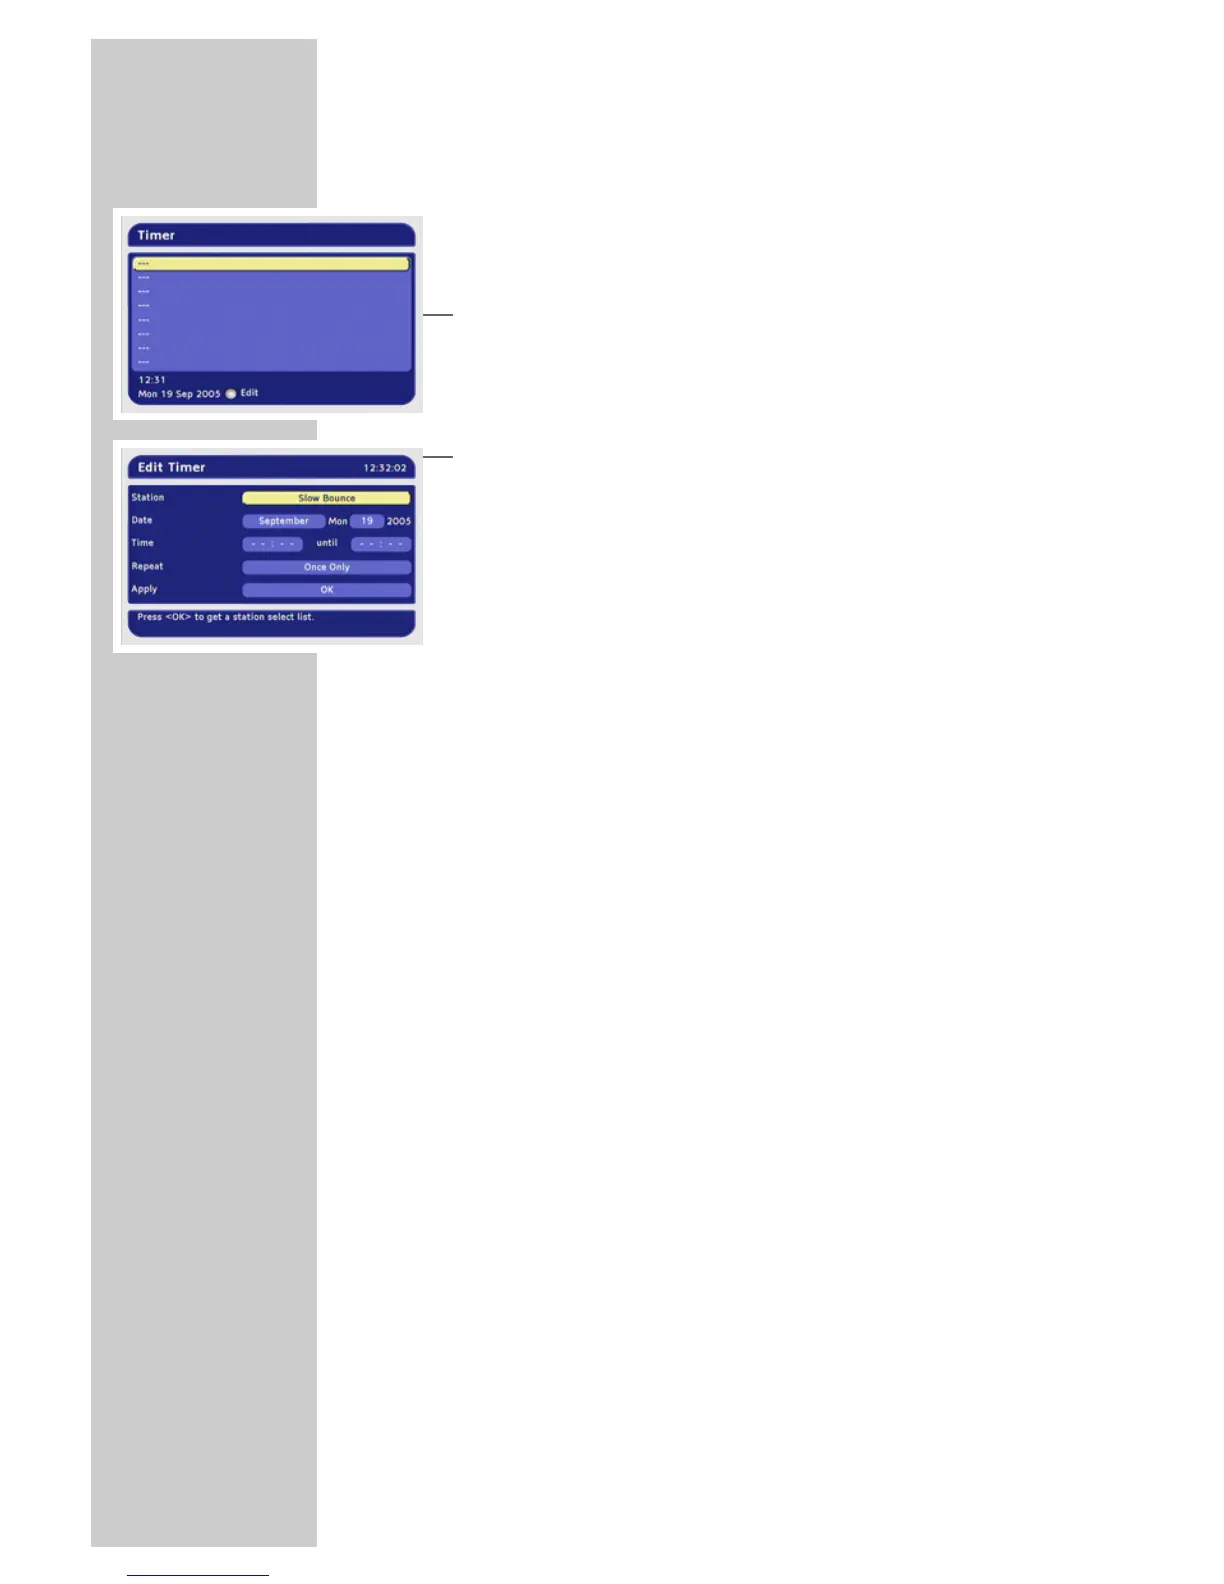
Programming the recording timer
1 In the main menu, select »Timer« with »P-« or »P+« and press
»OK« to confirm.
2 Press »P-« or »P+« to select the timer position (---) and press
»OK« to confirm.
3 Select »Station« with »P-« or »P+« and press »OK« to
confirm.
4 Press »P-« or »P+« to select the station from the list and press
»OK« to confirm.
5 Select the month with »
Ǹ
« or »
Ƿ
« and press »OK« to confirm.
6 Press »
Ǹ
« or »
Ƿ
« to select the day and press »OK« to
confirm.
7 Use »0« to »9« to enter the start and end time in four digits.
8 Press »
Ǹ
« or »
Ƿ
« to select the cycle and press »OK« to
confirm.
9 Press »OK« to store the timer.
– The timer is saved to the timer list.
– You can delete single timers by pressing »
z
« and all timers
by pressing »
ǷǷ
«.
10 Press »i« to finish the setting.
– The digital receiver switches to the selected station at the set
time.
Notes:
Your video recorder must also be programmed accordingly.
Entries by remote control are not possible during timer
recording.
You can interrupt the timer recording by pressing »
Ǽ« and
»OK«.
If the receiver is in standby mode before the timer starts, it
switches back to standby when the timer has finished.
ADDITIONAL FUNCTIONS
_____________________________
 Loading...