12 GTO 3000XLS/3200XLS Instruction Manual © 01.10.12
Step 3
Attach a vertical closed position stop plate to the SECOND gate.
Using appropriate hardware for your type of gate attach the vertical closed position stop plate to
the SECOND gate frame at the point where it will come in contact with the ground stop post. Do not
tighten it completely at this time. You must slide the closed position stop plate toward the ground
stop until they touch (Illustration C). Once you have moved the stop plate to the correct position,
tighten its hardware completely.
Step 2
Install a low prole ground stop (not provided)
beneath the SECOND gate stop plate.
The ground stop needs to be positioned near the
end of the gate as shown in Illustration A and may
be made of metal or concrete and should be rmly
secured in the ground (we recommend setting it
in concrete).
Closed Position Stop Plate mounted
on the gate leaf that CLOSES FIRST
Closed Position Stop Plate
Low Profile Ground Stop
in Near the Center of Driveway
FRONT VIEW
SIDE VIEW
Mount Vertically
Illustration C
Step 4
Return gates to the open position and reattach gate operators.
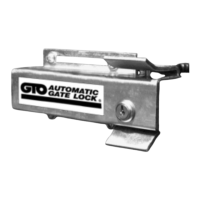
NOTE: The optional ground stop post is used to provide a secure point for the SECOND gate to close
against. If you will be using the GTO Automatic Gate Lock accessory with your gate operator system, the
low prole ground stop is REQUIRED, as example shown in illustration C.