EasyManua.ls Logo

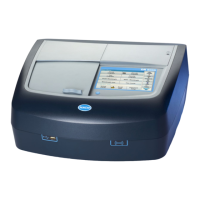
Hach DR 6000 - User Manual

Hach DR 6000
156 pages
Print Icon
To Next Page IconTo Next Page
Loading...
DOC022.53.90367
DR 6000
USER MANUAL
05/2012 Edition 2
© HACH Comp., 2012. All rights reserved. Printed in Germany.

Table of Contents

Other manuals for Hach DR 6000

Questions and Answers

  • R
    Richard MarquezSep 1, 2025
    What does 'Error Selfcheck stopped. Hardware error' mean on Hach DR 6000?
    • A
      Angelica GeorgeSep 2, 2025
      If the Hach Measuring Instruments displays 'Error Selfcheck stopped. Hardware error', it indicates an electronic defect. Contact technical support and provide the error number.
  • J
    James BoyleSep 14, 2025
    What to do if Hach Measuring Instruments displays 'Web server cannot be reached'?
    • D
      Debbie BensonSep 14, 2025
      If the Hach Measuring Instruments displays 'Web server cannot be reached', it means the Viper homepage cannot be reached. Try the connection again later.
  • S
    Steven Durham IIIAug 31, 2025
    What to do if Hach DR 6000 Measuring Instruments displays 'System check incorrect!'?
    • B
      Brandon ValdezAug 31, 2025
      If the Hach Measuring Instruments displays 'System check incorrect!', it means the measurement of air values failed. Switch the instrument off and then back on again. If the system check is still unsuccessful, contact technical support.
  • A
    Ashley SanfordSep 16, 2025
    What to do if Hach DR 6000 displays 'Temperature too high. Measurement not possible!'?
    • S
      Scott ParkerSep 16, 2025
      If the Hach Measuring Instruments displays 'Temperature too high. Measurement not possible!', switch off the instrument and allow it to cool for a few minutes. If necessary, move it to a cooler place.
  • T
    Thomas ZavalaSep 15, 2025
    What does 'Shelf life exceeded! Use chemicals?' mean on Hach DR 6000 Measuring Instruments?
    • W
      William HarrisonSep 15, 2025
      If the Hach Measuring Instruments displays 'Shelf life exceeded! Use chemicals?', the analysis may be erroneous. Use new chemicals.
  • G
    Gina WrightSep 23, 2025
    What does 'Control range not reached!' mean on Hach DR 6000?
    • A
      Amanda MyersSep 23, 2025
      If the Hach Measuring Instruments displays 'Control range not reached!', this is a warning notice indicating that the control limit set was not reached.
  • A
    Ashley WebsterAug 27, 2025
    What to do if Hach DR 6000 Measuring Instruments says 'File for instrument update is faulty'?
    • K
      kendradavisAug 28, 2025
      If the Hach Measuring Instruments indicates that the file for the instrument update is faulty, it means there was an error during the update. Save the update file again and repeat the procedure.
  • L
    Leonard SanchezAug 27, 2025
    What does 'Fault Clean cuvette!' mean on Hach DR 6000 Measuring Instruments?
    • Y
      yblackAug 27, 2025
      If the Hach Measuring Instruments displays 'Fault Clean cuvette!', it indicates that the cuvette is dirty or there are undissolved particles in it. Clean the cuvette and allow any particles to settle before proceeding.
  • K
    Kelly JohnsonAug 26, 2025
    What to do if Hach Measuring Instruments says 'Over measuring range'?
    • N
      Nicholas McclainAug 27, 2025
      If your Hach Measuring Instruments indicates that you are over the measuring range, it means the measured absorbance is above the calibration range of the test. To fix this, dilute the sample and measure it again.
  • J
    jamiewatsonAug 25, 2025
    What to do if Hach DR 6000 displays 'Concentration too high!'?
    • N
      ngreeneAug 26, 2025
      If the Hach Measuring Instruments displays 'Concentration too high!', it means the calculated concentration is higher than 999999. Dilute the sample and measure again to resolve this issue.

Summary

Section 1 Technical Data

Section 2 General Information

Safety Notes

Provides essential safety precautions for operating the instrument.

Safety Around Source Lamps

Details safety precautions related to high temperatures and UV light from lamps.

Chemical and Biological Safety

Outlines precautions for handling chemical and biological substances.

Section 3 Installation

Power Connections

Provides instructions for connecting the instrument to a power source.

Section 4 Startup

Instrument Startup Process

Details the steps for powering on the instrument and its initial startup sequence.

Instrument Self-Check

Describes the automatic diagnostic test performed upon instrument startup.

Section 5 Standard Programs

Instrument Setup Configuration

Overview of settings accessible from the Instrument Setup menu.

Operator ID Management

Instructions for setting up and managing operator identification.

Security Settings

Configuration options for controlling access to instrument functions.

Assigning Operator Security Levels

How to assign security levels to individual operator IDs.

Network Setup Configuration

Instructions for configuring Ethernet communication for network connectivity.

Managing Stored Data

Introduction to the data log and its functions for saving, recalling, sending, and deleting data.

Stored Programs Overview

Information on accessing and using pre-programmed tests.

Running a Standard Adjust

Procedure for adjusting the calibration curve using a standard solution.

Standard Addition Method

Explains the standard addition method for checking results and detecting faults.

Performing Barcode Tests

Steps for running tests using barcode identification.

Instrument Software Update via Internet

Instructions for updating instrument software using USB or web function.

Programming New Tests

Steps to create and program new test procedure.

Section 6 Expanded Programs

User Programs

Overview of creating and managing custom "made-to-measure" analysis programs.

Programming a User Method

Step-by-step guide to creating a new user-defined analytical method.

Single Wavelength Settings

Defining parameters for single wavelength measurements.

Multi Wavelength Settings

Configuring parameters for multi-wavelength analyses.

Calibration Settings

Methods for calibrating the instrument for single and multi-wavelength modes.

Calibration Curve Creation Methods

Options for creating calibration curves by entering values or measuring standards.

Free Programming Program Type

Overview of the advanced free programming option for creating custom methods.

Defining Measurement Process

How to define the steps and readings for a measurement process.

Entering Calibration Formulas

How to define calculation formulas for results.

Single Wavelength Mode

Introduction to measurements at a single wavelength.

Setting Up Single Wavelength Mode

Configuration options for performing single wavelength measurements.

Taking Single Wavelength Readings

Step-by-step instructions for performing a single wavelength measurement.

Multi Wavelength Mode Overview

Introduction to performing measurements at multiple wavelengths.

Setting Reading Mode for Multiple Wavelengths

Configuring the reading mode for multi-wavelength analyses.

Completing Multi Wavelength Readings

Steps for taking measurements in multi-wavelength mode.

Wavelength Scan Mode

Introduction to recording absorbance and transmission spectrums.

Setting Up a Wavelength Scan

Configuring parameters for performing a wavelength scan.

Performing a Wavelength Scan

Step-by-step instructions for executing a wavelength scan.

Working with Reference Scans

Using previously saved scans as references for comparison.

Section 6.6 Time Course Measurements

Introduction to collecting and analyzing absorbance/transmittance data over time.

Time Course Setup Parameters

Configuring settings for collecting data over time.

Performing Time Course Readings

Steps for taking readings in time course mode.

Section 6.7 System Checks

Overview of instrument checks for performance and diagnostics.

System Checks Menu Overview

Introduction to the System Checks menu for instrument diagnostics.

Updating Instrument Software

Instructions for updating the instrument's software via USB or internet.

Optical Checks

Performing checks on wavelength accuracy, stray light, and photometric accuracy.

Optical Checks Using Verification Kit

Steps for using the verification kit to perform optical checks.

Wavelength Check

Testing the accuracy of the instrument's wavelength settings.

Stray Light Check

Measuring the stray light level within the instrument.

Absorbance Check

Verifying photometric accuracy and repeatability.

Absorbance Check Procedure

Detailed steps for performing the absorbance check.

Noise Check

Testing the photometric noise level of the instrument.

Noise Check Procedure

Steps for performing the noise check and interpreting results.

Drift Check

Assessing the stability of the instrument over time.

Section 6.7.4 Analytical Quality Assurance (AQA)

Procedures for ensuring the quality and accuracy of analytical measurements.

AQA Standard Configuration

Setting up standard solutions for AQA measurements.

Managing AQA Standards and Reminders

Options for deleting standards and setting reminders for AQA analysis.

Performing AQA Measurements

Steps for executing AQA measurements, including standard and barcode programs.

Instrument Backup and Restore

Procedures for backing up and restoring instrument data to a USB stick.

Sample ID Management

Entering up to 100 Sample Identification tags.

Section 7 Maintenance

Cleaning Requirements

General guidelines and precautions for cleaning the instrument.

Lamp Replacement

Safety precautions and overview for replacing instrument lamps.

Changing the Halogen Lamp

Detailed instructions for replacing the halogen lamp.

Changing the Deuterium Lamp (UV)

Step-by-step guide for replacing the deuterium lamp.

Section 8 Troubleshooting

Troubleshooting Test Execution Errors

Lists common errors during test execution and their resolutions.

Section 9 Replacement Parts

Hach DR 6000 Specifications

General IconGeneral
Wavelength Range190 - 1100 nm
Light SourceTungsten and Deuterium lamps
DetectorSilicon photodiode
Wavelength Accuracy±1 nm
Wavelength Repeatability< 0.1 nm
Photometric Range± 3.0 Abs
Photometric Linearity±0.002 Abs at 0.0 to 1.0 Abs
Stray Light< 0.05%T at 340 nm
Display7 inch color touchscreen
Power Requirements100 - 240 V / 50 - 60 Hz
ConnectivityUSB, Ethernet

Related product manuals