48
Maintenance
6.4 Cleaning
6.4.1 Cleaning the Controller
With the enclosure securely closed, wipe the exterior with a damp cloth.
6.4.2 Cleaning the Photocell Window
Occasional cleaning of the photocell window is required. The frequency will
depend on the nature and concentration of dissolved and suspended solids in the
sample. Biological activity is a primary factor in mineral scale deposit on the
window and the amount differs with sample temperature. In general, more growth
will occur in warm temperatures and less in cold.
Note: Take care to not scratch the
photocell window.
Inspect the photocell window often to determine cleaning needs. Remove any
organic growth or film on the photocell window before standardization or
calibration. Use a cotton swab and isopropyl alcohol or a mild detergent (such as
Liqui-nox
®
) to remove most sediment and dirt. Mineral scale buildup may require
cleaning with a mild acid applied with a cotton swab followed by a detergent wash.
Do not use abrasive cleaners.
6.4.3 Cleaning the Turbidimeter Body and Bubble Trap
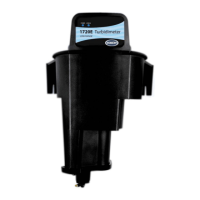
Sediment may collect in the turbidimeter body after extended use. Noise
(fluctuation) in the reading could indicate the need to clean the body and/or bubble
trap. The 1720E bubble trap and bottom plate may be removed to make cleaning
easier. Drain and clean the turbidimeter body before each calibration. Establish a
regular schedule or perform cleaning as determined by visual inspection.
Cleaning the Turbidimeter Body
Note: The turbidimeter body, bubble
trap, and detector must be cleaned
before each calibration.
1. Turn off sample flow to the turbidimeter body.
2. Remove the head assembly and bubble trap cover from the body. Remove the
bubble trap by lifting it vertically. Set it aside to be cleaned separately.
3. Drain the body by removing the plug from the bottom of the body.
4. Replace the drain plug and fill the body to the weir with cleaning solution. This
cleaning solution can consist of dilute chlorine solution (25 mL of household
bleach in 3.78 liters of water) or a laboratory detergent such as Liqui-nox
(1 mL detergent in 1 liter of water).
5. Use a soft brush to clean the inside surfaces of the body.
6. Remove the drain plug again and thoroughly flush the turbidimeter body with
ultra-filtered deionized water. Clean and replace the plug.
Cleaning the Bubble Trap
1. Prepare a cleaning solution (as in step 4 above) in a container large enough
to submerge the entire bubble trap.
2. Using a test tube brush such as Cat. No. 690-00, clean each surface.
3. Rinse the bubble trap thoroughly with ultra-filtered deionized water and
reinstall it in the turbidimeter body.
4. Replace the bubble trap cover and head assembly on the top of the body.

 Loading...