24
Installation
3.6 Turbidimeter Installation Information
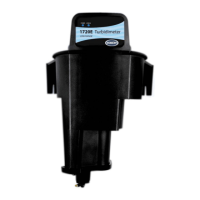
The turbidimeter body is designed for wall-mounting (although it may be mounted
on the optional floor stand). The turbidimeter sensor must be mounted within
six feet of the controller unless an extension cable is used. Maximum cable length
is 9.6 m (31 feet).
3.6.1 Mounting the Turbidimeter Body
Locate the turbidimeter as close to the sampling point as possible. A shorter
distance for the sample to travel results in a faster response time.
Clean the turbidimeter body and bubble trap before installation using the
instructions supplied in section 6.4.3, Cleaning the Turbidimeter Body and Bubble
Trap on page 48. Slotted mounting brackets are integral parts of the turbidimeter
body. Install customer-supplied hardware appropriate for the installation
environment using the criteria detailed below:
• Install in a location that is isolated from vibration.
• Allow at least 22 cm (approximately 10 inches) clearance for removal of the
head assembly and bubble trap cover from the top of the turbidimeter body.
• Leave enough room below the turbidimeter body to remove the bottom plug
and to place a container under the drain when calibrating or cleaning.
Note: Make sure the top of the
turbidimeter body is level.
• Install two ¼-20 bolts 10-
3
/4 inches apart (on center). Leave at least ¼-inch of
the bolt head exposed.
• Make sure the bolts are installed level.
Slide the slotted mounting brackets of the turbidimeter body onto the bolts.
3.6.2 Installing the Head Assembly
After the turbidimeter body has been mounted, install the bubble trap cover, then
place the head assembly on the turbidimeter body with the label facing the front.
Move the head assembly back and forth slightly to ensure it is properly seated on
the body of the instrument. Failure to properly seat the head will result in light
leakage and erroneous readings.
The rear portion of the head assembly has a molded “lip” which may be used to
hang the head assembly on the turbidimeter body edge for routine maintenance.
3.7 Installing a Sample Line
DANGER
This turbidimeter is not designed
for use in hazardous locations or
with samples that are flammable
or explosive in nature. If any
sample solution other than water
is used in this product, test the
sample/product compatibility to
ensure user safety and proper
product performance.
One-fourth inch O.D. rigid or semi-rigid tubing is recommended for sample lines.
Run them as directly as possible between the turbidimeter body and the sampling
point to minimize sample flow lag time.
Install sample line taps into larger process pipes to minimize interference from
air bubbles or pipeline bottom sediment. A tap projecting into the center of the
pipe is ideal. Figure 24 shows examples of sample tap installations.
Note: When setting the flow rate, take care to avoid sweeping air “micro-bubbles” through
the internal bubble trap. Observe the sample flow inside the turbidimeter body. If small
air bubbles can be seen flowing up through the center, reduce the flow rate.

 Loading...