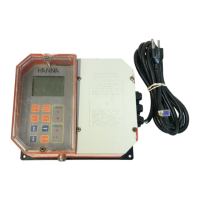
Installation & Controller Start-Up 30
4.2.4.2. Terminal 2 Wiring
Probe
1. Run the probe(s) cable through the conduit opening.
2. Connect the probe(s) leads to the removable terminal connector marked PROBE1 (PROBE2).
Follow the lead markings (+ positive / – negative) to ensure correct wiring position for output leads.
3. Carefully put the wired terminal connector into place on the board.
4. Position the excess cable through the cable gland, before tightening the nut.
5.
Remove the screw and hardware located below PROBE1 (PROBE2) connector and attach ground lead (g).
COMM
-
B A +
IN1 IN2 A01 A02 A03 A04
PROBE
-
B A +
PROBE 1
-
B A +
PROBE 2
-
B A +
INP
-
I +
A
+
B
—
A
+
B
—
Figure 21: Probes Wiring
Probe cabling color code
Marking Attached Cable
Patch Cable
*
Functionality
– GREEN BLACK 0V
B WHITE WHITE RS‑485 D –
A YELLOW BLUE RS‑485 D+
+ BROWN RED 5 V
g
GREEN / YELLOW PROTECTIVE GROUND CONNECTION
* Cables may be purchased separately to connect between the probe and controller up to 50 meters (164 ft).
COMM
1. Run the communication cable through the left front conduit opening.
2.
Connect the cable leads to the removable terminal connector marked COMM, using the marked lead locations.
3.
After leads are fixed in the terminal connector, carefully put the wired terminal connector into place on
the board.
Keep connection between COMM terminals and cable trunk as short as possible. Recommended use of
120 Ω / 0.5 W End Of Line Resistor (EOLR), if HI520 is the last device connected to a RS‑485 Bus cable.
4. Feed excess cable through the cable gland before tightening nut.

 Loading...