6
Chapter 2 - Quick Setup
Your access point can be up and running in just a few minutes. This quick installation guide will help to set
up your access point and configure its basic settings. Please follow the instructions in the chapters below:
2-1. Initial Setup
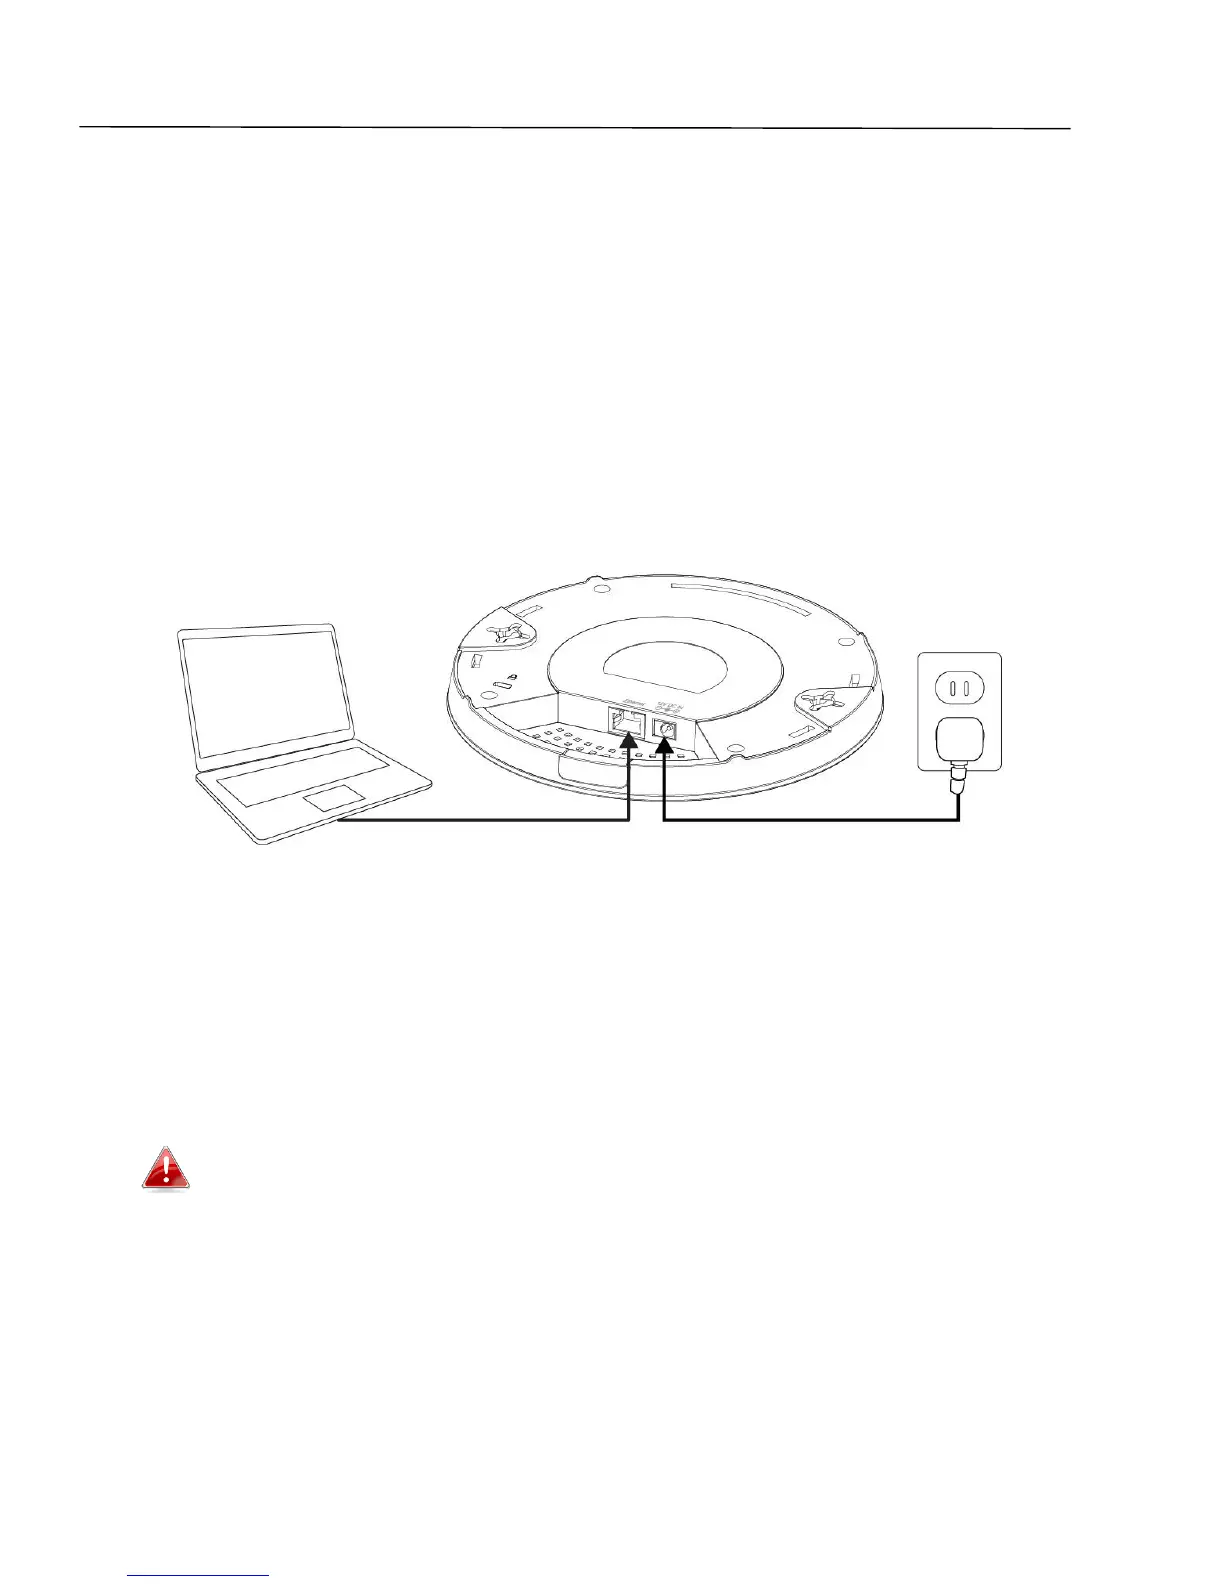
1. Connect the access point to a computer via Ethernet cable.
2. Connect the power adapter to the access point’s 12VDC port and plug the power adapter into a power
supply using the included cable.
3. Please wait a moment for the access point to start up. The access point is ready when the LED is
Purple.
4. Set your computer’s IP address to 192.168.1.x where x is a number in the range 1 – 100. If you are
unsure how to do this, please refer to the Chapter 5-1.
Please ensure there are no other active network connections on your computer
(disconnect Wi-Fi connections and Ethernet cables).
5. Enter the access point’s default IP address 192.168.1.230 into the URL bar of a web browser.

 Loading...