51
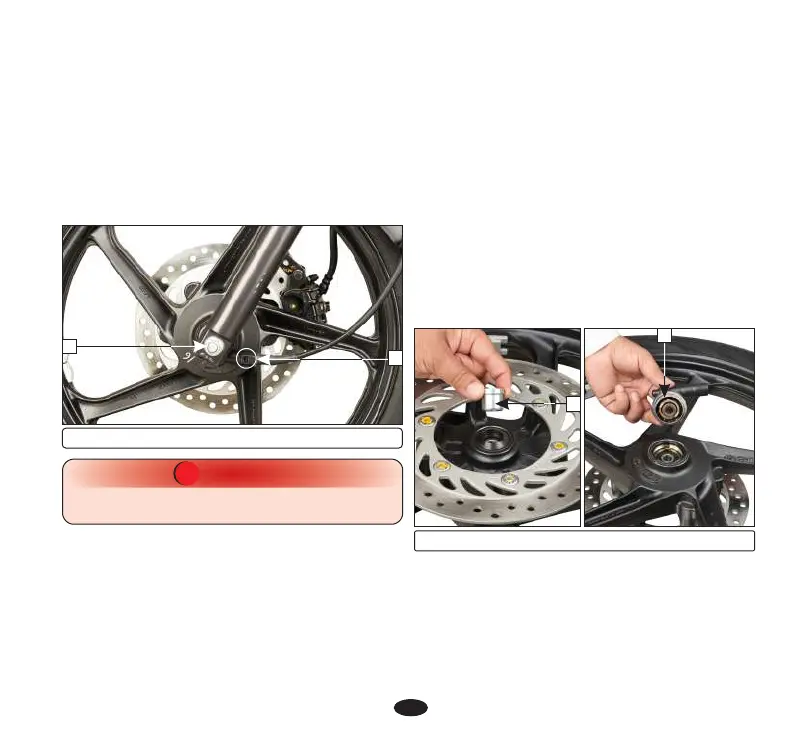
FRONT WHEEL REMOVAL
î Raise the front wheel off the ground.
î Remove the speedometer cable (1) by
pressing the tab (2) & pulling cable out
from the speedometer gearbox.
î Remove the front axle nut (2).
î Remove the axle and the wheel.
î Remove the side collar from the wheel.
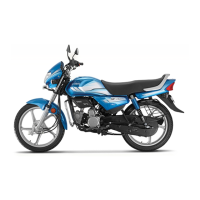
FRONT WHEEL INSTALLATION
î Install the side collar (1) to the right side of
the wheel hub and then install the
speedometer gear box (2) on the left side
of the wheel hub.
î Position the front wheel between the fork
legs by aligning the slot on the speedometer
CAUTION
!!
Do not operate front brake lever when the
wheel is removed.
REAR WHEEL REMOVAL
î Raise the rear wheel off the ground.
î Remove the rear brake adjusting nut (1)
and disconnect the brake rod (2) from the
brake arm (3) by pushing down the brake
pedal. Disconnect the brake stopper arm
gear box with the lug on the fork leg and the
disc between the brake pads to avoid
damage to the pads. Insert the axle from the
right side through the fork legs and wheel
hub.
î Tighten the front axle nut to the specified
torque.
TORQUE : 5.9 kgf-m
î After installing the wheel apply the brake
several times and then check if the wheel
rotates freely. Recheck the wheel if the
brake drags or if the wheel does not rotate
freely.
(1) Side collar (2) Speedometer gear box
(1) Tab (2) Axle Nut
1
2
1
2