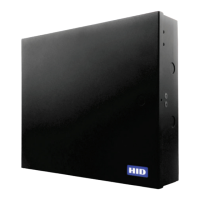
Web-Based Access Control Solution
ACW2-XN
Replace an AW2 Wiegand Module
Note
• You should not need to remove any wires from any of the AW2 Module’s screw terminals, as they
can unplug.
1. Take note how the existing wiring is connected (take a picture with a smartphone) before you remove
anything.
2. Disconnect the 12V Battery if there is one present in the cabinet.
3. Unplug the mains supply plug from the power outlet.
4. If the faulty AW2 module is the outer module (i.e., not trapped between two other modules) then
jump to step 7.
5. Remove the four screws securing the outer AW2 module to the Cabinet.
6. Leaving the outer module wiring in place unplug the outer module from the faulty module.
7. Unplug (only the wired) screw terminal plugs from the faulty AW2 Module
8. Remove the four corner screws that secure the faulty AW2 to the cabinet
9. Pulling sideways, unplug the faulty module from the module that it is plugged into.
10. Plug the new module into the now vacant socket and settle the module’s mounting base so that it is
positioned over the four screw holes.
11. Replace the four screws to secure the new module to the cabinet, using an appropriately-sized flat
screwdriver.
12. Take the label that came with the new AW2 Module and fix it over the faulty module’s label on the
back page of the ACW2-XN’s Quick Install Guide.
13. Remove the necessary plugs, one at a time, from the new module (put them on the old module) and
plug the existing wired plugs into their correct positions – using your photo for reference.
14. If you didn’t have to remove an outer module, jump to step 17.
15. Plug the outer module into the side connector of the new module.
16. Secure the outer module with its four corner screws, using an appropriately-sized flat screwdriver.
17. Reconnect the AC Mains – the STAT (Status) LEDs on the Controller and Wiegand Modules will flash
rapidly for approximately one second, allow a minute for the system to boot up.
18. Using HID Access Manager, click on Device Discovery so that the new Wiegand port addresses will be
read into the system.
19. Click on “Doors”, and navigate to the door/s associated with the replaced AW2 Module. Allocate the
new Wiegand port addresses (these will be on the new label that you fixed on the last page of the
Quick Start Guide. (All other settings for the effected doors will

 Loading...