20
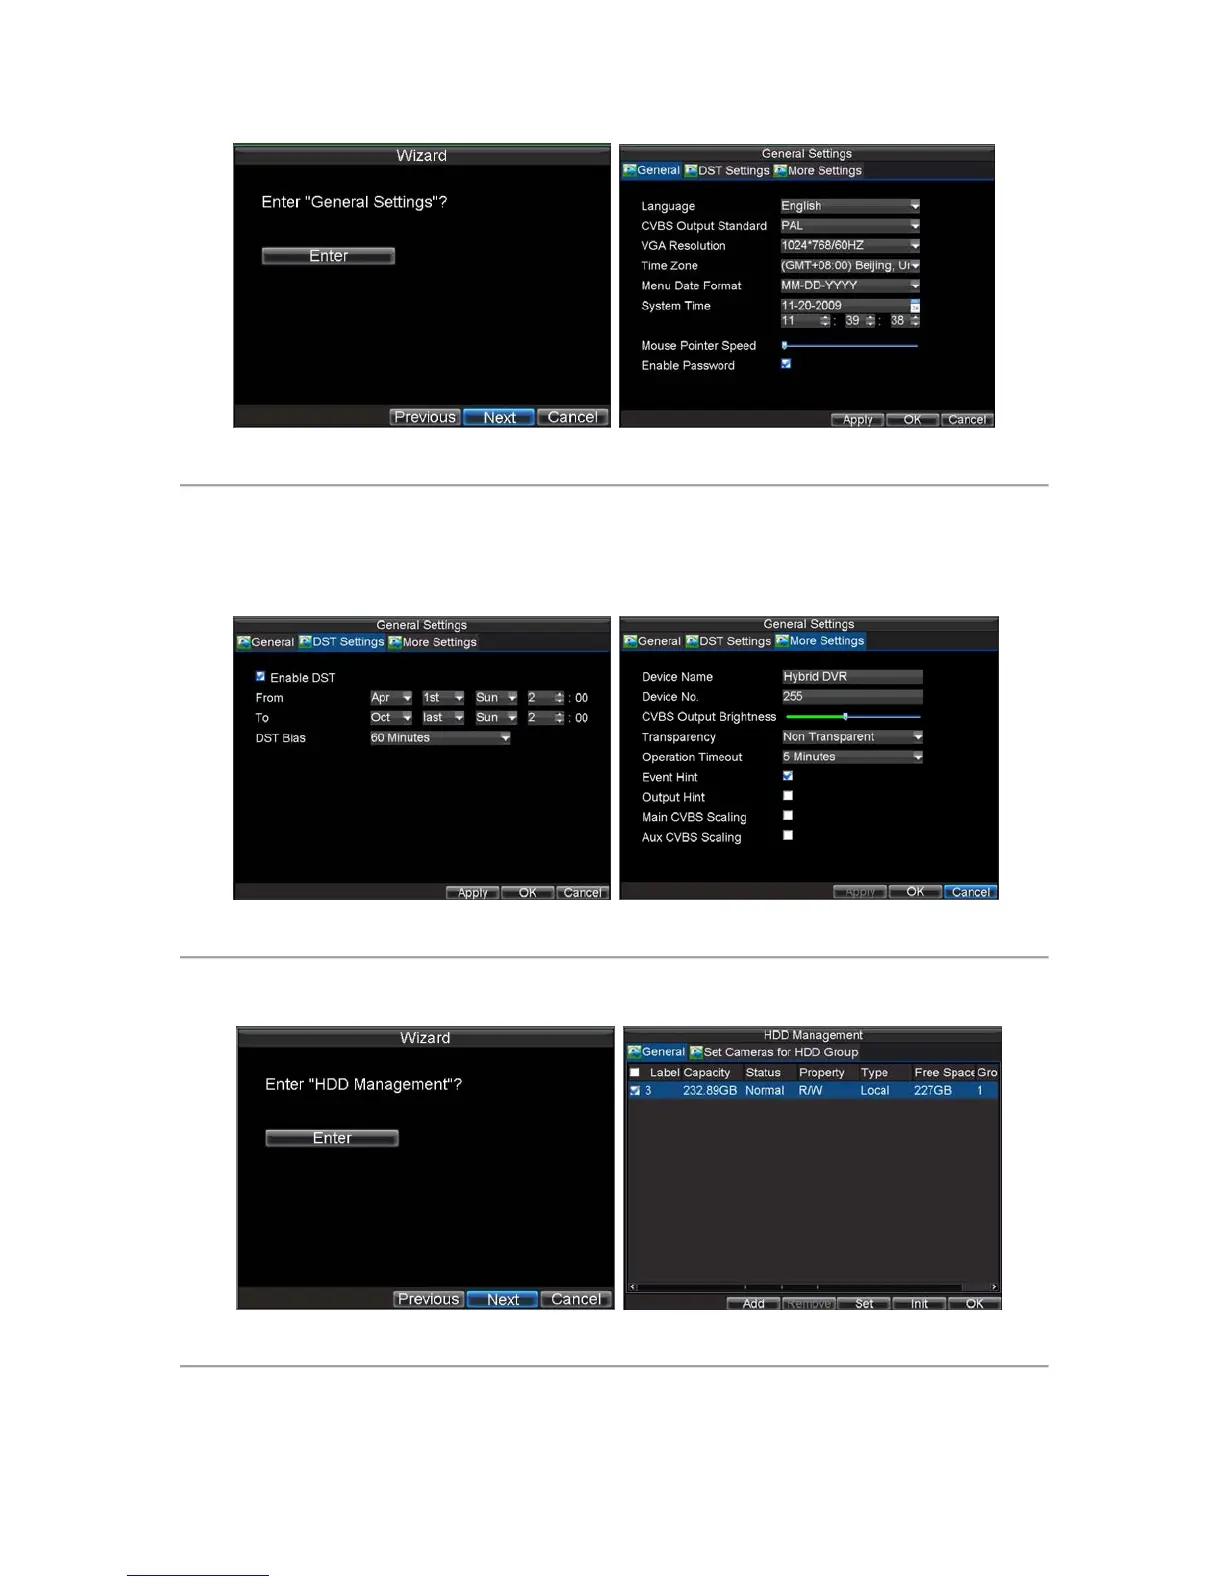
Figure 4. General Settings
6. To start general settings, click the Enter button.
7. Select the language, output standard, VGA resolution and time zone here. If you do not need to input
password whenever you enter the menu, you can disable password.
8. Enter the correct date and time under System Time. Click the Apply button to save the setting.
9. Select the DST Settings tab to enable DST, and More Settings to change device name and number.
Figure 5. General Settings--More
10. After the general settings, click the OK button which will take you back to the Setup Wizard window.
11. Click the Next button. This will take you to the HDD Management window, shown in Figure 6.
Figure 6. HDD Management
12. To start HDD management, click the Enter button.
13. If a new HDD was recently installed, select the HDD from the list to initialize it. Initializing the HDD
 Loading...