Rail Network Video Recorder User Manual
26
3.1 Local Network Settings
Purpose:
You can configure the basic network parameters and time synchronization parameters.
3.1.1 Network Settings
Purpose:
You need configure the basic network parameters to ensure well network communication.
Before you start:
Connect the LAN 2 to a network switch with network cable.
Port 1 and Port 2 respectively represent LAN 1 and LAN 2. LAN 1 is for debugging. LAN 2 is for connecting IP
cameras and network transmission.
Steps:
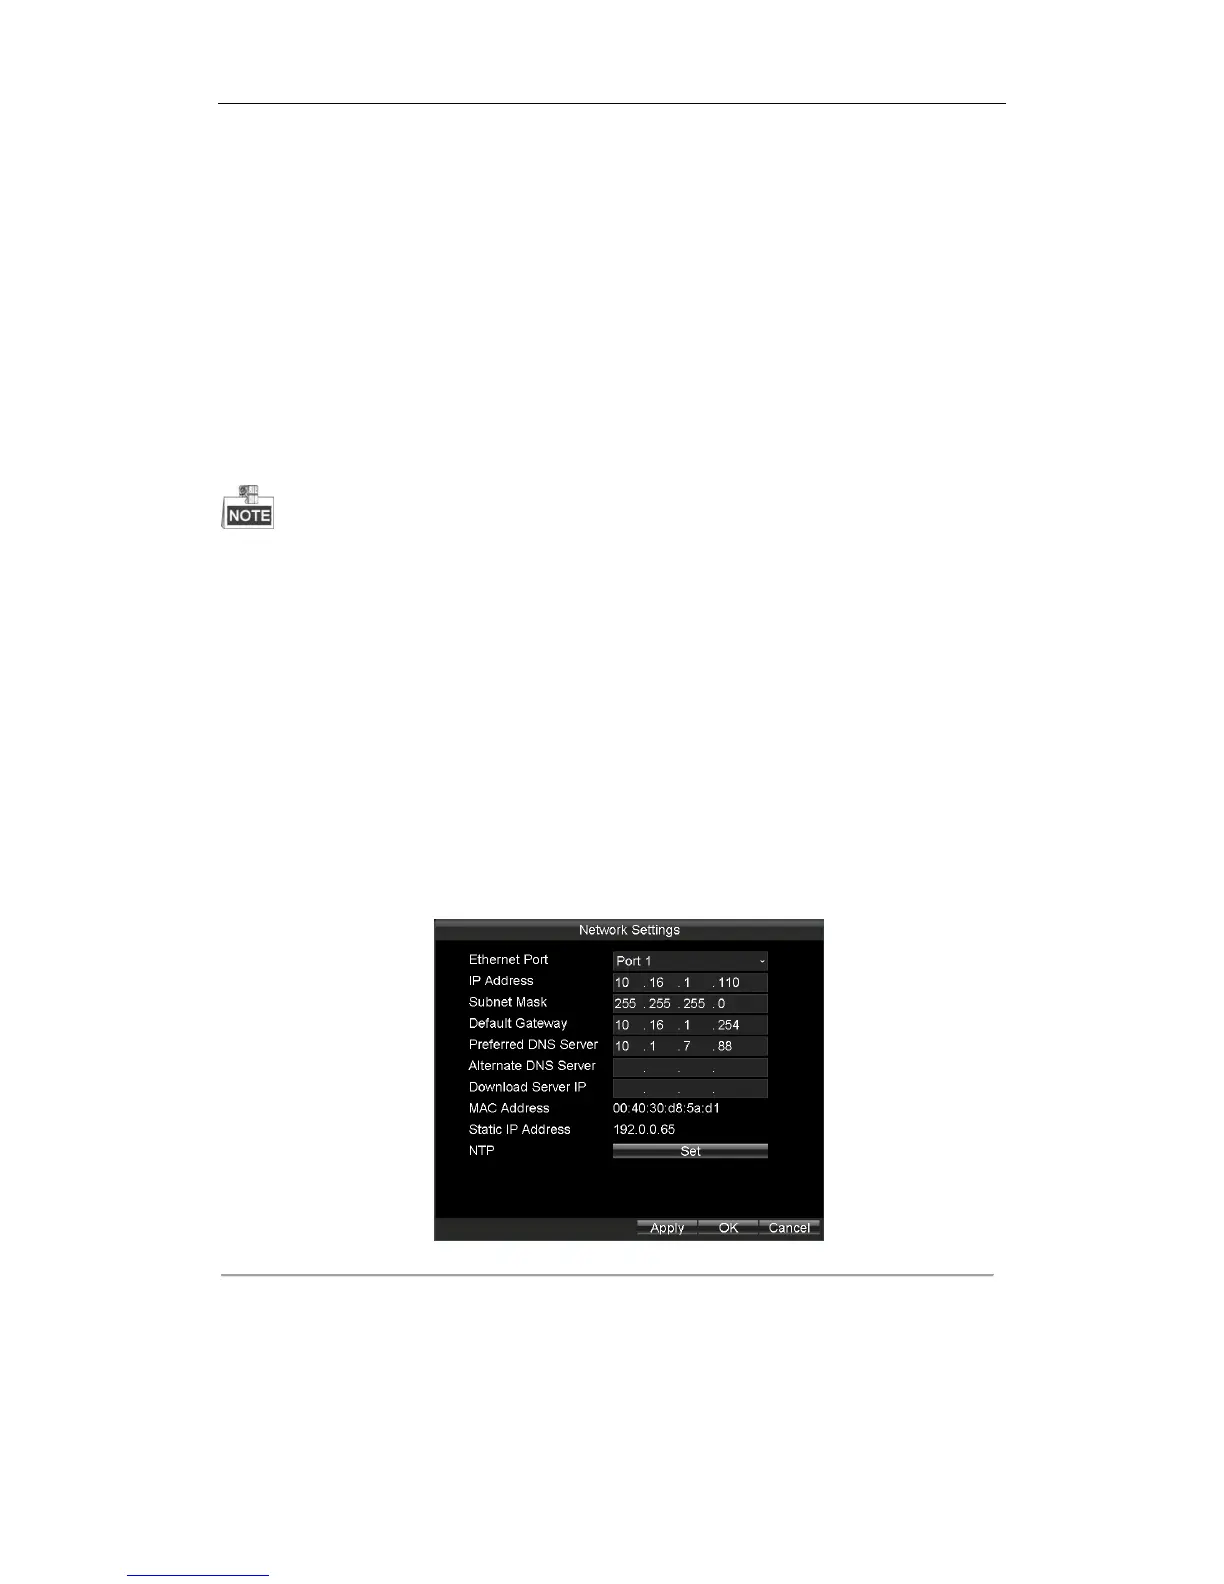
1. Enter the Local Network Settings interface.
Main Menu > Basic Settings > Network
2. Select Ethernet Port as Port 2.
3. Input the device IP address, Subnet Mask, Default Gateway, Preferred DNS Server, Alternate DNS Server in
the corresponding text fields.
Download Server IP: To upload videos to the Auto Backup Server, you need to input the IP address of
server, where the tool locates, in Download Server IP text field. You can ask technical support for the Auto
Backup Server.
IP address: LAN 2’s default IP address is 192.1.0.64.
4. Click OK to save the settings.
Figure 3. 2 Local Network Settings
3.1.2 Time Synchronization
Purpose:
You can synchronize Rail NVR’s time with NTP server.
Steps:
 Loading...