Note: Before to refit the part lubricate
the thread in order to prevent blockings
because of dirt or oxide.
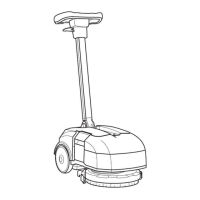
4.2.3 Brush Motors
• Put the machine in safe conditions.
• Disassemble the Brush Coupling
Flange (see section 4.2.2 at page 22).
• Unplug the Solution Hoses that con-
nects the distributor to the Brush
Motors.
• Loose the blocking screws and re-
move the Brush Motors (see fig. 4.2.3-13).
• Proceed at reverse to refit the part.
Note: Use the thread lock liquid on the
screw during the assembling.
4.2.3-10 4.2.3-11
4.2.3-12 4.2.3-13
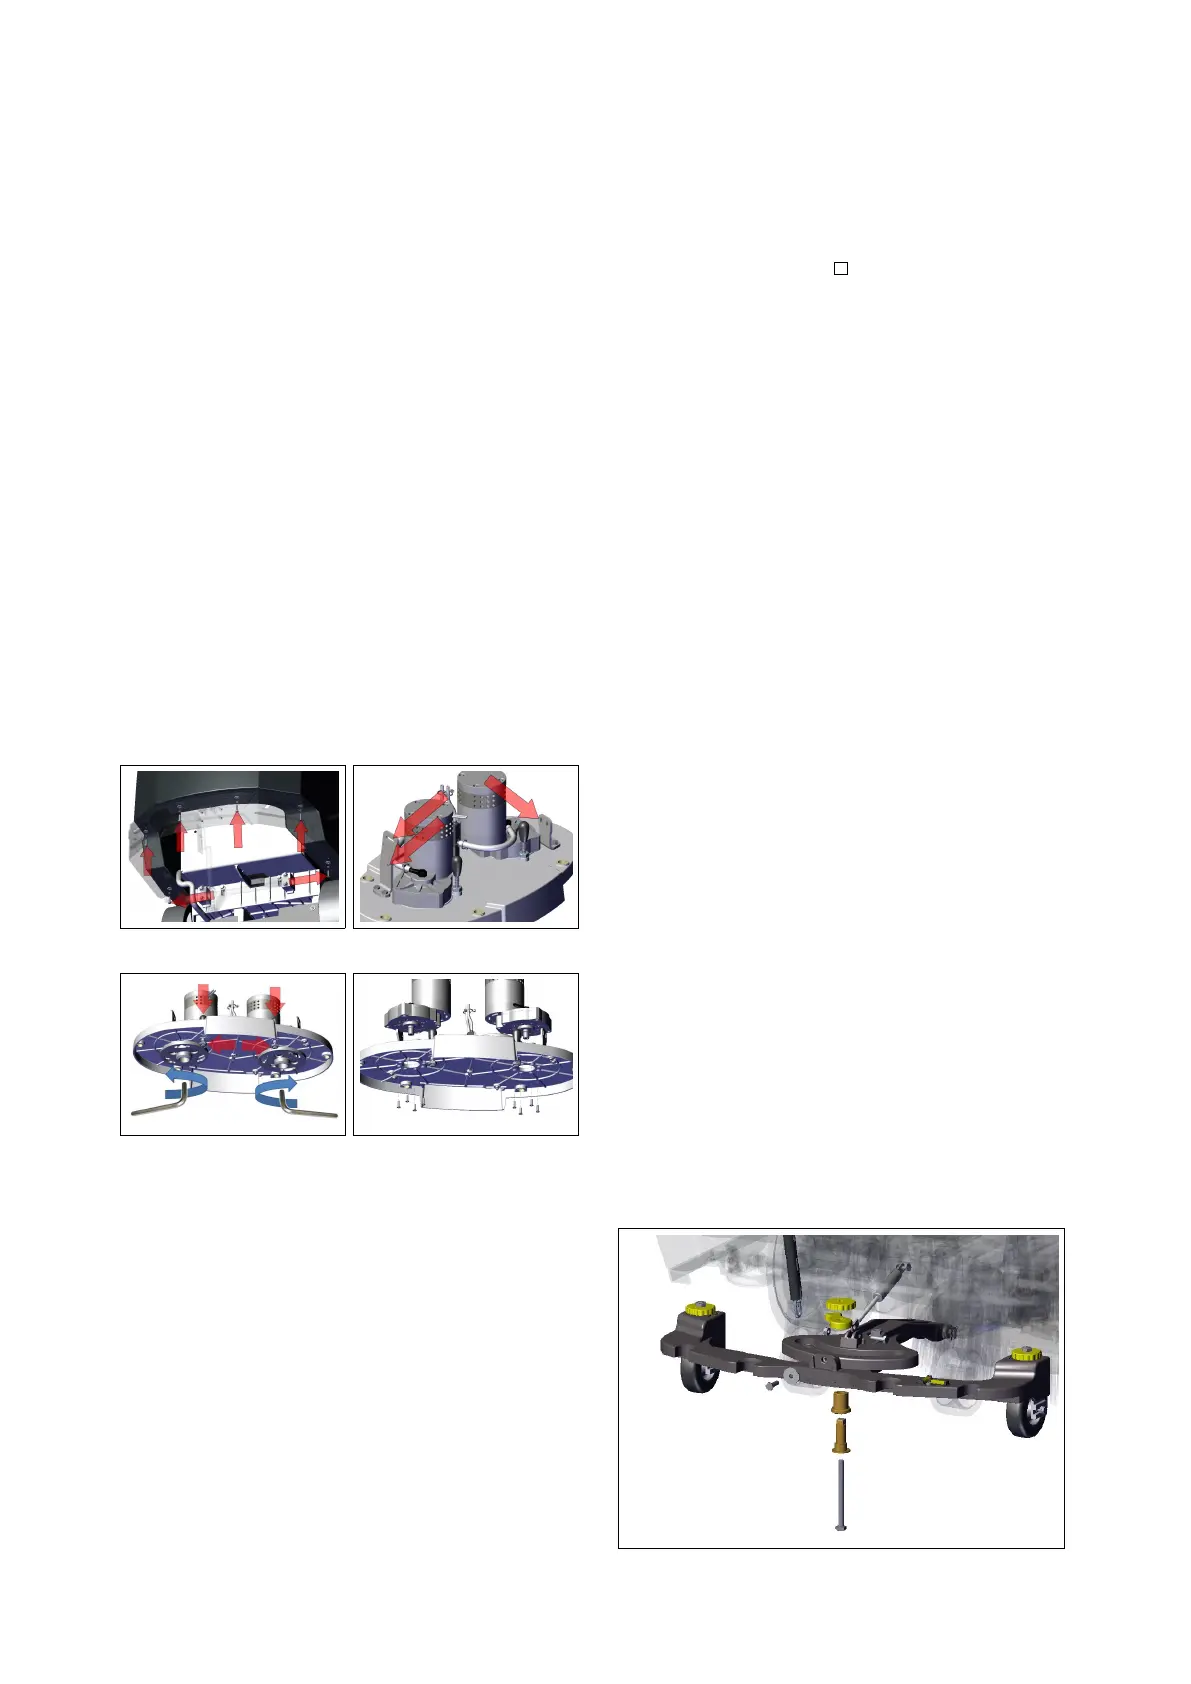
4.2.4 Brush deck Actuator
• Put the machine in safe conditions.
• Disassemble the complete Brush
Deck from the machine (see section 4.2.1
at page 22).
• Release the plug and disconnect the
actuator arm from the brush deck
arm.
• Remove the elastic ring, and remove
the actuator from its support (see fig.
4.2.4-14).
4.2.4-
14
4.3 Drying System
4.3.1 Squeegee Support
• Put the machine in safe conditions.
• Disassemble the Squeegee from the
Machine.
• Be sure that the Squeegee Com-
mand Lever is in lower position.
• Unscrew the screw that fix the chain
to the Squeegee Command Lever and
let it lie behind the Squeegee Sup-
port.
• Loose the nuts that block the Gas
Spring to the Squeegee Support and
Remove the Gas Spring.
• Loose the screws that block the
Squeegee Support to the Squeegee
Rotation Arm.
• Remove the Squeegee Support.
• Proceed at reverse to refit the part,
paying attention to take care about
the bushing positioning.
23
 Loading...