English 11
6. Press the tool against the working surface again and check whether a click can be heard when the trigger
is pulled.
Result 1 / 3
The tool cannot be pressed fully against the working surface – triggering is not possible.
▶ Check that the rotating sleeve is closed. If necessary, turn the rotating sleeve to the left as far as it
will go.
▶ Check the position of the slider. If the slider has not clearly moved to the left, have the tool repaired
by Hilti Service.
Result 2 / 3
The tool can be pressed fully against the working surface (the spring on the pressure pin is fully
compressed) and a click is heard when the trigger is pressed.
The nail detector in the tool is working correctly and the tool can be used.
Result 3 / 3
The tool can be pressed fully against the working surface (the spring on the pressure pin is fully
compressed) but no click is heard when the trigger is pressed.
▶ Have the tool repaired by Hilti Service.
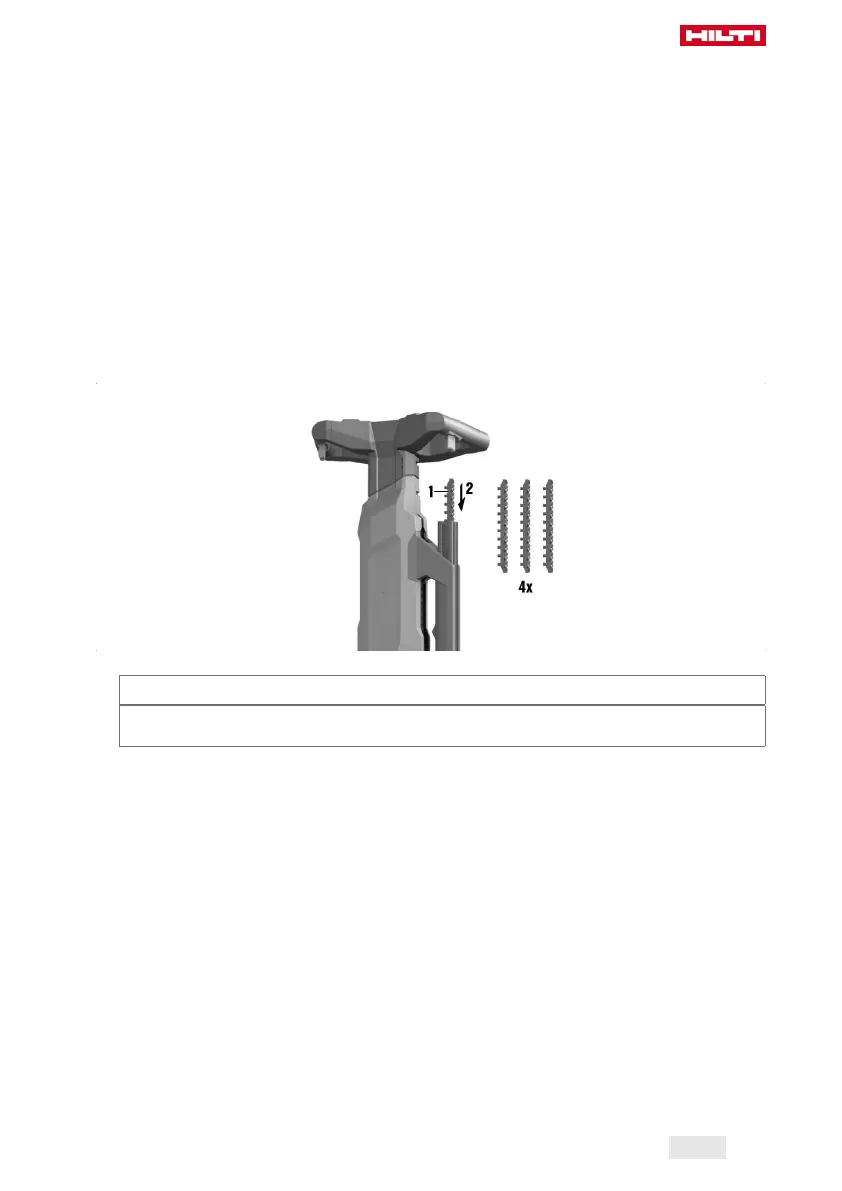
5.1.3 Loading fastener strips
1. Insert 4 fastener strips in the magazine from above.
Materials
Fasteners
XENP 19
2. Press the last fastener strip in until it lies flush with the magazine.
Printed: 30.04.2019 | Doc-Nr: PUB / 5491711 / 000 / 00
 Loading...