16 English
1. Disassemble the base plate. → page 16
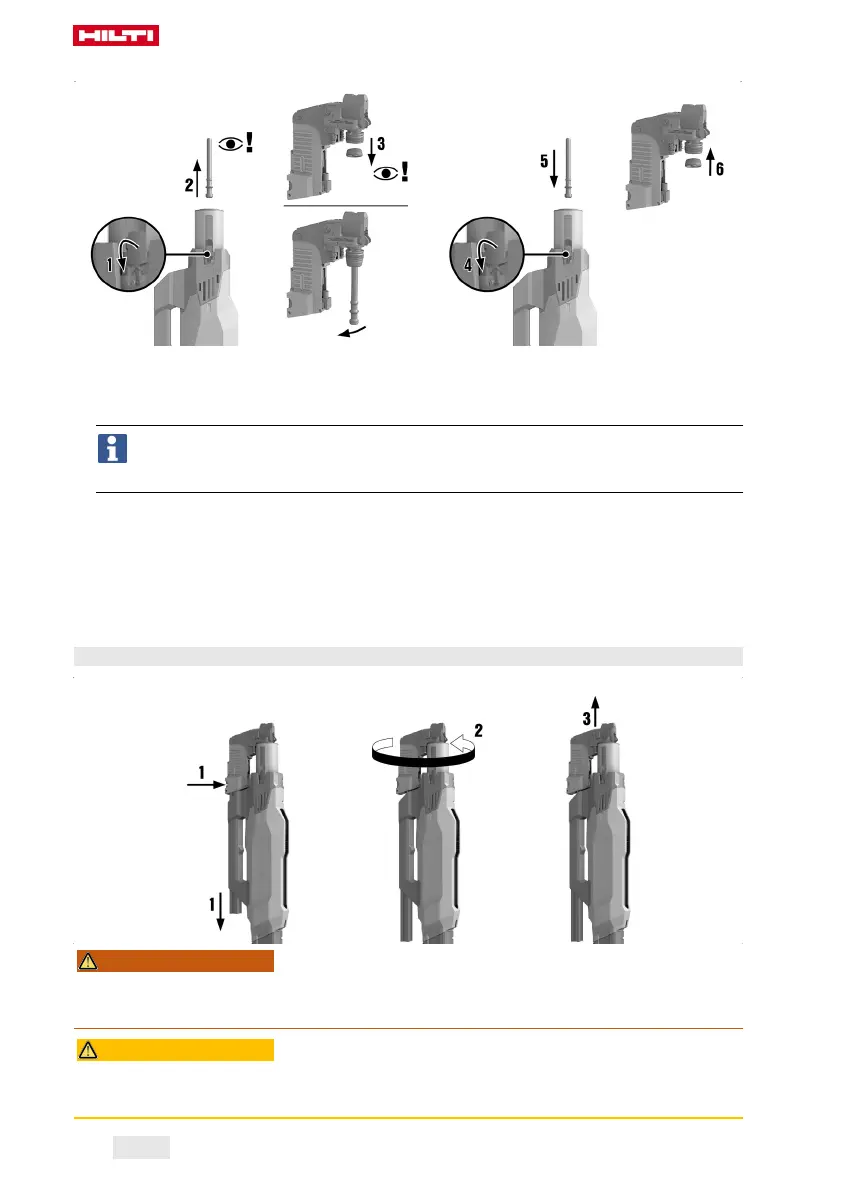
2. Pull the piston out of the piston guide.
3. Pull the piston stopper out of the base plate (possibly with the aid of the piston).
4. Check the piston and piston stopper for damage. Check the piston for straightness by rolling it on a
smooth surface.
Never use a worn or damaged piston and do not tamper with or modify the piston.
Observe the wear criteria applicable to important tool components, as listed in the “Care and
maintenance” section. → page 19
Result
If damage is found and/or if the piston is bent or jammed with the piston stopper
▶ Replace the piston and piston stopper as a set.
5. Pull out the catch and hold it in this position. Insert the piston, pushing it in until the tip of the piston no
longer projects beyond the end of the tool, and then release the catch.
6. Insert the piston stopper (rubber part to the front) into the base plate.
7. Fit the base plate. → page 17
6.2 Disassembling the base plate
WARNING
Risk of injury! Cartridges in the tool could fire (explode).
▶ Check that all cartridges have been removed from the tool before carrying out the following tasks with
the tool.
CAUTION
Risk of burns! Parts of the tool may be very hot after the tool has been in use.
▶ If it is necessary to carry out maintenance without first allowing the tool to cool down, it is essential that
protective gloves are worn.
Printed: 30.04.2019 | Doc-Nr: PUB / 5491711 / 000 / 00
 Loading...