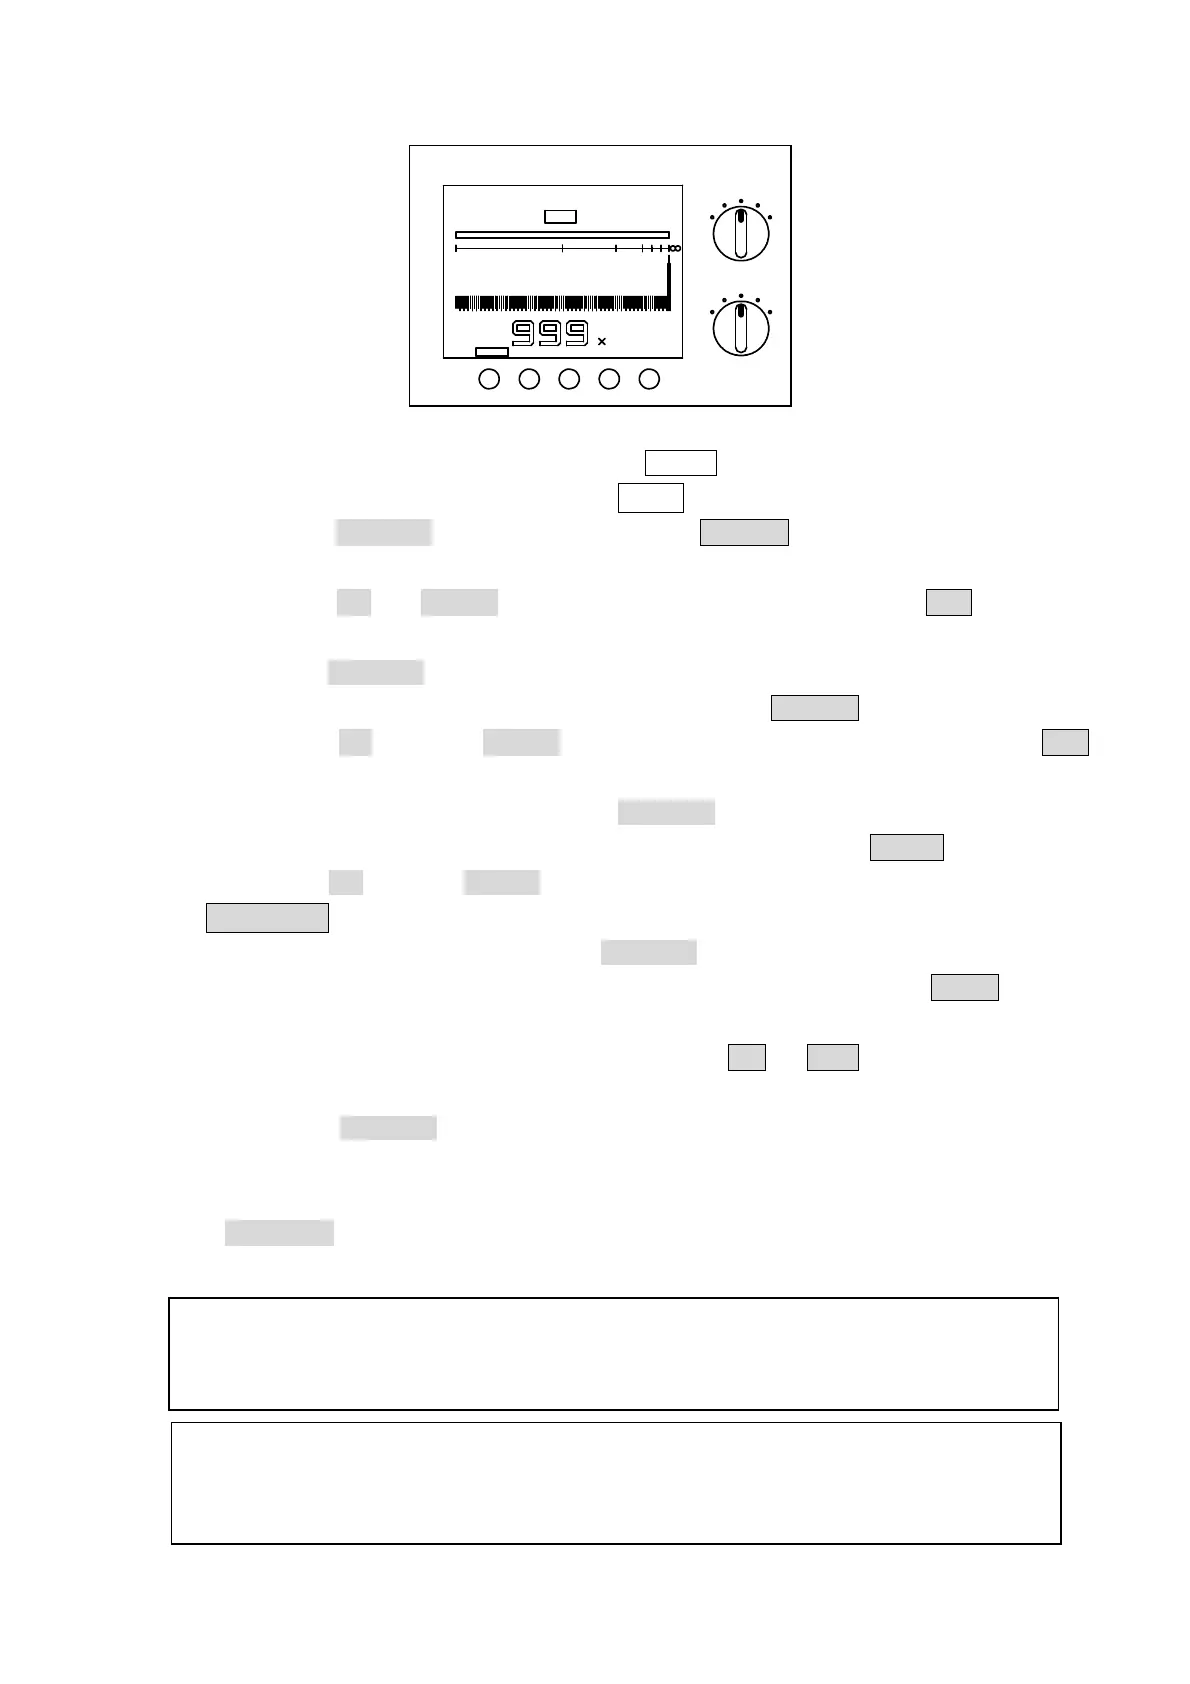
30
Fig. 6.6.4
1) Set the VOLTAGE selector switch to 100 V .
2) Set the RANGE selector switch to ×10
2
.
3) Press the SELECT switch to show the C. SET indication for charging
time setting mode.
4) Using the UP or DOWN switch, set the charging time to 010 seconds.
(Fig. 6.6.4)
5) Press the SELECT switch to enter the value of 010. This action provides
the measuring time setting mode, showing the M. SET indication.
6) Using the UP and/or DOWN switches, set the measuring time to 050
seconds.
7) When this value is OK, press the SELECT switch to enter it. This action
provides the judgment level setting mode, showing the COMP indication.
8) Using the UP and/or DOWN switches, set the judgment level to
1.00×10
2
MΩ. (Fig. 6.6.2)
9) When this level is OK, press the SELECT switch to enter it. This action
provides the buzzer sound on/off setting mode, showing the BUZZ
indication.
10) Using the UP and/or DOWN switches, set ON or OFF for the buzzer.
(Fig. 6.6.3)
11) Press the SELECT switch to end the measuring condition setting mode,
and go back to the measurement screen.
After setting the measuring conditions as shown in the example, press
the CHARGE switch. Then, the measurement starts after a charging
period of 10 seconds.
VOLTAGE
RANGE
DOWN UP
2
100
2
×10
010
C. SET
s
CHARGE MEASURE/DIS CHARGESELECT
MΩ
10
2010521.5
100V
Not
e 1: The set measuring conditions are stored in the memory, and
the contents are kept backed up even if the power is turned
Note 2: The comparison judgment level settings are valid only for the
range and test voltage used for setting. For oth
test voltages, change the settings, accordingly.