29
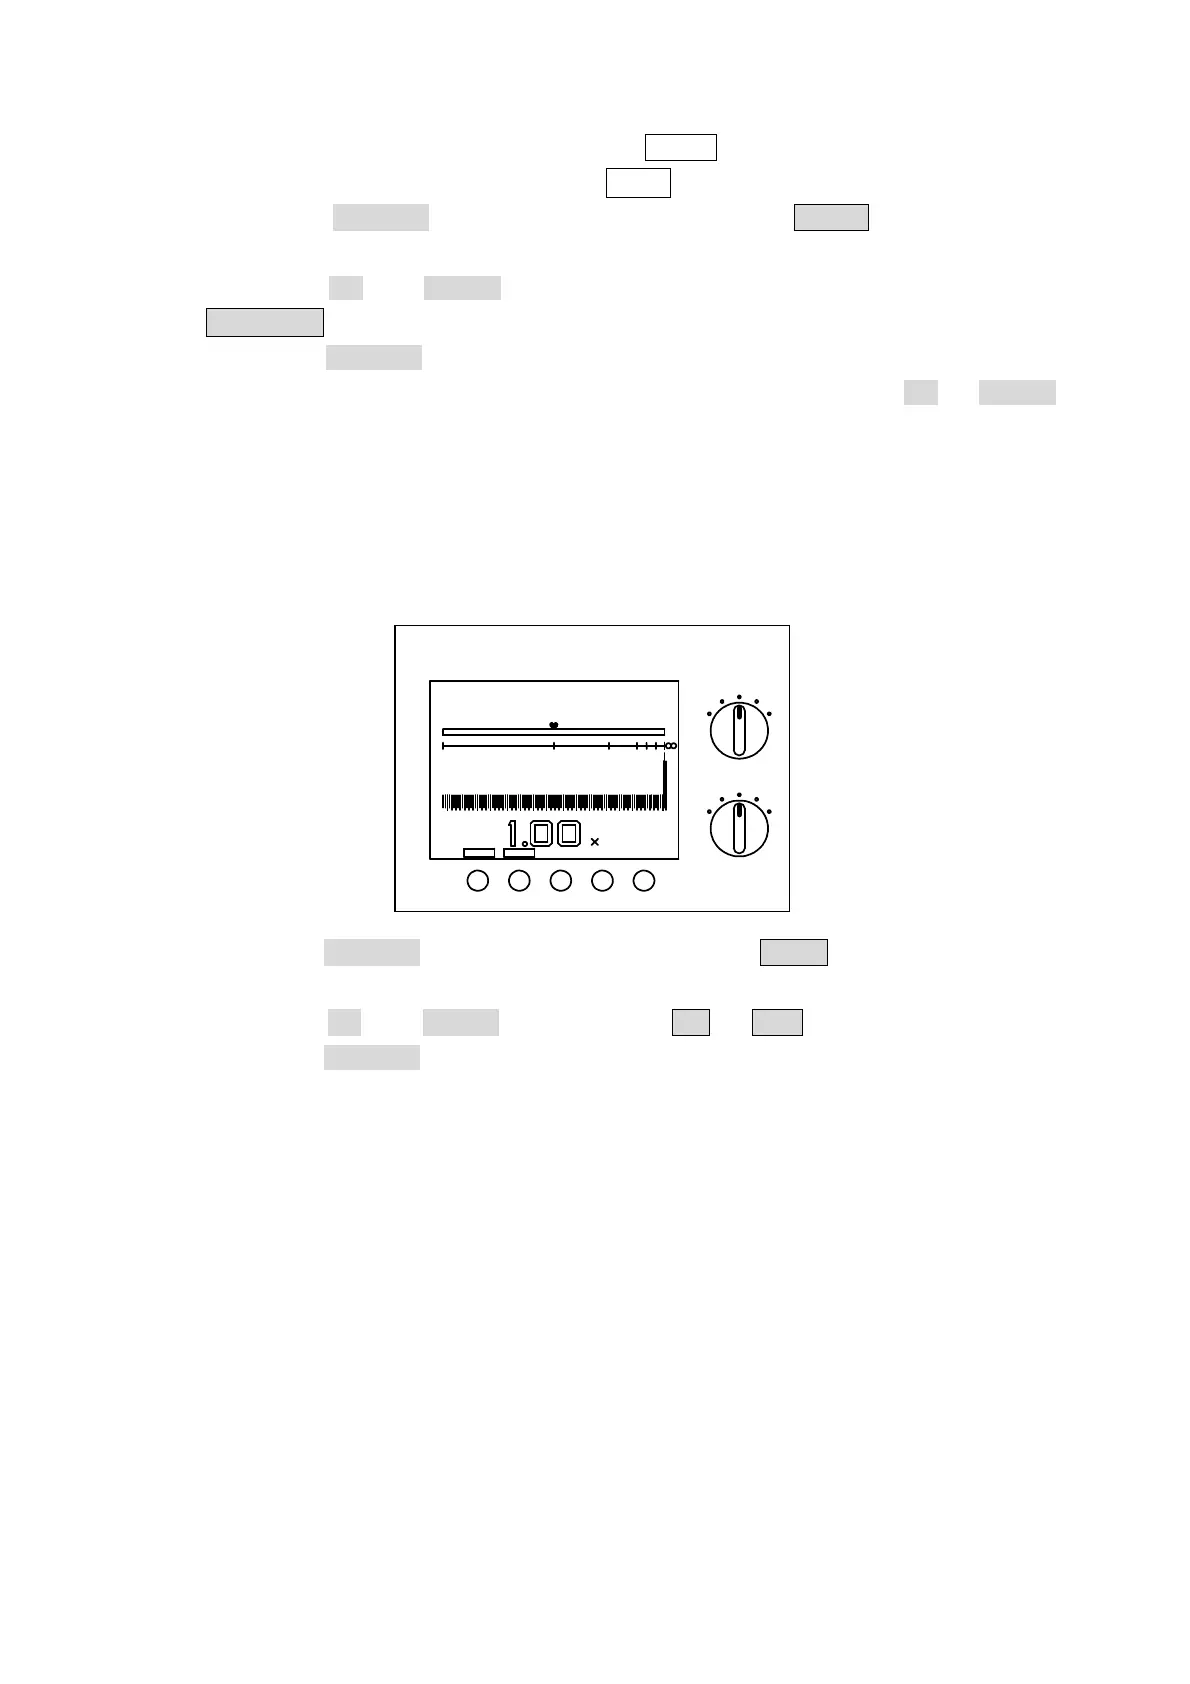
1) Set the VOLTAGE selector switch to 100 V.
2) Set the RANGE selector switch to×10
2
.
3) Press the SELECT switch 3 times to show the COMP indication in the
lower left area of the LCD for the comparison GO/NO judgment level.
4) Using the UP and DOWN switches, set the GO/NO judgment level to
1.00×10
2
MΩ.
5) Press the SELECT switch twice to return to the measuring display.
To accelerate the change of a value, keep the corresponding UP or DOWN
switch pushed.
Note: The comparison GO/NO judgment level setting can be effective for
the currently set RANGE and VOLTAGE values, only. If setting is
required for other RANGE and VOLTAGE values, set desired RANGE
and VOLTAGE, first.
6.6.3 Setting Buzzer Sound ON/OFF
Fig. 6.6.3
1) Press the SELECT switch 4 times to show the BUZZ indication in the
lower left area of the LCD for the buzzer sound ON/OFF setting.
2) Using the UP and DOWN switches, set ON or OFF .
3) Press the SELECT switch once to return to the measuring display.
6.6.4 Setting Charging Time, Measuring Time, Comparison GO/NO
Judging Level and Buzzer Sound ON/OFF
Example: Setting for measuring conditions below:
Charging Time: 10 seconds
Measuring Time: 50 seconds
Comparison Level: NO<100MΩ≦GO judgment
Buzzer Sound: Buzzer sounds when NO judgment is resulted.
RANGE Position: ×10
2
VOLTAGE Position: 100 V
VOLTAGE
RANGE
DOWN UP
100
2
×10
2
ONBUZZ
CHARGE MEASURE/DISCHARGESELECT
s
MΩ
10
2010521.5
000
100V