20
English
SAW BLADE MOUNTING AND DISMOUNTING
WARNING: To prevent an accid ent or personal injury, always turn off the trigger switch and disconnect
the power plug from the rece ptacle before removing or installing a saw blade.
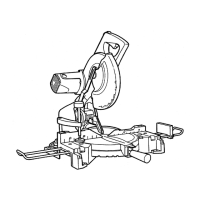
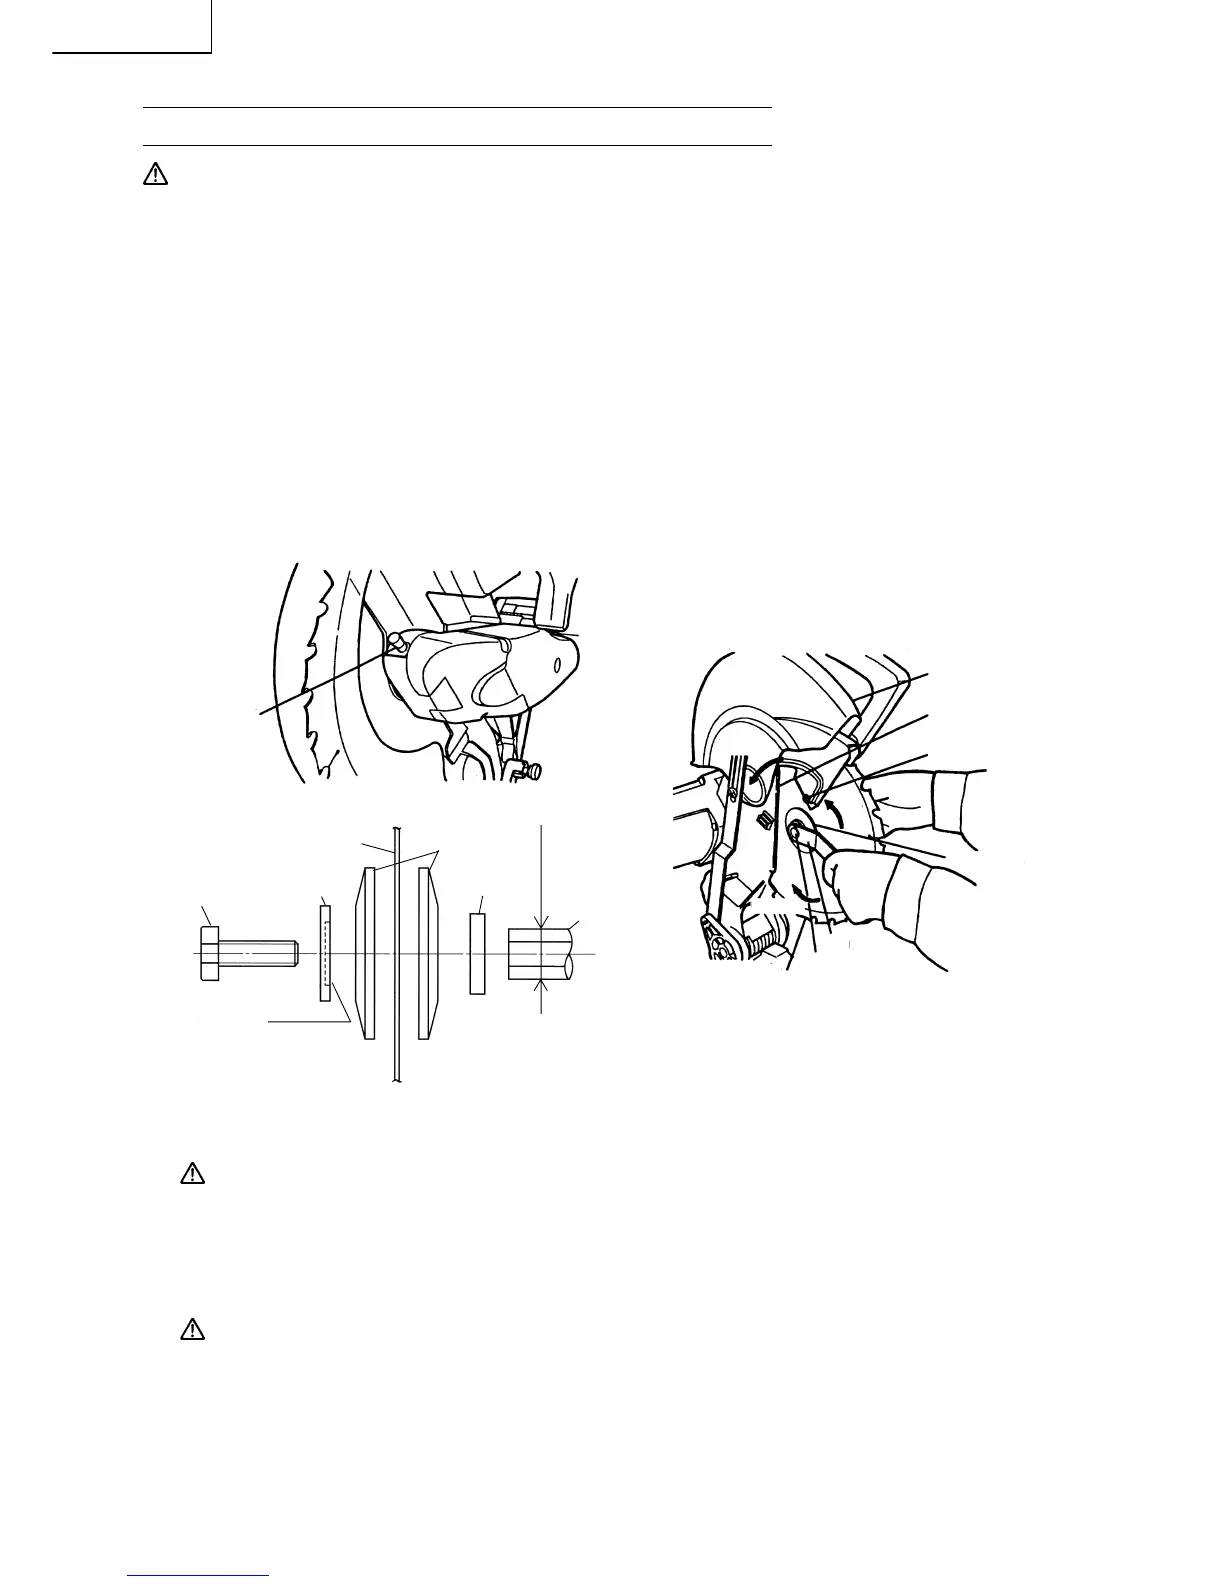
1. M ounting the sa w blade
(1) Rotate blade guard (plastic), to top position.
(2) Loosen 5 m m screw to free cutter shaft guard.
And rotate cutter shaft guard to the up position as shown in Fig. 36-b.
At that time, the blade guard (plastic) move together.
(3) Press in spindle lock and loosen bolt with wrench.
Since the bolt is left-hand threaded, loosen by turning it to the right as show n in Fig. 36-b.
NOTE: If the spi ndle lock cannot be easily pressed in to lock the arbor shaft, turn the bolt with
wrench while applying pressure on the spindl e lock.
The arbor shaft is locked when the spindle lock is pre ssed inward.
(4) Re m ove the bolt and arbor collar.
(5) Mount the saw blade.
WARNING: Whe n mounting the saw blade, confirm that the rotation indicator mark on the saw
blade and the rotation direction of the blade guard (metal) are properly matched.
(6) Thoroughly clean collar, arbor collar, blade washer (confirm mounting direction) and the bolt, and
install them onto the arbor shaft as sho wn in Fig. 36-c.
(7) Press in the spindle lock and tighten the bolt by turning it to the left by wrench as indicated in Fig.
36-b.
CAUTION: * Confirm tha t the spindle lo ck has return ed to the retra ct position after installing or
removing the saw blade.
* Tighten the bolt so it does not come loose dur ing operation.
Confirm the bolt has been properly tightene d before the power tool is started.
(8) Rotate the cutter shaft guard to the initial position and tighten 5 m m scre w.
(9) Place blade guard (plastic) in the do wn position.
Fig. 36-a
Fig. 36-c
Fig. 36-b
Spindle
Lock
Wrench
Bolt
Saw Blade
Loosen
Tighten
Up
Bla de G uard
(Plastic)
Cutter S haft
Guard
5 m m Scre w
Arbor Collar
Bolt
Saw Blade
Bla de Washer
5
/
8
"
(
1
5
.
9
m m
)
Collar
Arbor
Collar
Arbor Shaft
Spot Facing
 Loading...