44
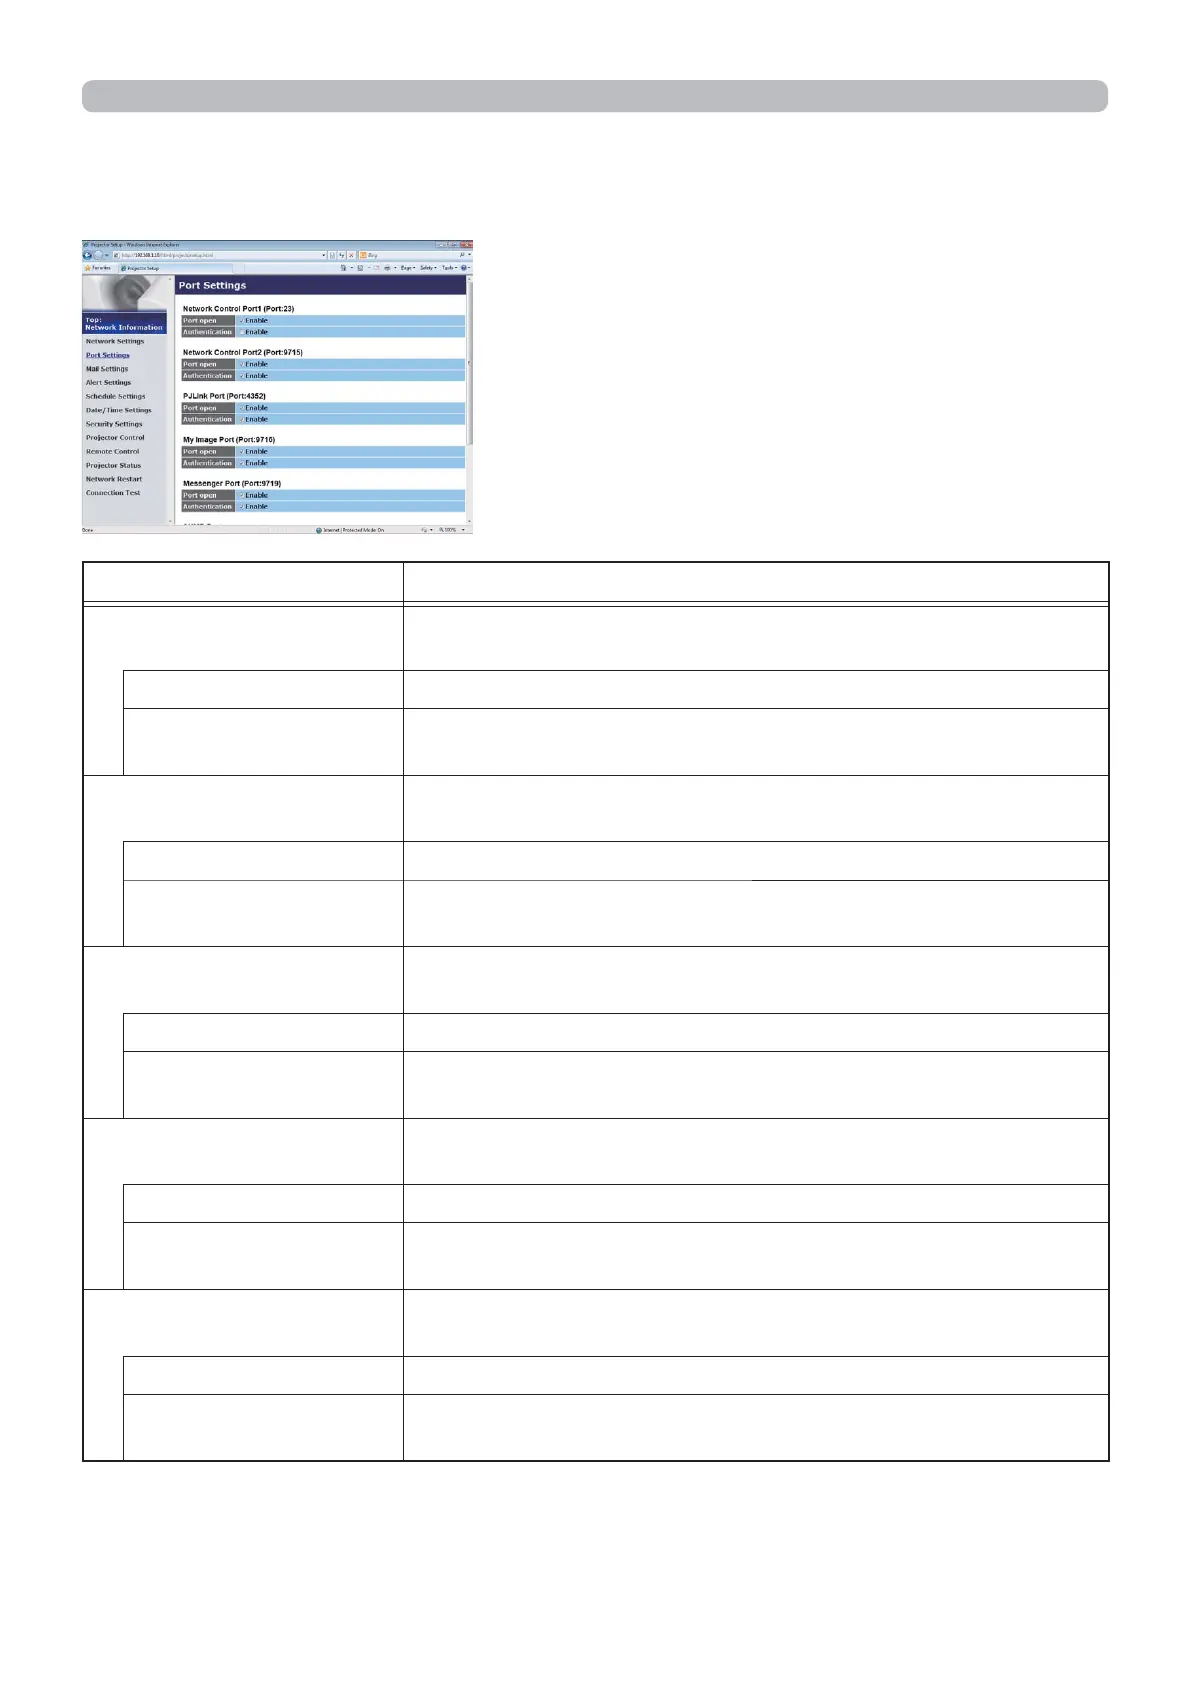
3.1.4 Port Settings
Displays and configures communication port
settings.
Item Description
Network Control Port1
(Port:23)
Configures command control port 1 (Port:23).
Port open Click the [Enable] check box to use port 23.
Authentication
Click the [Enable] check box when authentication is required
for this port.
Network Control Port2
(Port:9715)
Configures command control port 2 (Port:9715).
Port open Click the [Enable] check box to use port 9715.
Authentication
Click the [Enable] check box when authentication is required
for this port.
PJLink
TM
Port
(Port:4352)
Configures the PJLink
TM
port (Port:4352).
Port open Click the [Enable] check box to use port 4352.
Authentication
Click the [Enable] check box when authentication is required
for this port.
My Image Port
(Port:9716)
Configures the My Image Port (Port:9716).
Port open Click the [Enable] check box to use port 9716.
Authentication
Click the [Enable] check box when authentication is required
for this port.
Messenger Port
(Port:9719)
Configures the Messenger Port (Port:9719).
Port open Click the [Enable] check box to use port 9719.
Authentication
Click the [Enable] check box when authentication is required
for this port.
(continued on next page)
3. Web Control
3.1 Projector Web Control (continued)
 Loading...