BF15DmBF20D
9.
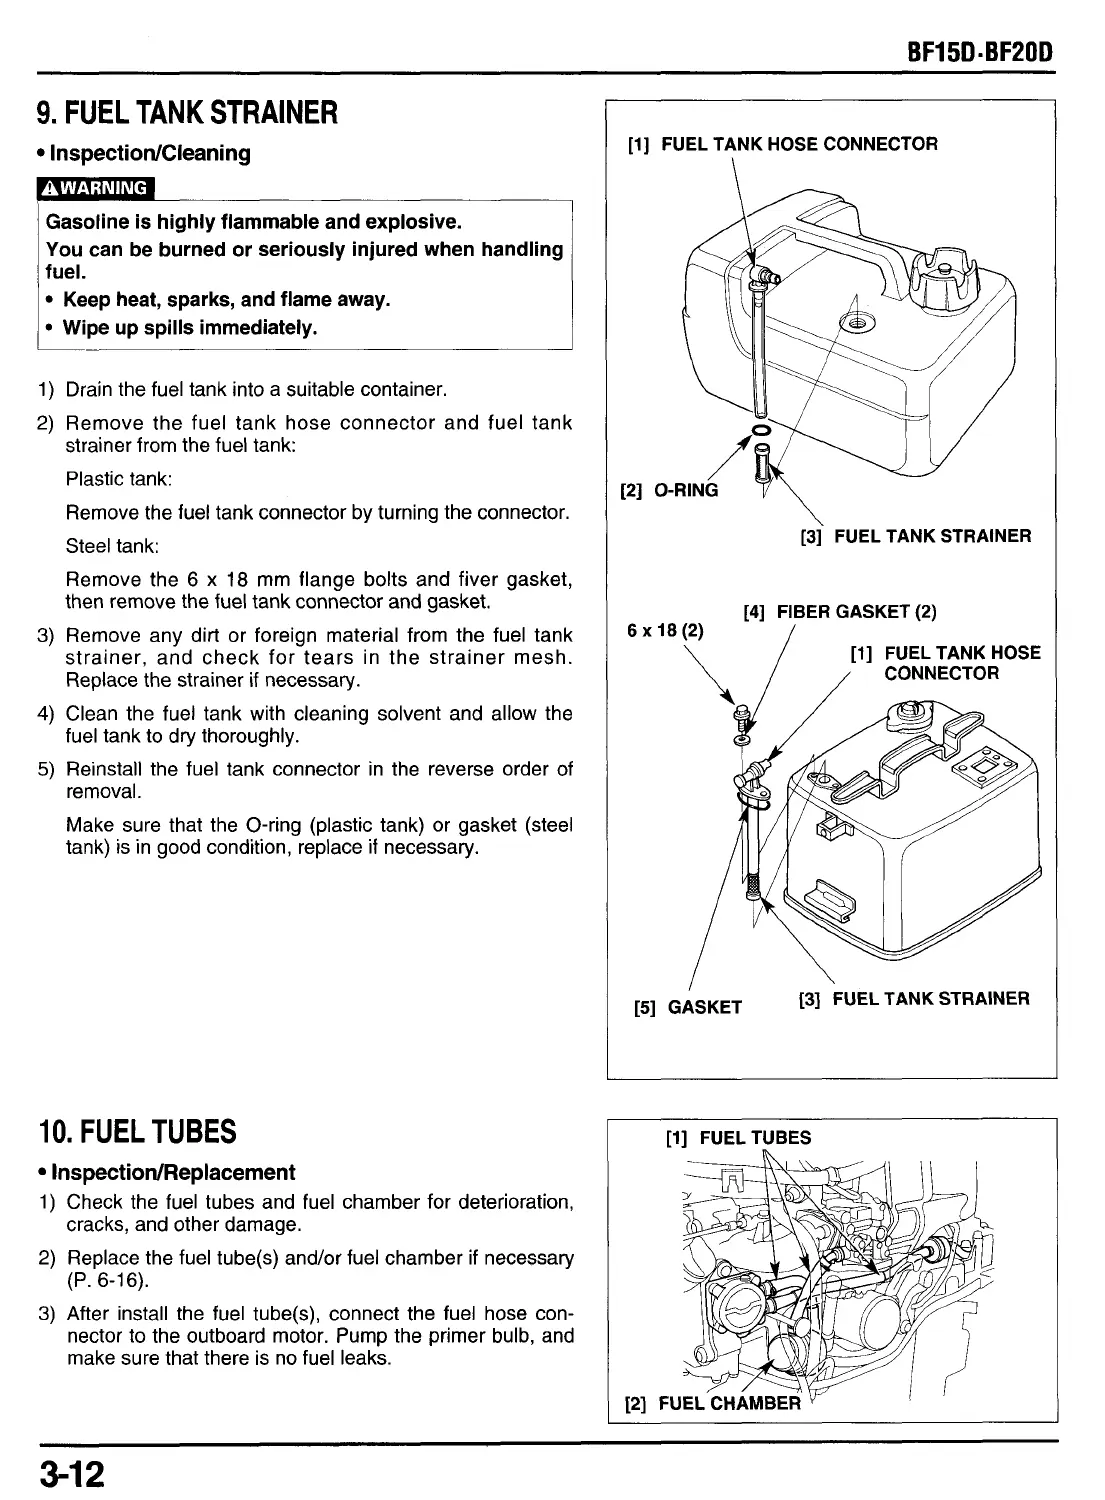
FUEL TANK STRAINER
InspectiodCleaning
Gasoline is highly flammable and explosive.
You can be burned or seriously injured when handling
fuel.
Keep heat, sparks, and flame away.
Wipe up spills immediately.
1)
Drain the fuel tank into a suitable container.
2)
Remove the fuel tank hose connector and fuel tank
strainer from the fuel tank:
Plastic tank:
Remove the fuel tank connector by turning the connector.
Steel tank:
Remove the 6
x
18
mm flange bolts and fiver gasket,
then remove the fuel tank connector and gasket.
3)
Remove any dirt or foreign material from the fuel tank
strainer, and check for tears in the strainer mesh.
Replace the strainer
if
necessary.
4)
Clean the fuel tank with cleaning solvent and allow the
fuel tank to dry thoroughly.
5)
Reinstall the fuel tank connector in the reverse order of
removal.
Make sure that the O-ring (plastic tank) or gasket (steel
tank)
is
in good condition, replace
if
necessary.
10.
FUEL TUBES
InspectiodReplacement
1)
Check the fuel tubes and fuel chamber for deterioration,
cracks, and other damage.
2)
Replace the fuel tube(s) and/or fuel chamber if necessary
3)
After install the fuel tube(s), connect the fuel hose con-
nector to the outboard motor. Pump the primer bulb, and
make sure that there is no fuel leaks.
(P.
6-16).
[l] FUEL TANK HOSE CONNECTOR
\
[3j
FUEL
TANK
STRAINER
[4]
FIBER GASKET
(2)
“18(;:
/
/[1] EE..:IOSE
151 GASKET
[3]
FUEL TANK STRAINER
I
[l] FUELTUBES
I’
1
121
FUEL’CHAMBER~
3-12