ID2000 Series Installation & Commissioning Manual
Installation - Panel Electronics
28997-433-000-5, Issue 5
May 2010
5 To re-align the paper exit path:
i Locate the paper release control (Q) immediately to
the left of the paper exit slot and pull the top lug
outwards and down through approximately 90
O
. With
the lug in this position the paper alignment can now
be adjusted. Re-align the paper by gently pulling it
left or right until centrally placed in the slot - make
sure that the slack in the paper is kept to a minimum
between the printer mechanism and paper roll. IF
USING A STAINLESS STEEL COVER ON THE
PANEL, SEE ADDITIONAL INFORMATION BELOW.
ii When satisfied that the paper is aligned correctly,
return the lug to its former position, i.e. locked. Press
the ‘ ’ pushbutton to feed the paper a number of
lines to check the paper re-alignment.
Note: Each press of the button advances the paper one
line
Instructions for fitting the serrated tear-off plate to the
front cover and cutting the printer paper to length are
given in the cover’s installation instructions, 997-228.
The drawing at left shows the PRN-ID printer fitted
correctly.
5.6.2 Printer Used With Stainless Steel Cover
The following additional steps are required:
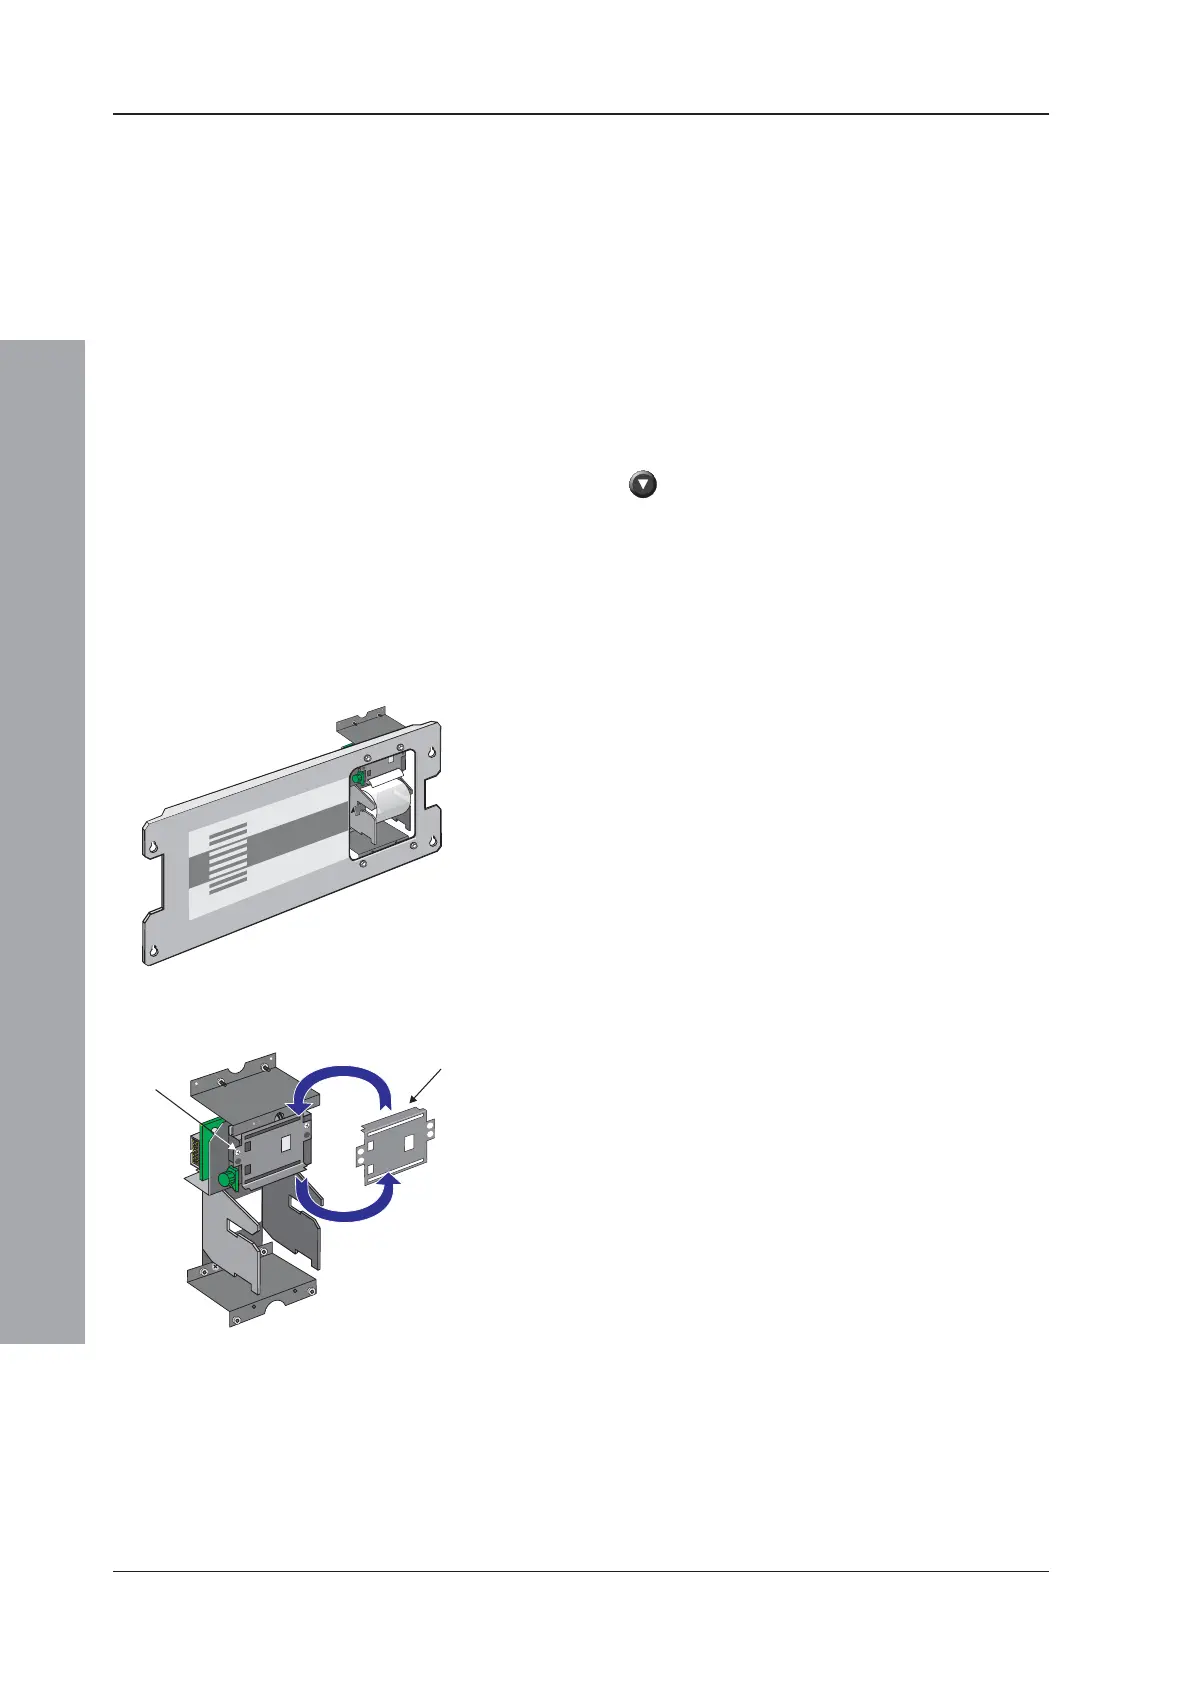
1 Before you begin: Remove the two screws (X) that
secure the paper guide in position. Rotate the plate
180
O
vertically to give the orientation shown as ‘THIS
WAY UP’ in the illustration, then use the two screws
(X) to re-attach it to the printer.
2 Fitting the paper roll: Manually feed the paper
through the slot in the front cover.
X (x2)
THIS WAY
UP

 Loading...