Installing an expansion card
Visit http://www.hp.com/go/quickspecs to learn which graphics cards are supported in the
workstation, how much memory each graphics card includes, and graphics card power requirements.
To install an expansion card:
1.
Power down the workstation (see
Predisassembly procedures on page 74).
2.
Disconnect power from the workstation (see
Predisassembly procedures on page 74).
3.
Remove the side access panel (see
Removing the side access panel on page 77).
4.
Remove the expansion card support (if installed) by removing the two screws and lifting up on the
support (see
Removing an expansion card on page 123).
5.
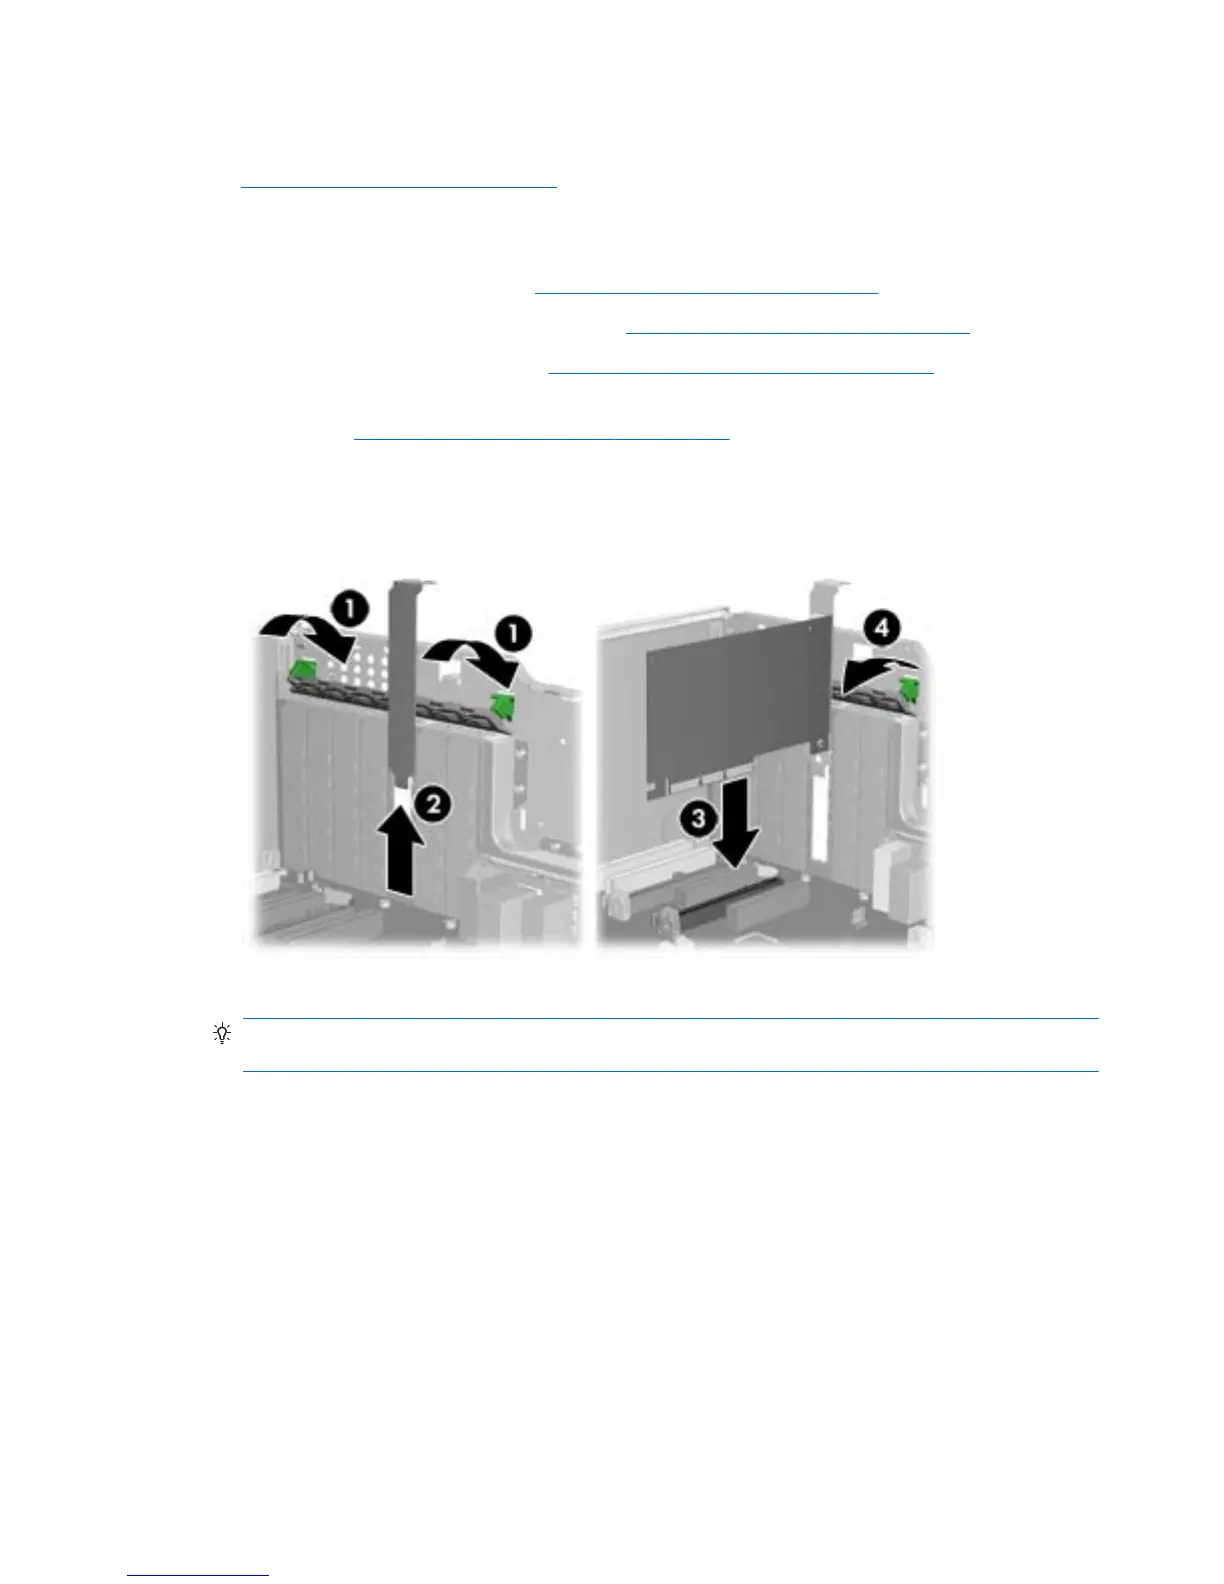
Push the expansion card retention clamp levers down on the outside of the chassis to release the
retention clamp (1) as shown in the figure below.
Figure 5-52 Removing the slot cover
6.
Remove the expansion card slot cover by pulling it up, out of the chassis (2).
TIP: Grasp the slot cover between two fingers—one from the inside of the chassis, and one from
the outside.
7.
Angle the card into the expansion card guide.
8.
Align the PCIe card keyway with the slot key. For full—length expansion cards, also align the card
with the front fan holder/card guide (if installed).
9.
Firmly seat the card in the slot (3).
10.
Close the expansion card retention clamp by rotating it downward (4).
If the PCI retention clamp does not close, ensure that all cards are properly seated, and then try
again.
If required by the card, connect the auxiliary power cable to the card (not illustrated).
126 Chapter 5 Replacing components ENWW
 Loading...