Hardware options installation 42
3.
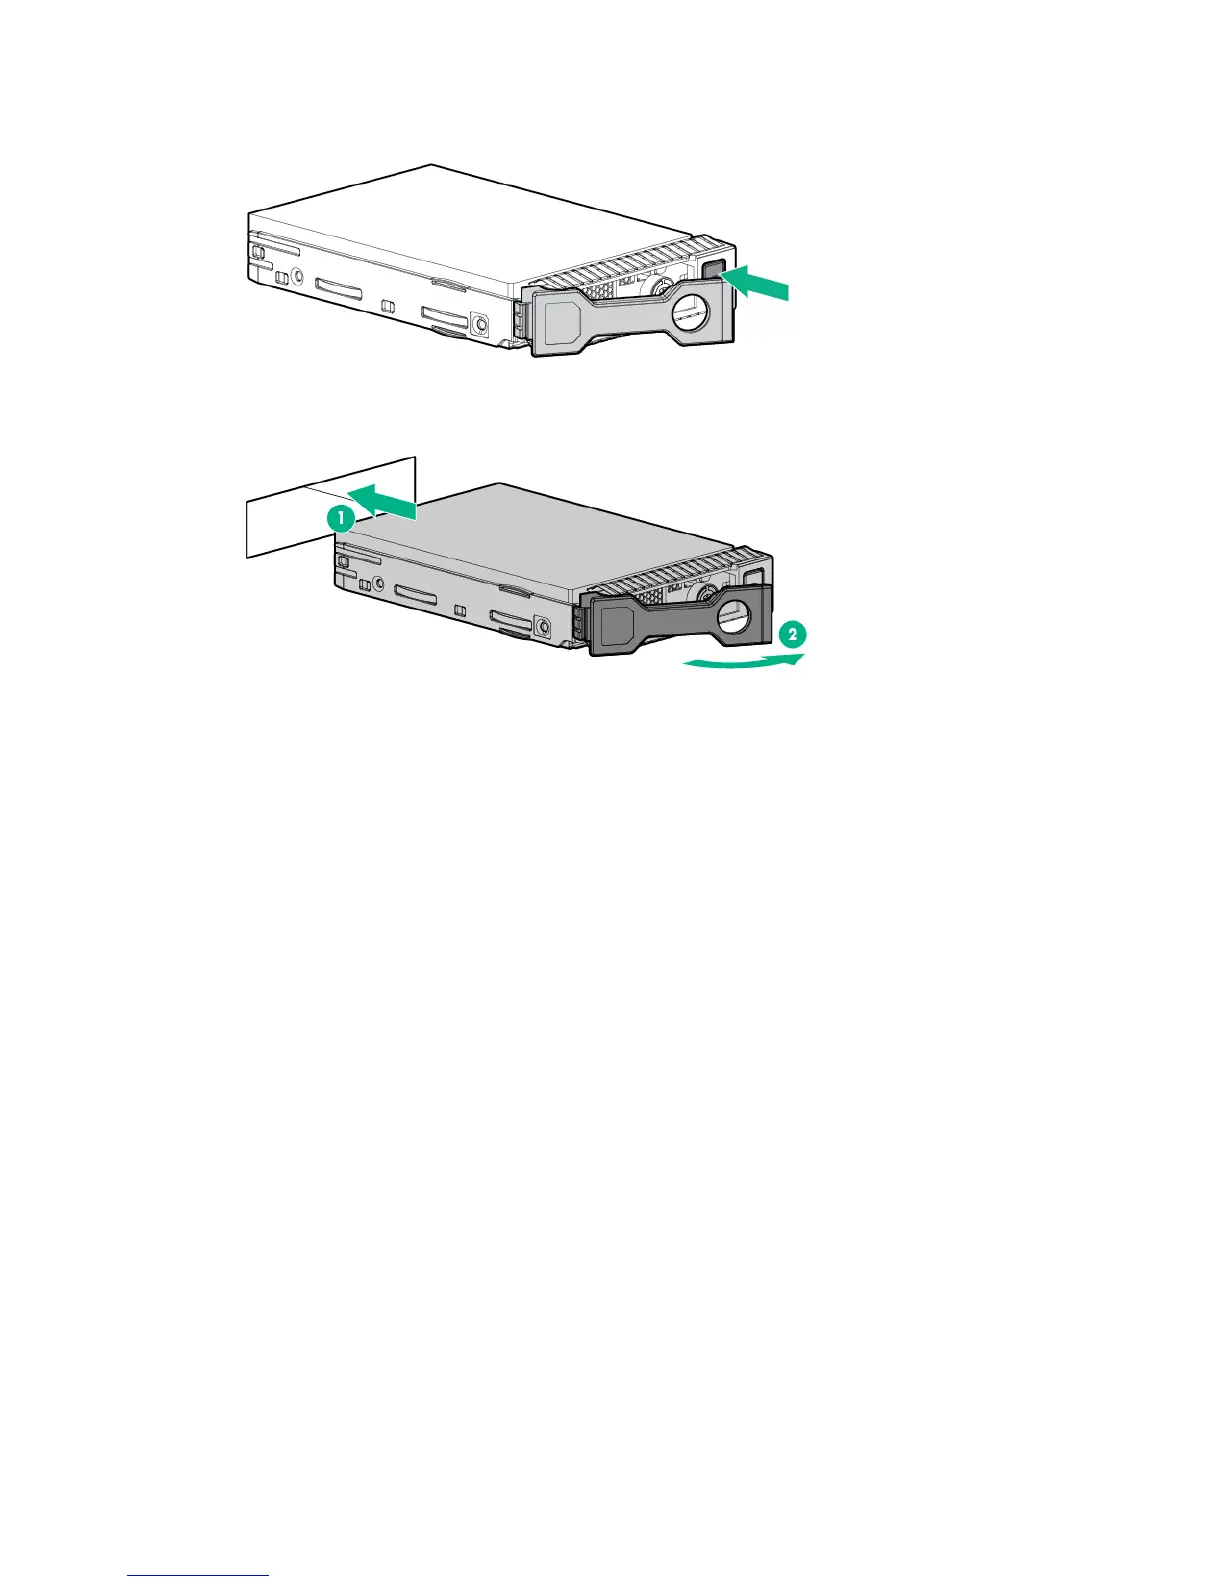
Prepare the drive.
4. Install the drive.
5. Determine the status of the drive from the drive LEDs ("Hot-plug drive LED definitions" on page 14).
To configure arrays, see the HPE Smart Storage Administrator User Guide on the Hewlett Packard
Enterprise website (http://www.hpe.com/info/smartstorage/docs).
Drive cable options
Use these drive cable options to support a Host Bus Adapter or a Smart Array Controller.
For more information about product features, specifications, options, configurations, and compatibility,
see the product QuickSpecs on the Hewlett Packard Enterprise website (http://www.hpe.com/info/qs).
Host Bus Adapter Mini-SAS cable option
For more information about product features, specifications, options, configurations, and compatibility,
see the product QuickSpecs on the Hewlett Packard Enterprise website (http://www.hpe.com/info/qs).
To install the component:
1. Back up all server data.
2. Power down the server (on page 16).
3. Remove all power:
a. Disconnect each power cord from the power source.
b. Disconnect each power cord from the server.
4. Remove the bezel (on page 17).
5. Place the server on its side with the access panel facing up.
6. Remove the access panel (on page 18).
7. Remove the air baffle (on page 20).
8. Disconnect the existing Mini-SAS cables from the drive backplane and the Mini-SAS connectors on
the system board.

 Loading...