NOTE: Arrows on the side of the fan indicate the direction the fan blows. Make sure the fan is
oriented so air flows out of the chassis and the system fan cable exits from the bottom right side of the
system fan.
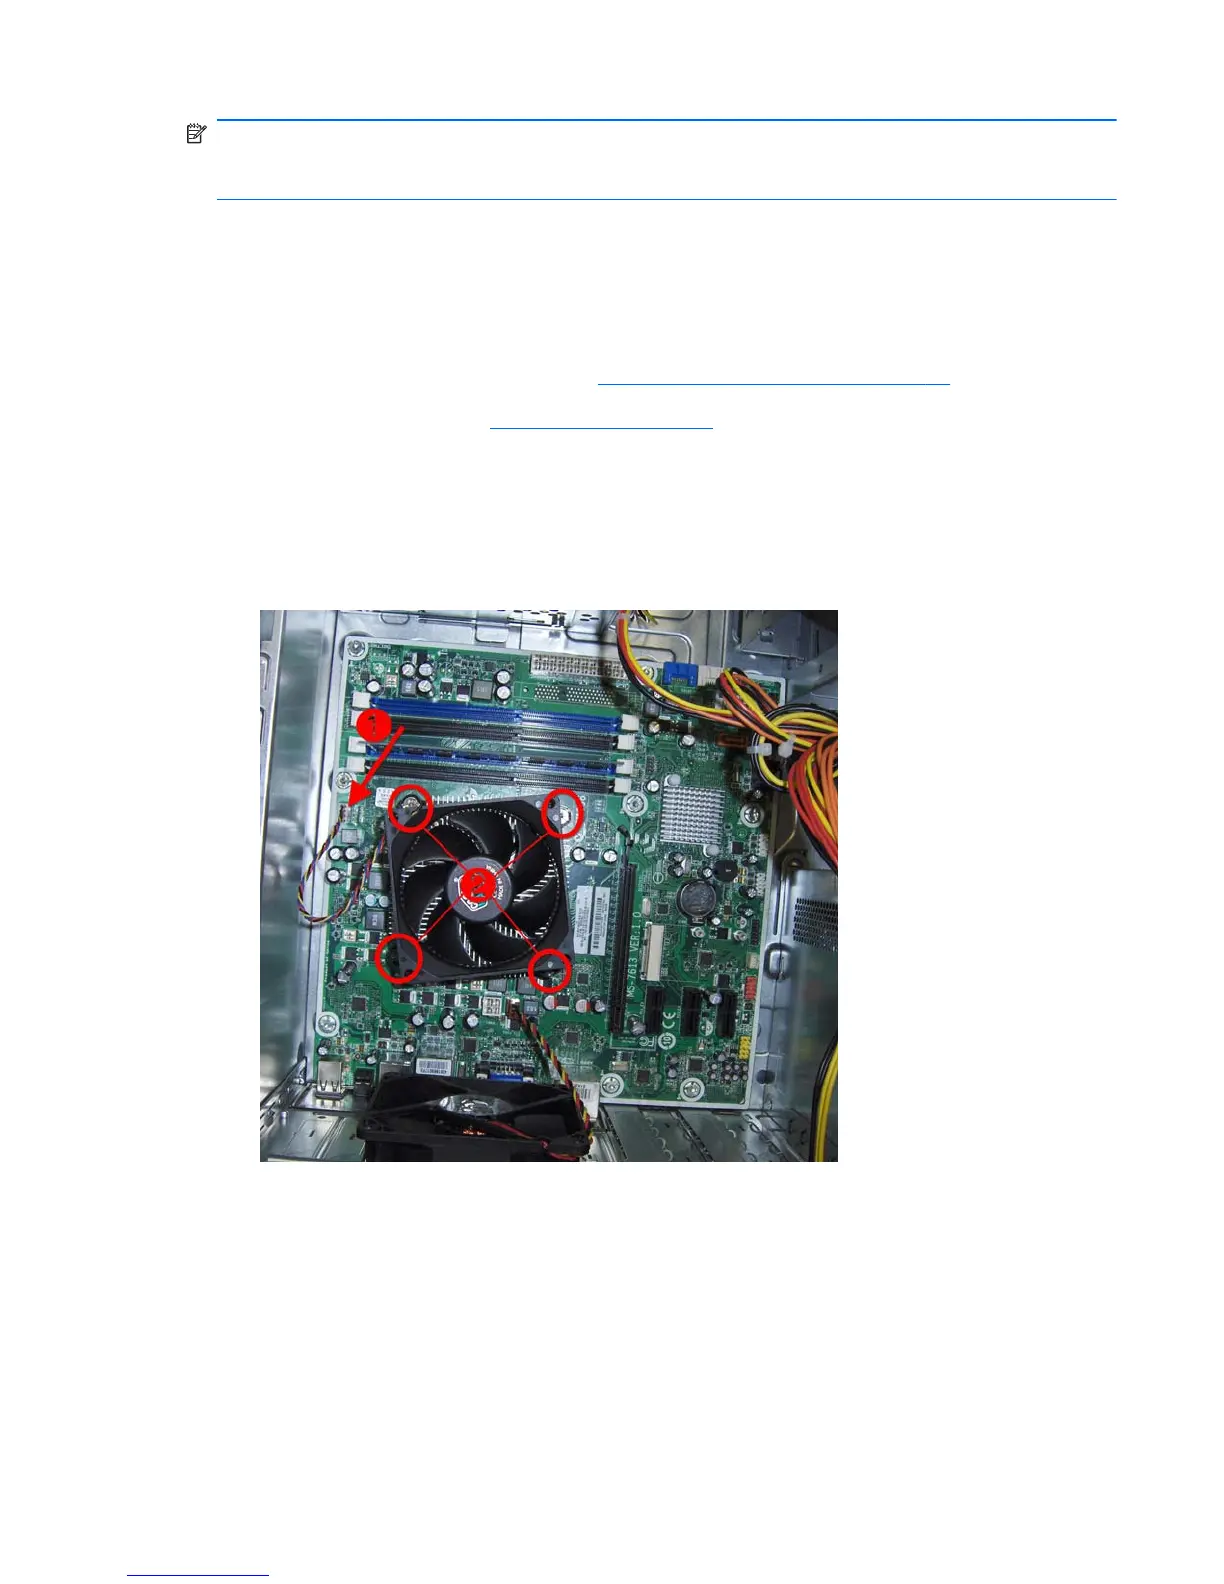
Heat sink assembly
There are two different types of heat sinks available. One uses four Torx screws to secure it to the
system board. The other uses a latch and clips. Both heat sink types are shown in the following section.
1.
Prepare the computer for disassembly (
Preparation for Disassembly on page 42).
2.
Remove the access panel (
Access Panel on page 43).
3.
Lay the computer on its side with the rear facing toward you.
4. Disconnect the heat sink fan control cable (1) from the white system board connector.
5.
If the computer uses a heat sink secured with four Torx screws, loosen the four captive torx T15
screws (2) that secure the heat sink to the system board.
6. If the heat sink is secured using a lever mechanism, lift the lever (1) that secures the heat sink latch
to the heat sink bracket attached to the system board.
7. After loosening the lever, press downward on the lever to release the square clip (2) from the tab
on the heat sink bracket.
8. Use the lever to maneuver the square clip on the opposite side on the heat sink (3) free from the
tab on the heat sink bracket.
Heat sink assembly
75