Hardware options installation 109
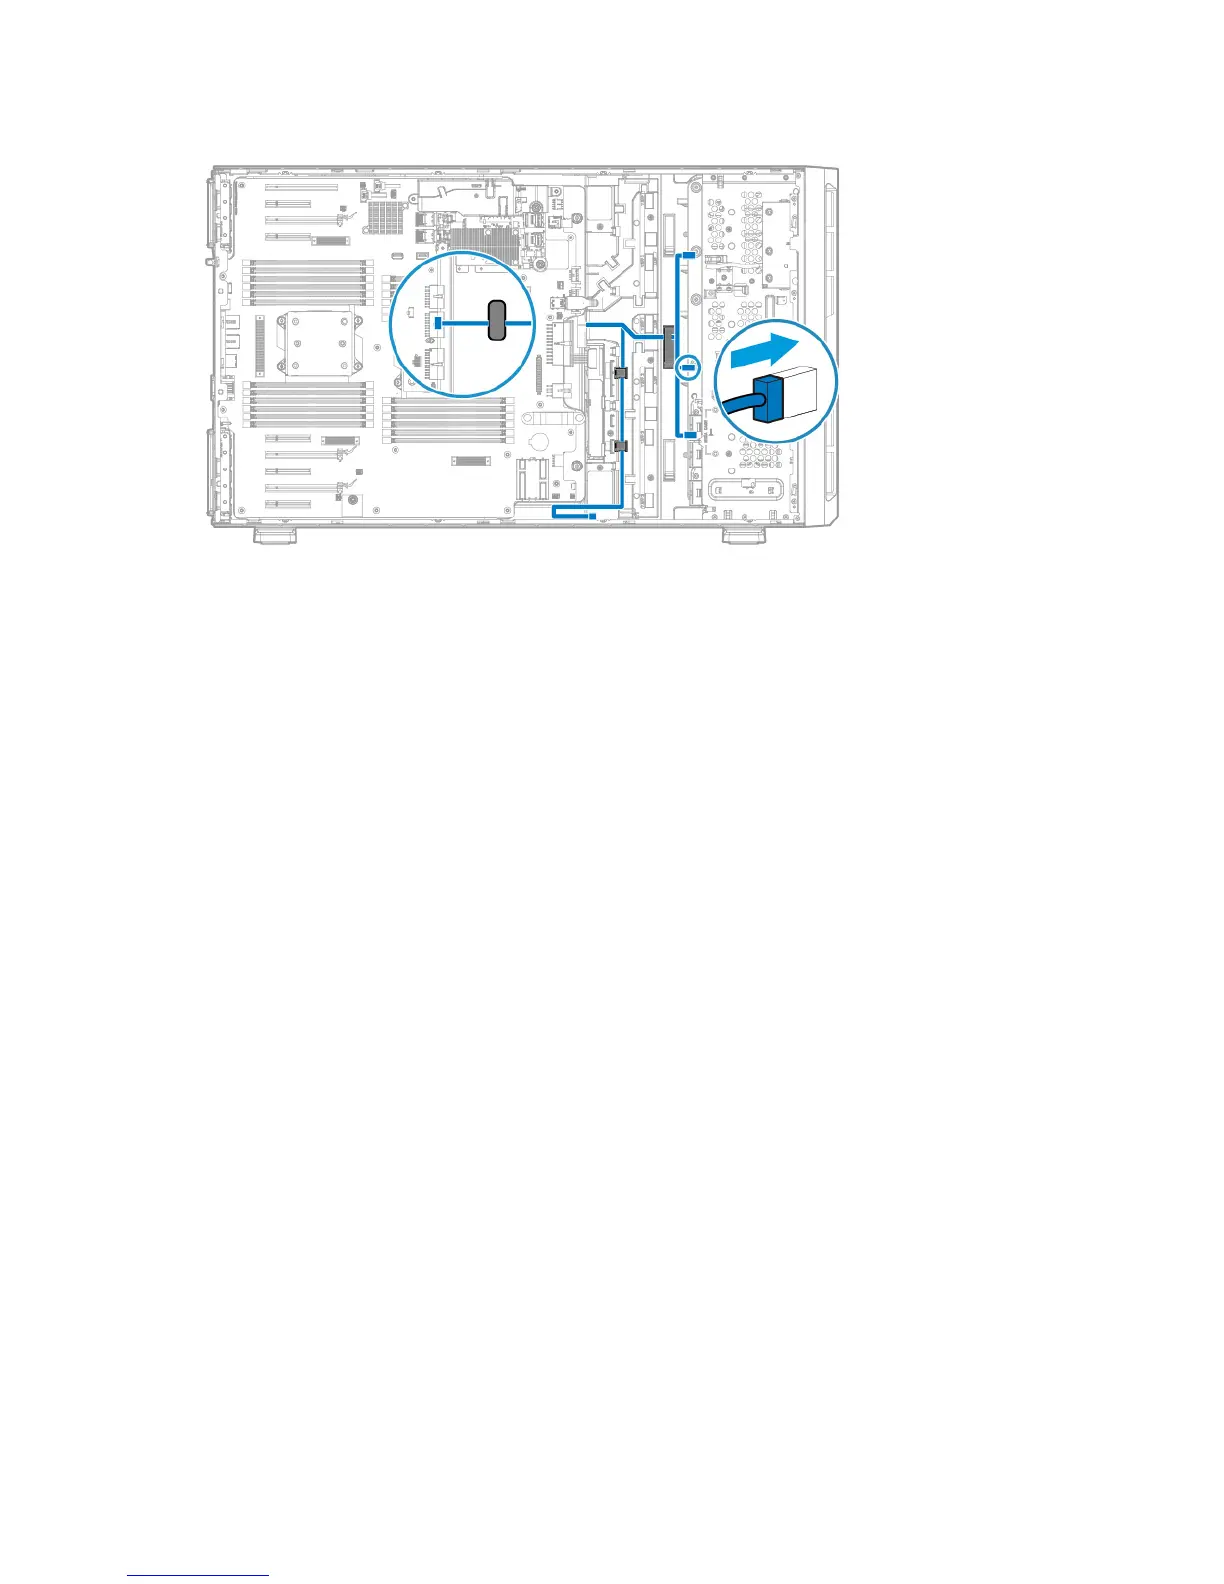
12. Connect the power cable to the drive backplane.
13. Install the drives into the drive cage.
14. Populate any unused drive bays with a drive blank.
15. Install the fan cage (on page 37).
16. Install the air baffle (on page 34).
17. Install the access panel (on page 32).
18. Do one of the following:
o If the server is in a tower configuration, return the server to an upright position.
o If the server is in a rack configuration, slide the server into the rack.
19. Connect each power cord to the server.
20. Connect each power cord to the power source.
21. Power up the server (on page 29).
22. Do one of the following:
o For tower models, install the tower bezel (on page 31).
o For rack models, install the security bezel ("Security bezel option" on page 48).
Eight-bay LFF drive backplane option
The server ships with a drive backplane and cables for data and power installed for box 3. Install a second
optional backplane in box 2 and then a third optional backplane in box 1.
To install an additional eight-bay LFF drive cage, an optional storage controller is required. To obtain the
option, contact an HP authorized reseller.
For more information on drive and box numbering, see "Device numbering (on page 20)."
To install the component:
1. Do one of the following:
o For tower models, open and remove the tower bezel ("Remove the tower bezel" on page 30).

 Loading...