Processor heatsink
Removing the CPU heatsink
NOTE The following illustrated CPU heatsink is typical of what you might have in your
workstation. Be aware that different variations of the CPU heatsinks exist, but the overall
procedures listed are sufficient to assist you in removing the CPU heatsink.
1. Shut down the workstation, and disconnect power from the system ( Pre-disassembly
procedures on page 55). Remove the access panel (Access panel on page 61), and place the
workstation on its side with the system board facing up.
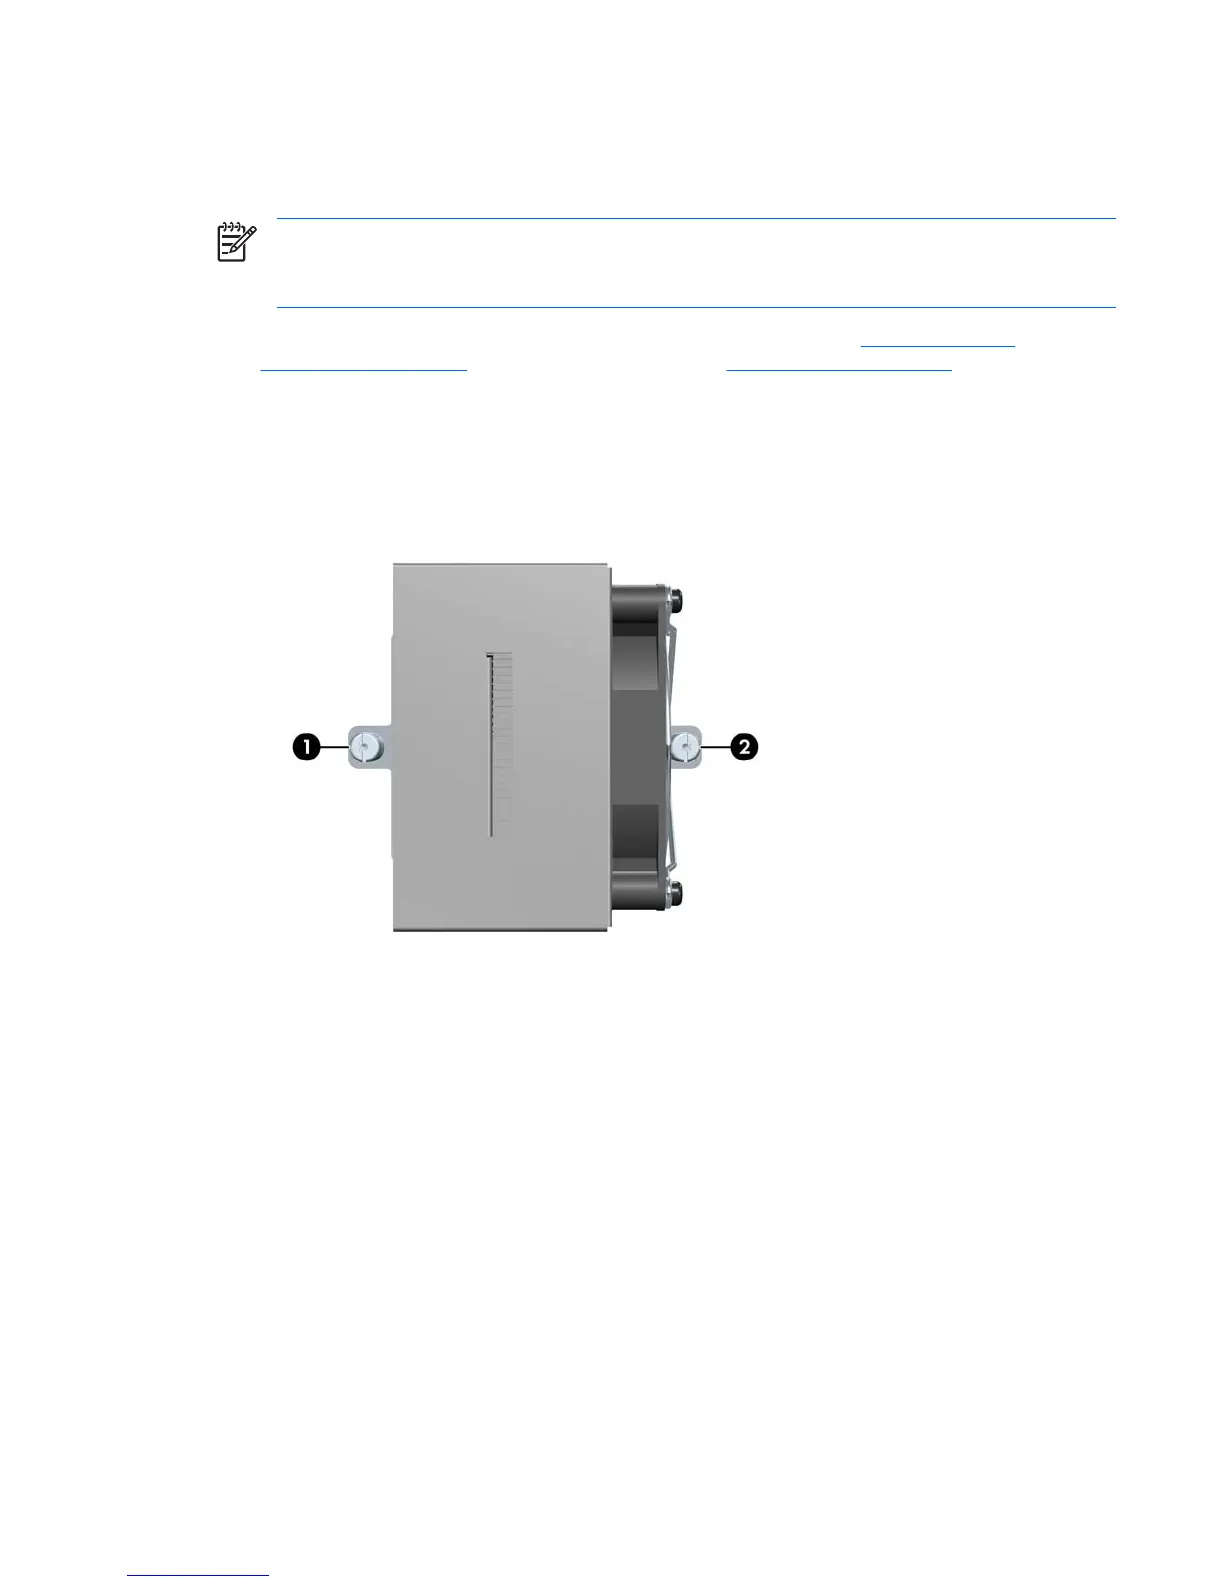
2. Remove the two processor screws slowly, being sure to loosen the screws evenly. Loosen one
screw (1) until the screw shank disengages from the system board, then loosen the remaining
screw (2). Do not fully loosen one screw, then move on to the next. Loosen both screws a little at
a time, so that the processor remains level.
Figure 4-45 Identifying proper screw removal order
3. Disconnect the CPU heatsink fan connector (1) from the system board.
ENWW Removing and replacing components 91
 Loading...


