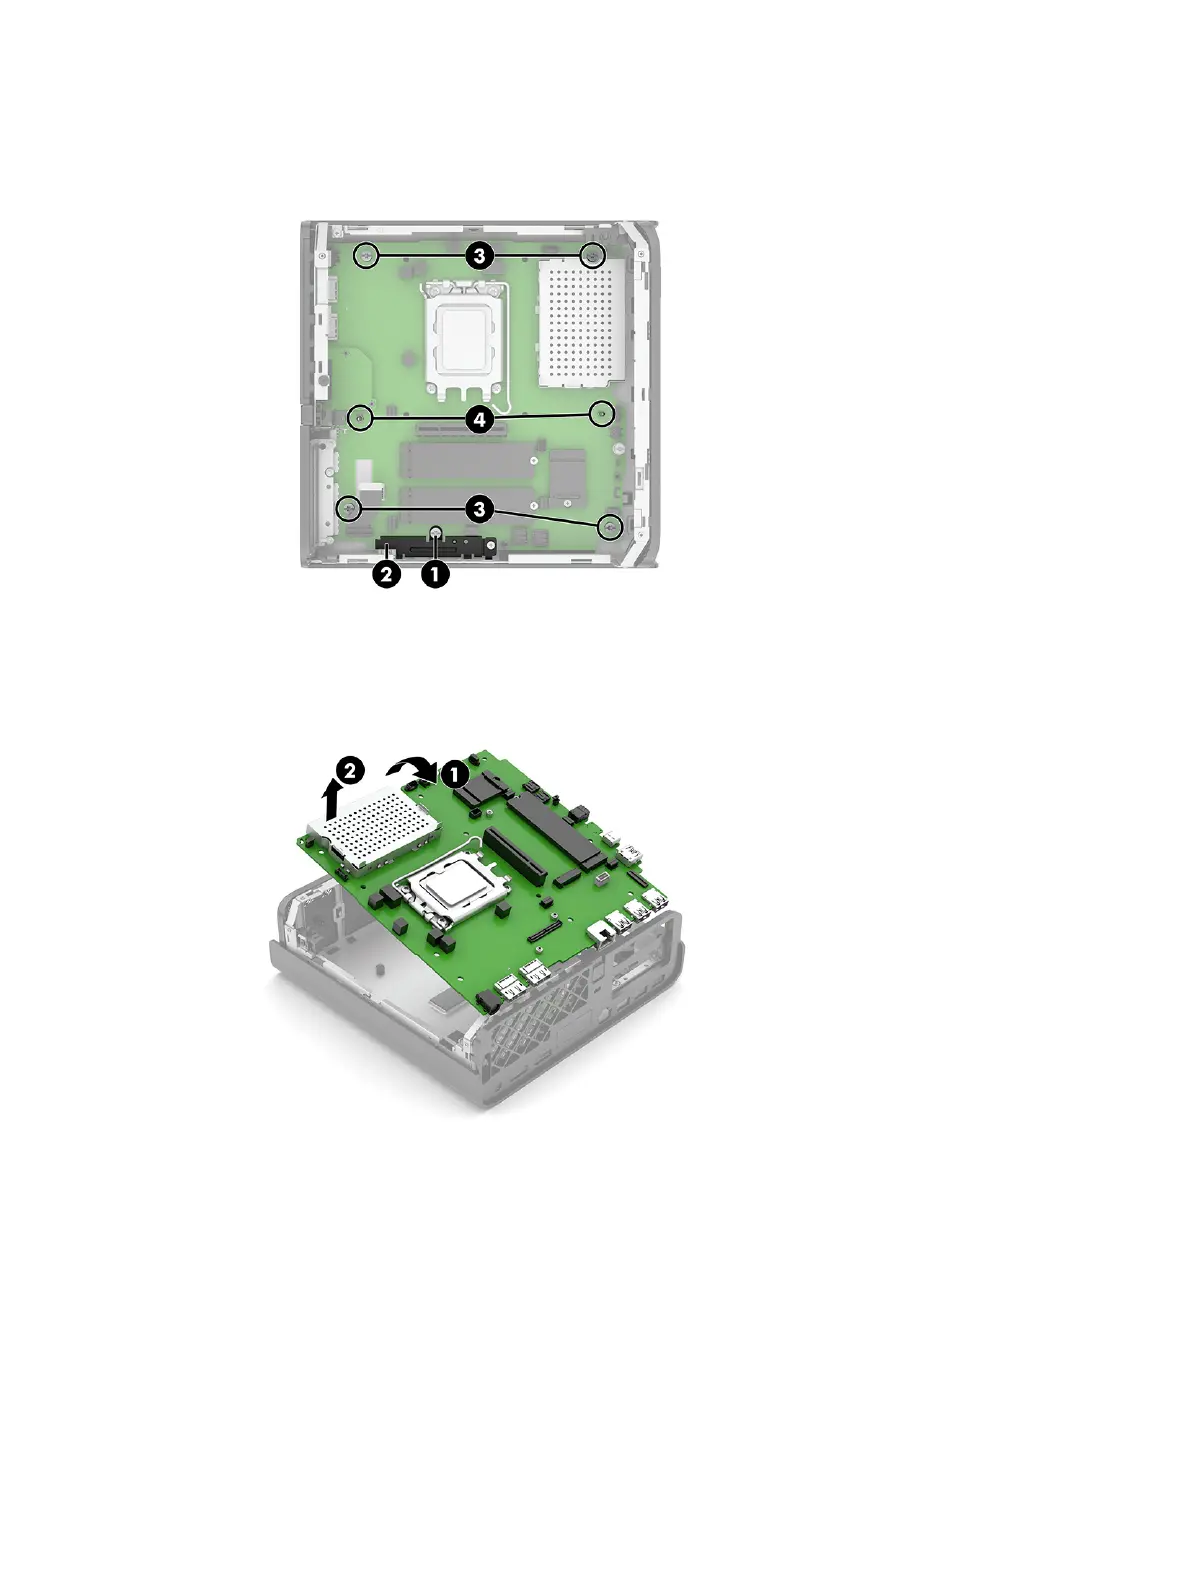
2. Remove the four Torx screws (3) that secure the system board to the computer.
3. Remove the two hex standoffs (4) that secure the system board to the computer.
4. Pull up and at the same time slide the board to the right so that the board is removed from the I/O
holes in the side of the computer.
5. Lift the side of the system board (1), and then remove it from the computer (2).
36
Chapter 4 Removal and replacement procedures
 Loading...