BACK CALIBRATION
WOULD YOU LIKE TO CALIBRATE THE DECODER
PLATE OR DECODE A KEY?
DECODE KEY
DECODER PLATE CALIBRATION COMPLETED
press "CONFIRM" to save
CONFIRM CANCEL
Please Confirm
CONFIRM DECODER PLATE IS STILL INSTALLED AND
PRESS "CONFIRM" TO CONTINUE
PRESS "CANCEL" TO GO BACK
CONFIRM CANCEL
Please Confirm
6. The Decoder will touch off on the Calibration Key.
The screen will display a new confirmation screen.
Select CONFIRM to save this calibration.
7. The screen will now display the CALIBRATE/DECODE
window. Select DECODE KEY.
8. You will now be prompted to confirm the Decoder
Plate is still installed, and to load and gauge the key
to be decoded. Select CONFIRM. NOTE: on some
tip-gauged keys it may be necessary to first move the
carriage to the Service Position in order to gauge the
key. In this case, select CANCEL, then BACK.
The TOOLS menu will be displayed. Select SERVICE
POSITION. Then select DECODE, followed by
DECODE KEY.
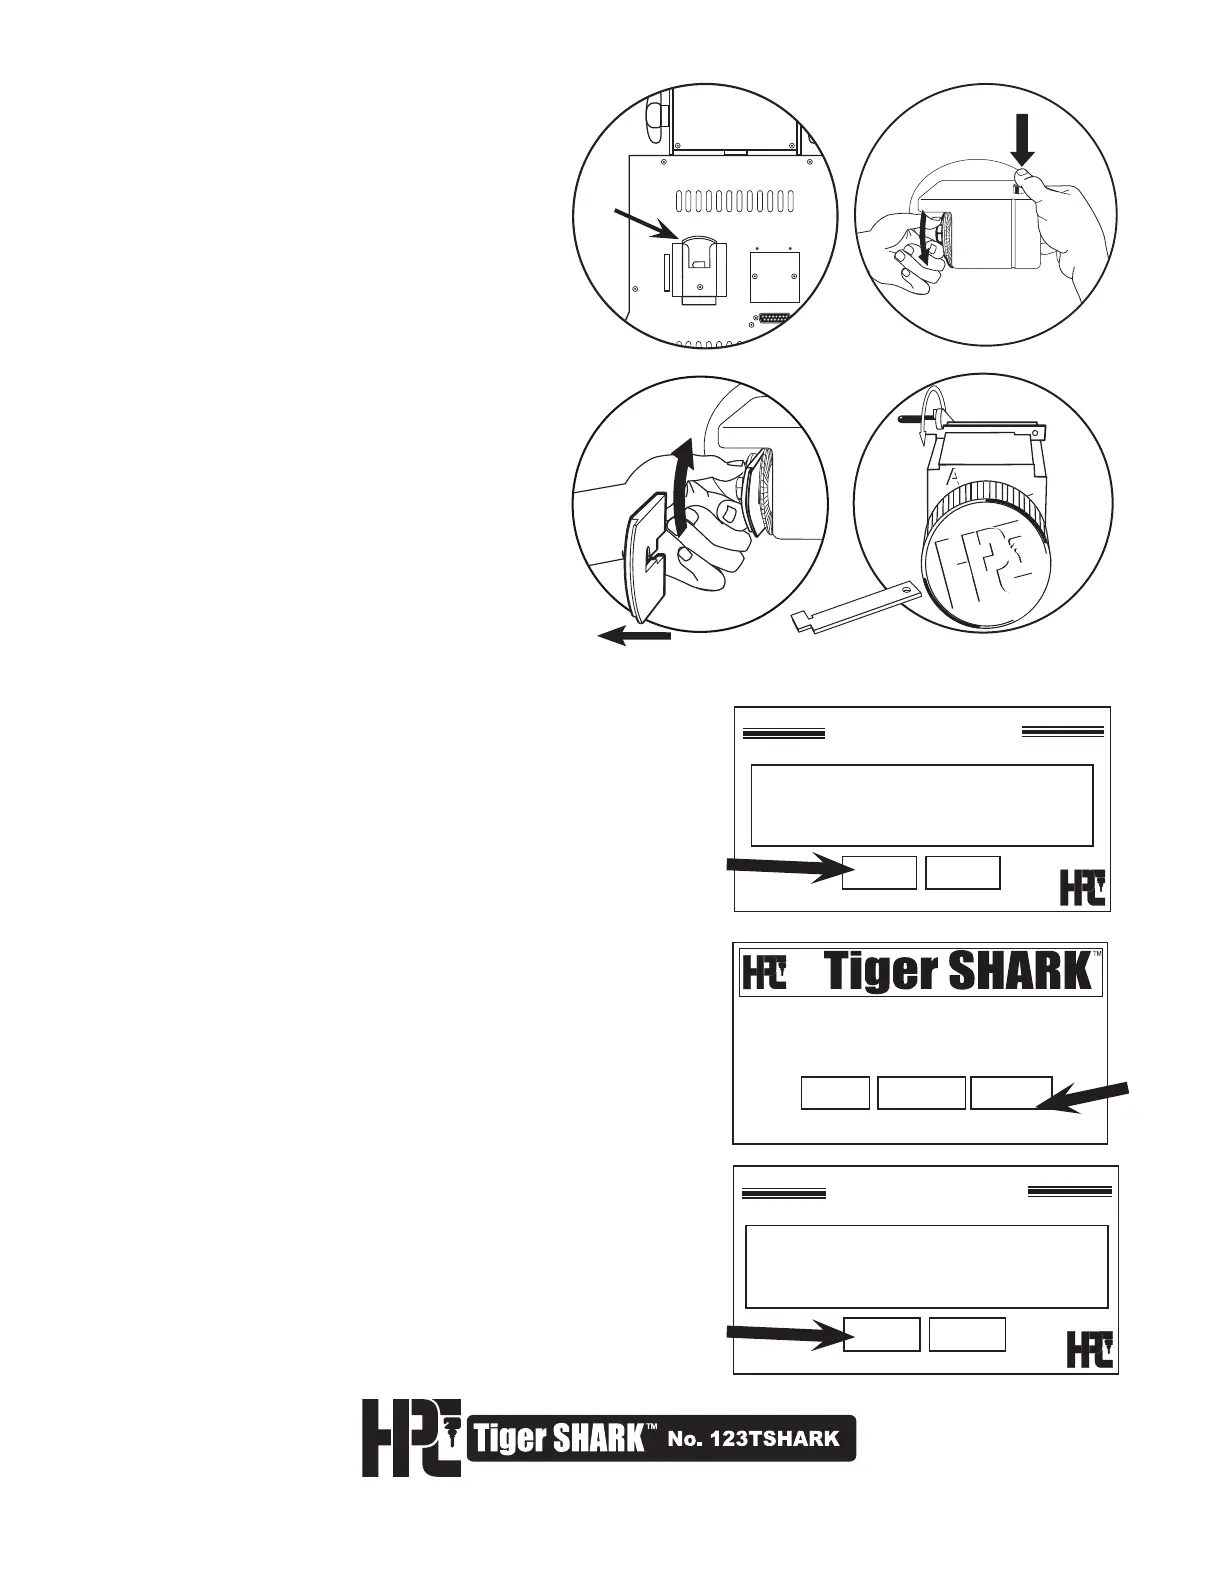
3. Remove the Decoder Plate from the storage
pocket on the back of the machine (Fig. 1).
Loosen the Quick Nut (Fig. 2).
Place the Decoder Plate on the Cutter Shaft,
at the outside of the cutter (to the left) and
tighten the Quick Nut (Fig. 3) NOTE: It is not
necessary to remove the Quick Nut to mount
the Decoder Plate.
5. With the Decoder Plate and Calibraton Key
properly installed, you are ready to calibrate
the tracer. Tighten the wing nut. Select
CONFIRM. If the Calibration key blank that
was included is not available, use any key
blank that has a blade width of .250”
(6.35mm).
Fig. 1
Fig. 2
Fig. 3
4. Load the Calibration Key (Fig. 4). Gauge at the
back of JAW-A using the shoulder gauge.
Calibration Key
Fig. 4
Offset faces left