SHAFT LOCK ASSEMBLY
SHAFT LOCK PLUNGER
SHAFT LOCK SPRING
RETAINING RING
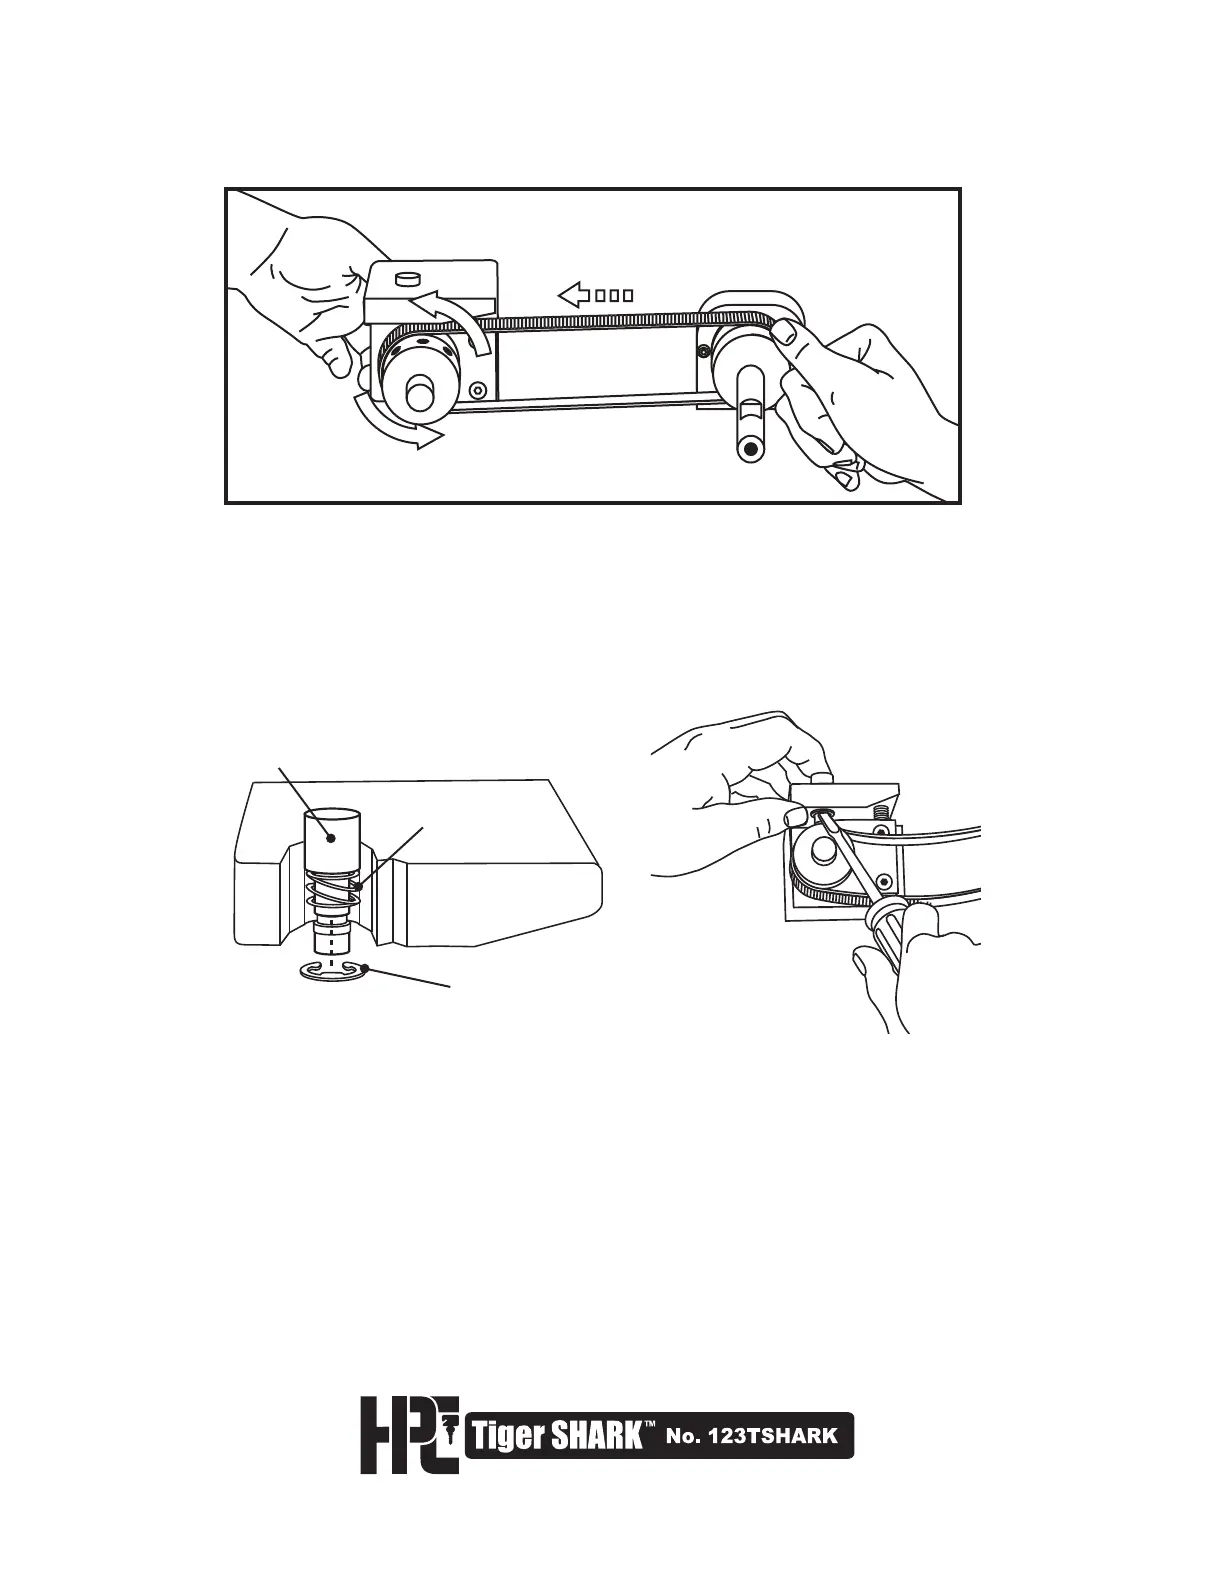
9. Rotate the front Cutter Pulley, by turning the Cutter Wheel from right to left.
At the same time, push the belt off of the rear pulley with your thumb.
The belt will slide off the rear pulley and go limp (Fig. 1).
10. To remove the old belt, you need to remove the Shaft Lock Button Assembly
from the Cutter Block. Identify the arc ring located underneath the Cutter Block
as shown (Fig. 2). Push the Shaft Lock Plunger down and with a small flat blade
screwdriver, pry the Retaining Ring off of the assembly (Fig. 3). Do this carefully
as the Shaft Lock is spring loaded. Remove Shaft Lock Plunger, Shaft Lock
Plunger Spring and Retaining Ring, and set aside.
Fig. 2
Fig. 3
11. You can now remove the worn belt, by sliding slack belt through the front of the
machine. You are also ready to install the new belt.
12. Refer again to the diagram for step 7 and thread the new belt into front of
machine. First, place rear of belt behind the Rear Cutter Pulley. Next, align
and mount front of belt onto Front Cutter Pulley.
Fig. 1