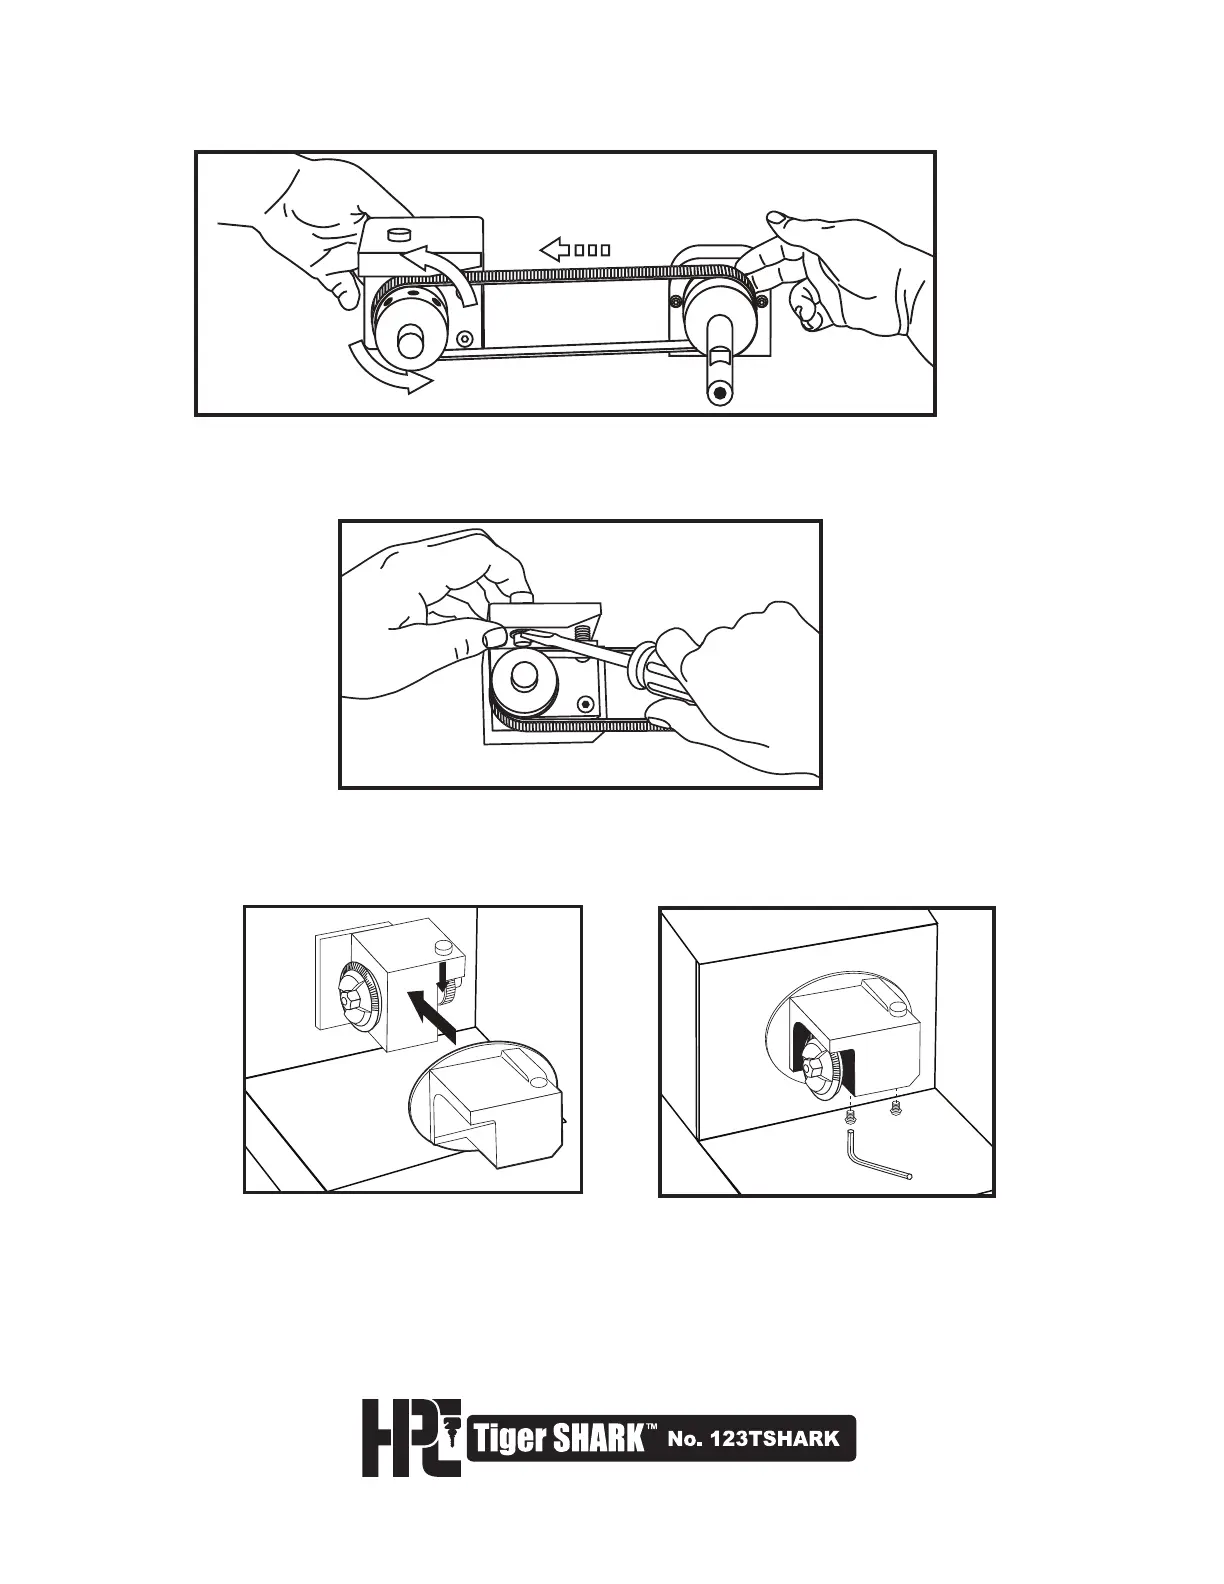
Fig. 3
Fig. 4
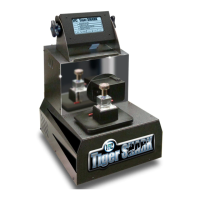
13. Rotate the front Cutter Pulley, by turning the Cutter Wheel from right to left. At the same time, pull the belt
onto the rear pulley with your fingers. The belt will slide onto the rear pulley and tighten (Fig. 1).
14. Next, re-install the Shaft Lock Plunger Assembly. First, insert Plunger and Spring into hole at top of Cutter
Block. Hold Plunger down and line up arc ring to slot in plunger. Now, press Retaining Ring onto Plunger
with screwdriver until it snaps into place (Fig. 2).
Fig. 2
15. Next, re-install Cutter Head Housing. Line up Housing with Shaft Lock Button. Press button down while sliding
the Housing over Cutter Block (Fig. 3). Housing will snap into place, and Button will pop up when Housing is
properly mounted. Next, secure with Allen Screws (Fig. 4).
16. Installation of the Cutter Head Belt is now complete. If you are not replacing the Drive Belt at this time, then
re-attach the Lower Chassis Cover, re-connect the Power Wires to Switch, and re-attach the Deburring Brush.
Re-connect power supply and test the machine. If you are installing a new Drive Belt at this time, read 6.3
“Replacement of Drive Belt.” beginning on the next page.