CAUTION: Be sure to tighten each heatsink nut fully in the order indicated. Otherwise, boot
failure or intermittent shutdowns might occur.
c. Using a T-30 Torx screwdriver, fully tighten each heatsink screw in the order indicated on the
heatsink label (1 -2 -3 -4) until it no longer turns.
8. Install the air baffle.
9. Install the server into the chassis.
10. Power up the server.
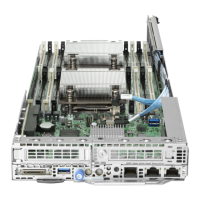
Installing the fabric processor heatsink assembly and enablement board
Determine if there are temperature requirements for the component. For more information, see
Temperature requirements.
Hewlett Packard Enterprise recommends identifying the processor heatsink module components before
performing this procedure. See "Processor, heatsink, and socket components on page 9."
Prerequisites
Before installing this option, be sure that you have the following items:
• The components included with the hardware option kit
• T-30 Torx screwdriver
Procedure
1. Observe the following alerts:
CAUTION: When handling the heatsink, always hold it along the top and bottom of the fins.
Holding it from the sides can damage the fins.
36 Installing the fabric processor heatsink assembly and enablement board
 Loading...