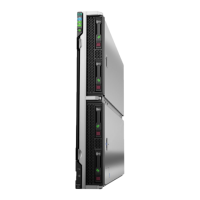
8. Remove the front panel/drive cage assembly.
9. Remove the internal USB drive, if installed.
To locate the internal USB connector, see "System board components."
10. Remove the microSD card, if installed.
To locate the microSD card, see "System board components."
11. Remove all DIMM baffles.
12. Remove all DIMMs.
Be sure to note the DIMM slot locations in which each DIMM is installed. These components must be
installed in the same locations on the new system board.
13. Remove the HPE Persistent Memory modules installed on the system board (Removing and replacing
an HPE Persistent Memory module).
Be sure to note the DIMM slot locations in which each HPE Persistent Memory module is installed.
These components must be installed in the same locations on the new system board.
14. Do the following:
a. Observe the guidelines and procedures for NVDIMM relocation.
b. Remove all NVDIMMs.
15. Remove all mezzanine option cards.
16. Remove the processor heatsink assembly from the failed system board, and place it on a flat, level
surface.
See Migrating a processor heatsink assembly to a replacement system board.
17. Disassemble the heatsink blank, and then use the dust cap to cover the processor socket on the system
board.
18. Remove the system board from the base pan.
a. Grasp the system board handle at the front.
b. Slide it rearward to just beyond the pan arrow marking.
IMPORTANT: Be sure to observe the base pan arrow markings when removing the system
board. After the system board is just past the pan arrow markings, you can then lift the entire
board out of the pan.
c. Grasp the system board with one hand on the system board handle and the other on the system
board rear side.
d. Lift the system board out away from the pan.
58 Removal and replacement procedures

 Loading...