EasyManuals Logo

Huawei SUN2000-8KTL-M1 User Manual

Huawei SUN2000-8KTL-M1
142 pages
To Next Page IconTo Next Page
To Previous Page IconTo Previous Page
Page #46 background imageLoading...
Page #46 background image
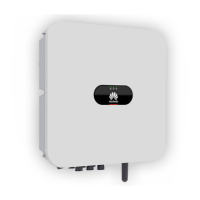
Figure 4-15 Securing the mounting bracket
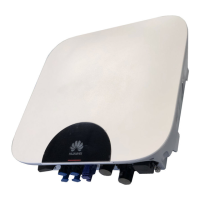
Step 4 (Optional) Install the locking screw for the DC switch.
NO TE
The locking screw for the DC switch is delivered with the SUN2000. According to the
Australian standard, the locking screw is used to secure the DC switch to prevent the
SUN2000 from being started by mistake.
For the model used in Australia, perform this step based on the local standards.
Figure 4-16 Installing the locking screw for the DC switch
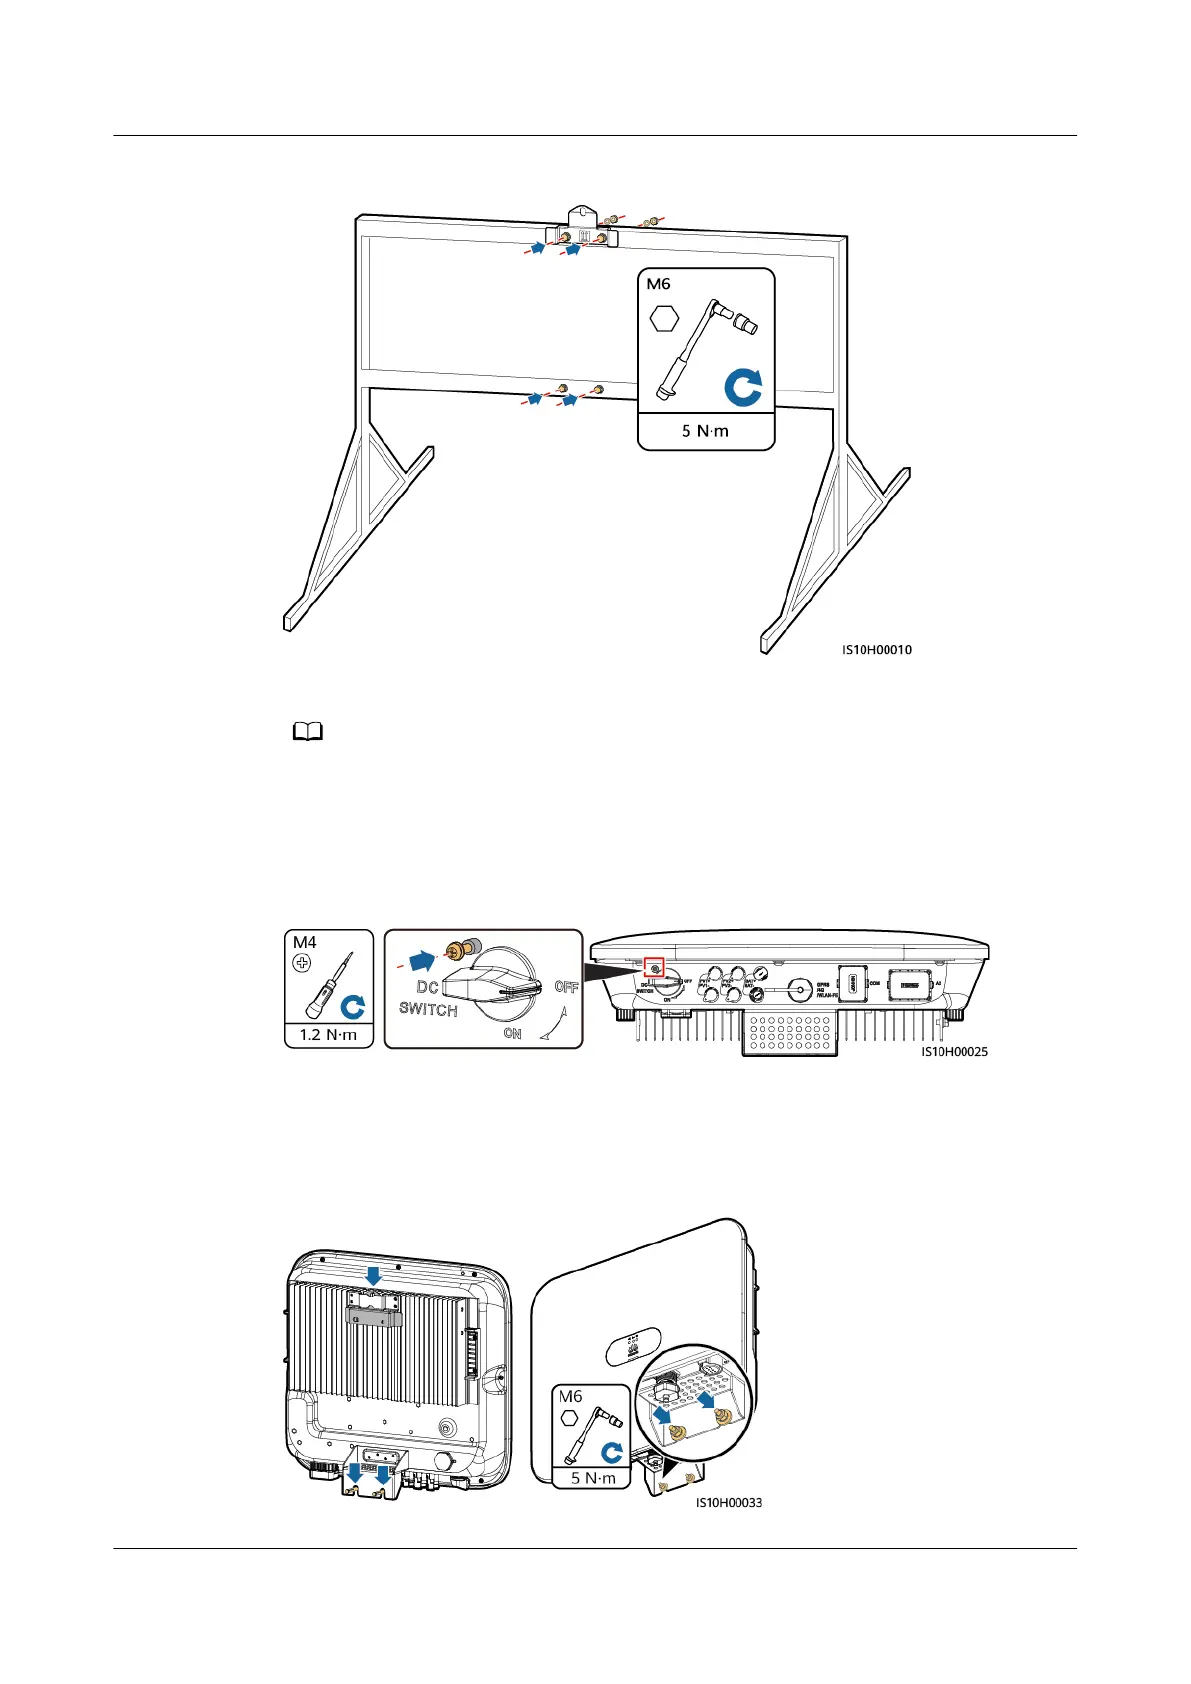
Step 5 Install the SUN2000 onto the mounting bracket.
Step 6 Tighten bolt assemblies.
Figure 4-17 Installing a SUN2000
SUN2000-(3KTL-10KTL)-M1 Series
User Manual 4 Installation
Issue 17 (2024-01-12) Copyright © Huawei Technologies Co., Ltd. 36

Table of Contents

Questions and Answers:

Question and Answer IconNeed help?

Do you have a question about the Huawei SUN2000-8KTL-M1 and is the answer not in the manual?

Huawei SUN2000-8KTL-M1 Specifications

General IconGeneral
Max. Efficiency98.6%
Max. Input Voltage1100 V
Nominal Input Voltage600 V
Number of MPP Trackers2
Max. Output Power8000 W
Nominal Output Frequency50 Hz / 60 Hz
Weight17 kg
Max. apparent AC power8800 VA
Rated AC power8000 W
Operating Temperature Range-25°C to +60°C
CoolingNatural Convection
Protection DegreeIP65
Warranty10 years
Nominal Output Voltage230 V / 400 V

Related product manuals