209
Transducer Setup
1
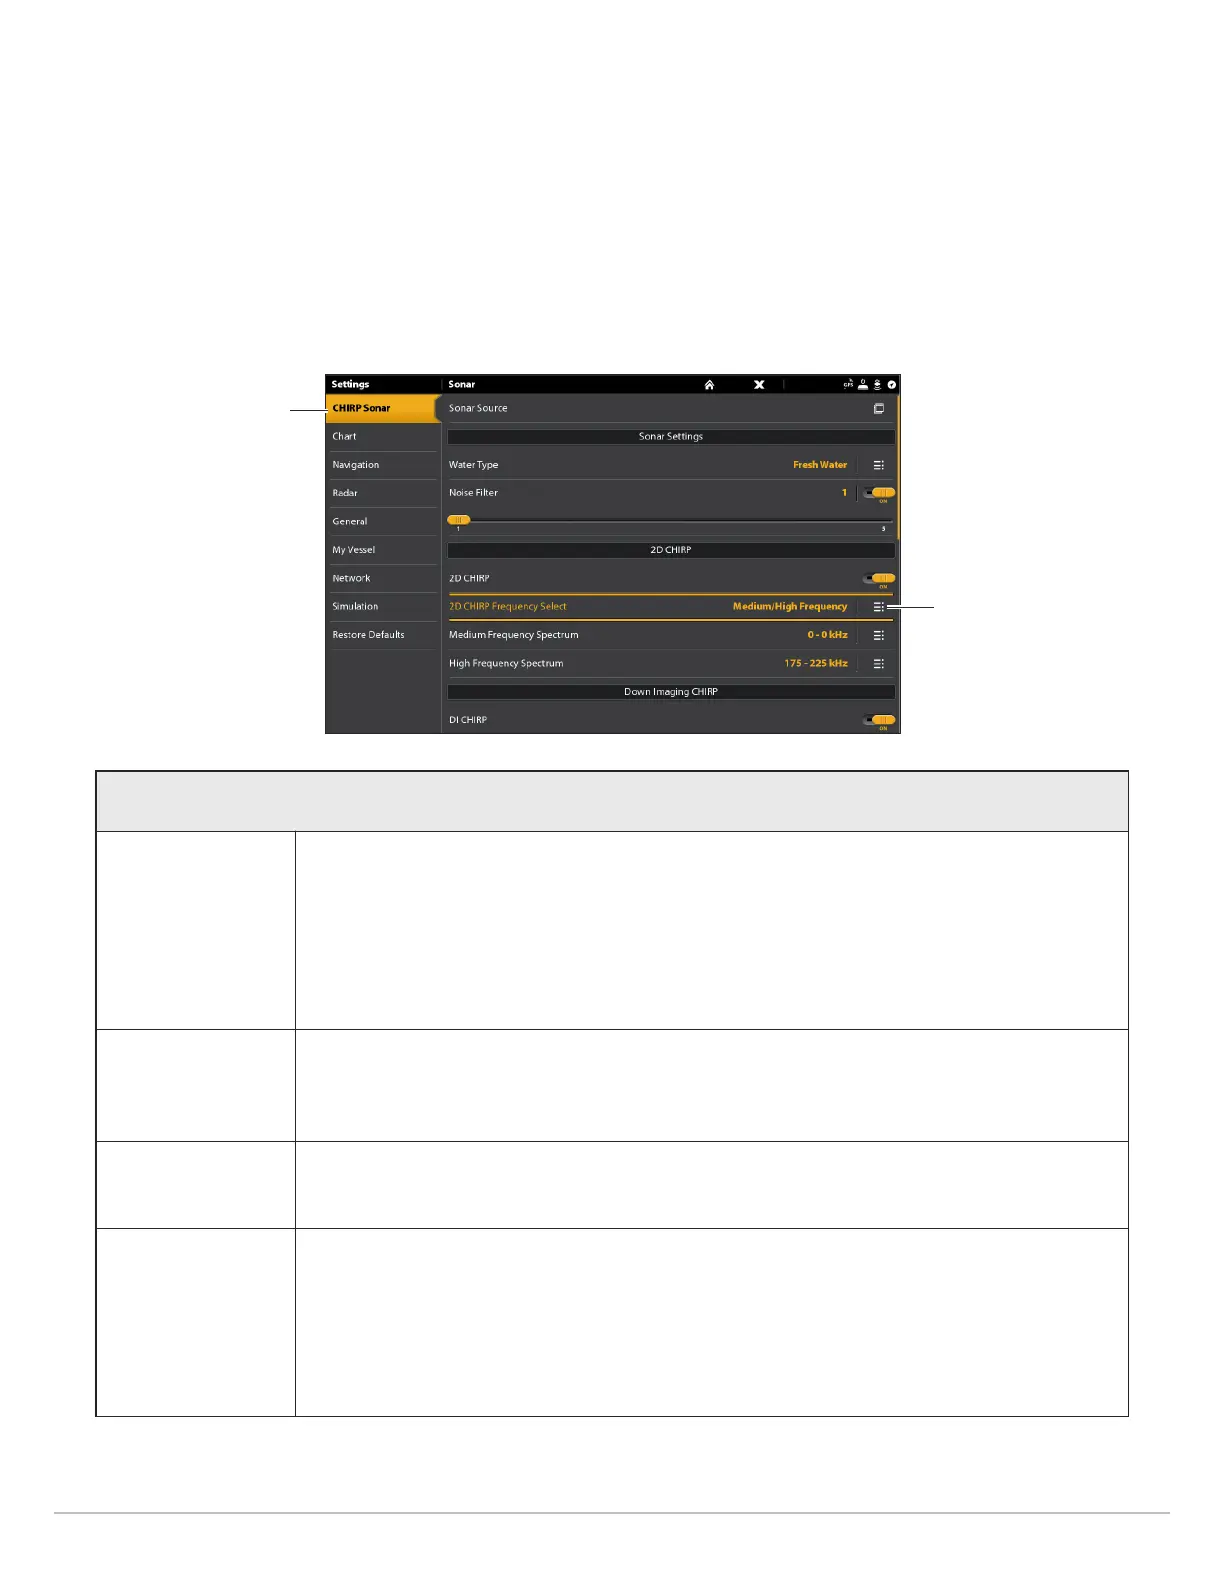
. Press the HOME key.
2. Select Settings.
3. Select CHIRP Sonar.
4. Under 2D CHIRP, select 2D CHIRP Frequency Select.
5
. Select a frequency.
See the Frequency Select Options tables on the following pages. To access all beams in the 2D Sonar View, but view individual
frequencies on different control heads, select Auto, Medium, or Medium/High Frequency.
Selecting 2D CHIRP Sonar Frequencies
CHIRP sonar
Frequency Select
menu for 2D CHIRP
Sonar
2D Frequency Select (CHIRP Off, On)
Auto
Auto is the default selection. When Auto is selected, all sonar source beams are available for
display in the 2D Sonar View.
When Auto is selected, the transducer will only ping when the 2D Sonar View is being used,
which may cause interruptions in the sonar history if the view is closed and then reopened.
To display sonar history without interruption, select the blended Medium/High Frequency
beams.
Medium
Frequency
Select Medium Frequency for deep water (more than 800 feet). Medium Frequency can be
used for deep returns at high speed. If Medium Frequency is selected, the high frequency
beam pings in the background but is not displayed.
High Frequency
Select High Frequency for more detail at shallower depths (less than 800 feet). If High
Frequency is selected, the medium frequency beam is not available.
Medium/High
Frequency
Select Medium/High Frequency to ensure both beams ping continuously, so the sonar history
is not interrupted if the Sonar View is closed.
The returns from both beams are blended by starting with the wide beam return, dimming it,
and then overlaying it with the narrow beam return. The narrow beam sonar returns will stand
out from the wide beam sonar returns.


 To Next Page