Machine Maintenance: 5-8
Servicing Valves on the High Pressure Pump
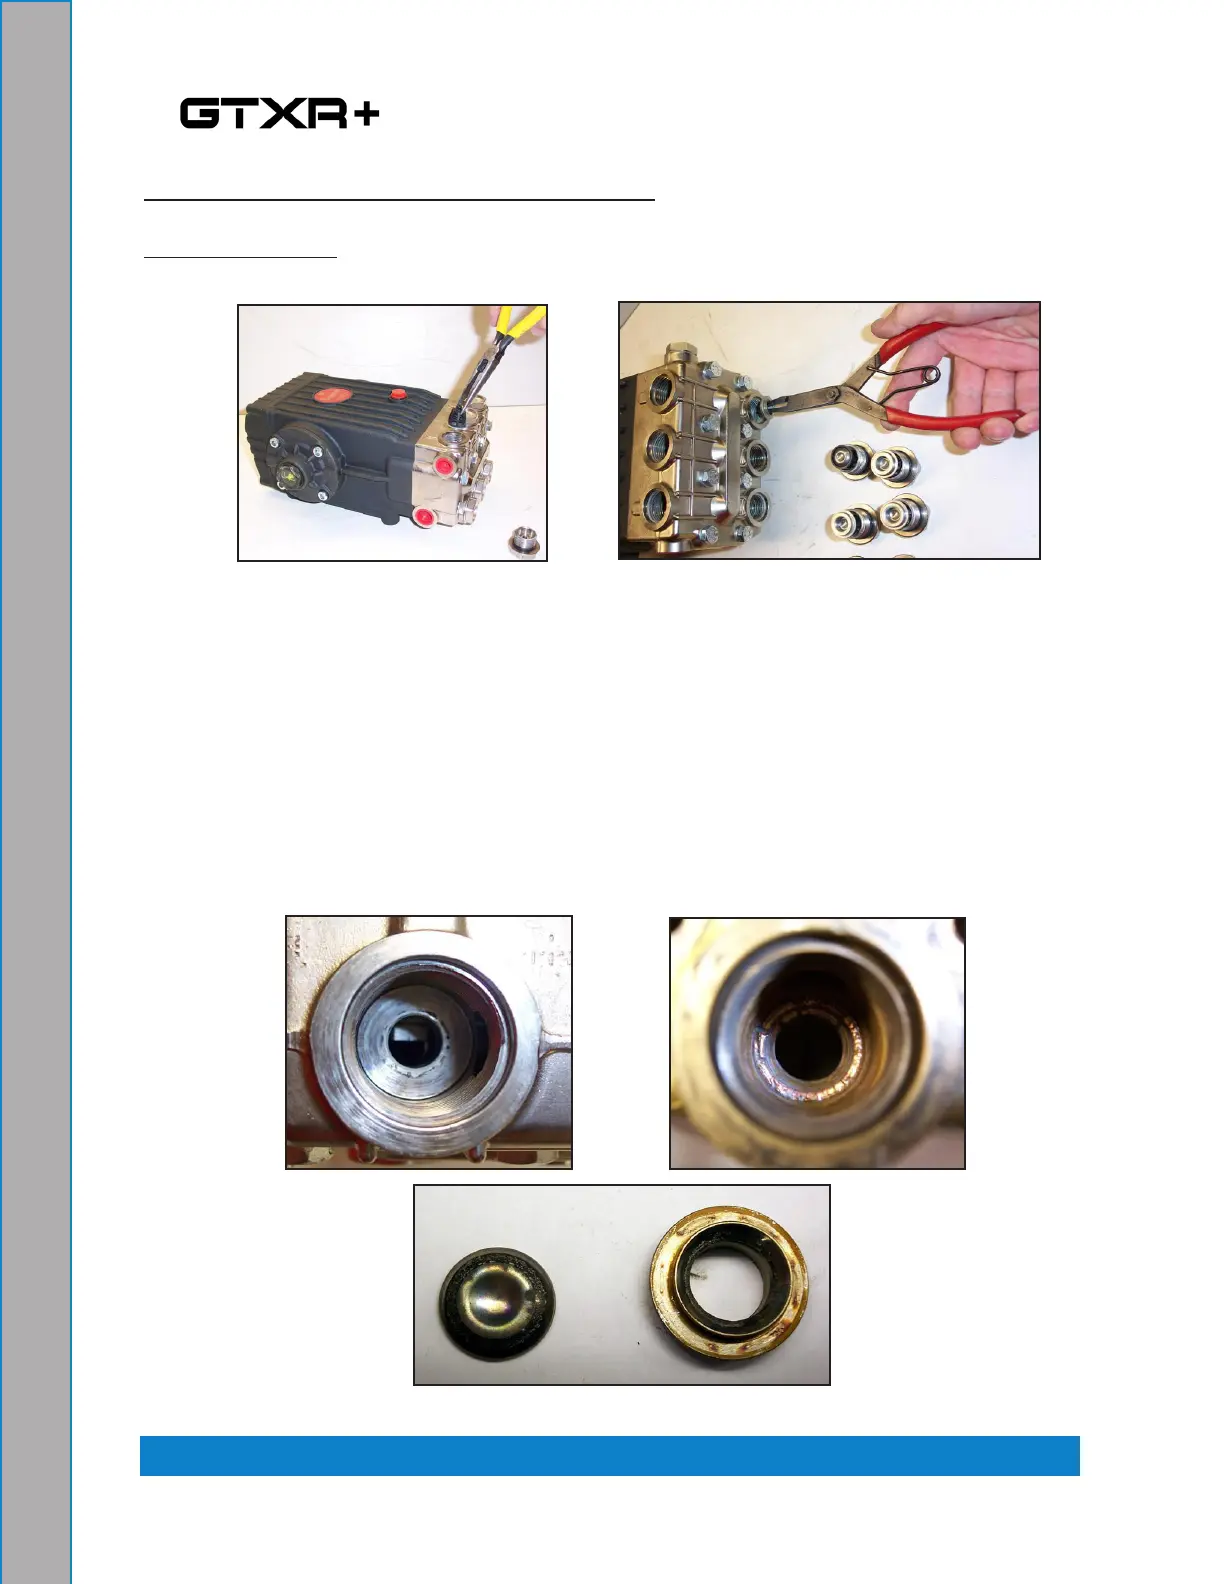
Removing a Valve
1. Remove the valve cap (30 mm) and extract the valve assembly (see Figure 5-1).
2. Remove the valve assembly (retainer, spring, valve plate, valve seat) from the valve
cavity.
3. Remove the O-ring and support from the valve cavity.
4. Examine the O-ring and replace if there is any evidence of cuts, abrasion, or
distortion.
5. Inspect the manifold for wear or damage (see Figure 5-2).
6. Inspect the old valves for wear or damage. Only one valve kit (P/N 000-078-521)
is necessary to repair all the valves in the pump. (The kit includes new supports,
O-rings, valve seat, valve poppet, spring and retainer; all are pre-assembled.)
Figure 8-1. Remove Valve Cap and Valve Assembly
Figure 8-2. Inspect Manifold and Old Valves