MXT+ Hydraulic Torque Wrench Basic Operations Manual
14
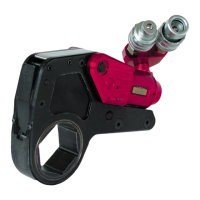
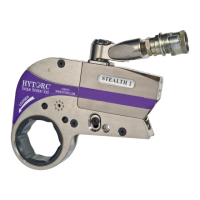
TIGHTENING THE HYTORC WASHER
• Connect hydraulic hoses and set pump to desired torque output (refer to pages 11-12).
• Place the tool onto the nut and HYTORC Washer, so that the driver is fully engaged.
• Push and hold the advance button on the pump remote until the tool fully advances, then release.
• Continue successive cycles of “PUSH-ADVANCE-CLICK-RELEASE” until the tool “stalls” at the pre-set Torque/PSI
and the nut no longer turns.
LOOSENING THE HYTORC WASHER
• Configure the HYTORC Washer Driver so that LOOSEN is visible when tool is mounted on the application.
• Turn up the pump pressure or torque value to the maximum or peak value.
• Mount the driver onto the application so that it engages both the nut and the HYTORC Washer.
• Apply pressure until the out sleeve moves freely.
• Loosen bolts gradually in reverse order of tightening, to prevent misalignment.
• Remove the nut and HYTORC Washer by hand.
HYTORC Washer HYTORC Washer Driver
INSTALLING THE HYTORC WASHER DRIVER
• Slide the appropriate size HYTORC Washer Driver
over the square drive and spline while aligning the
thumb screw with the flat on the spline.
• Tighten the thumb screw to secure driver. Challenge
the Driver to make sure it is secure.
The HYTORC Washer System consists of the HYTORC Reaction Washer and Backup Washer. The tool is configured for
bolting with the HYTORC Washer by installing a dual-socket HYTORC Washer Driver. The driver engages the lobes of the
washer while constraining the reaction force of the tool as it tightens.
NOTE: No reaction arm is required when bolting with the HYTORC Washer. Installation of the spline cover is recommended.
. BOLTING WITH THE HYTORC WASHER