5. Adjust the brackets to the rack depth and tighten all the 6-32 x 1/4-in. screws
to a torque of 9 in-lbs (10 cm-kgs).
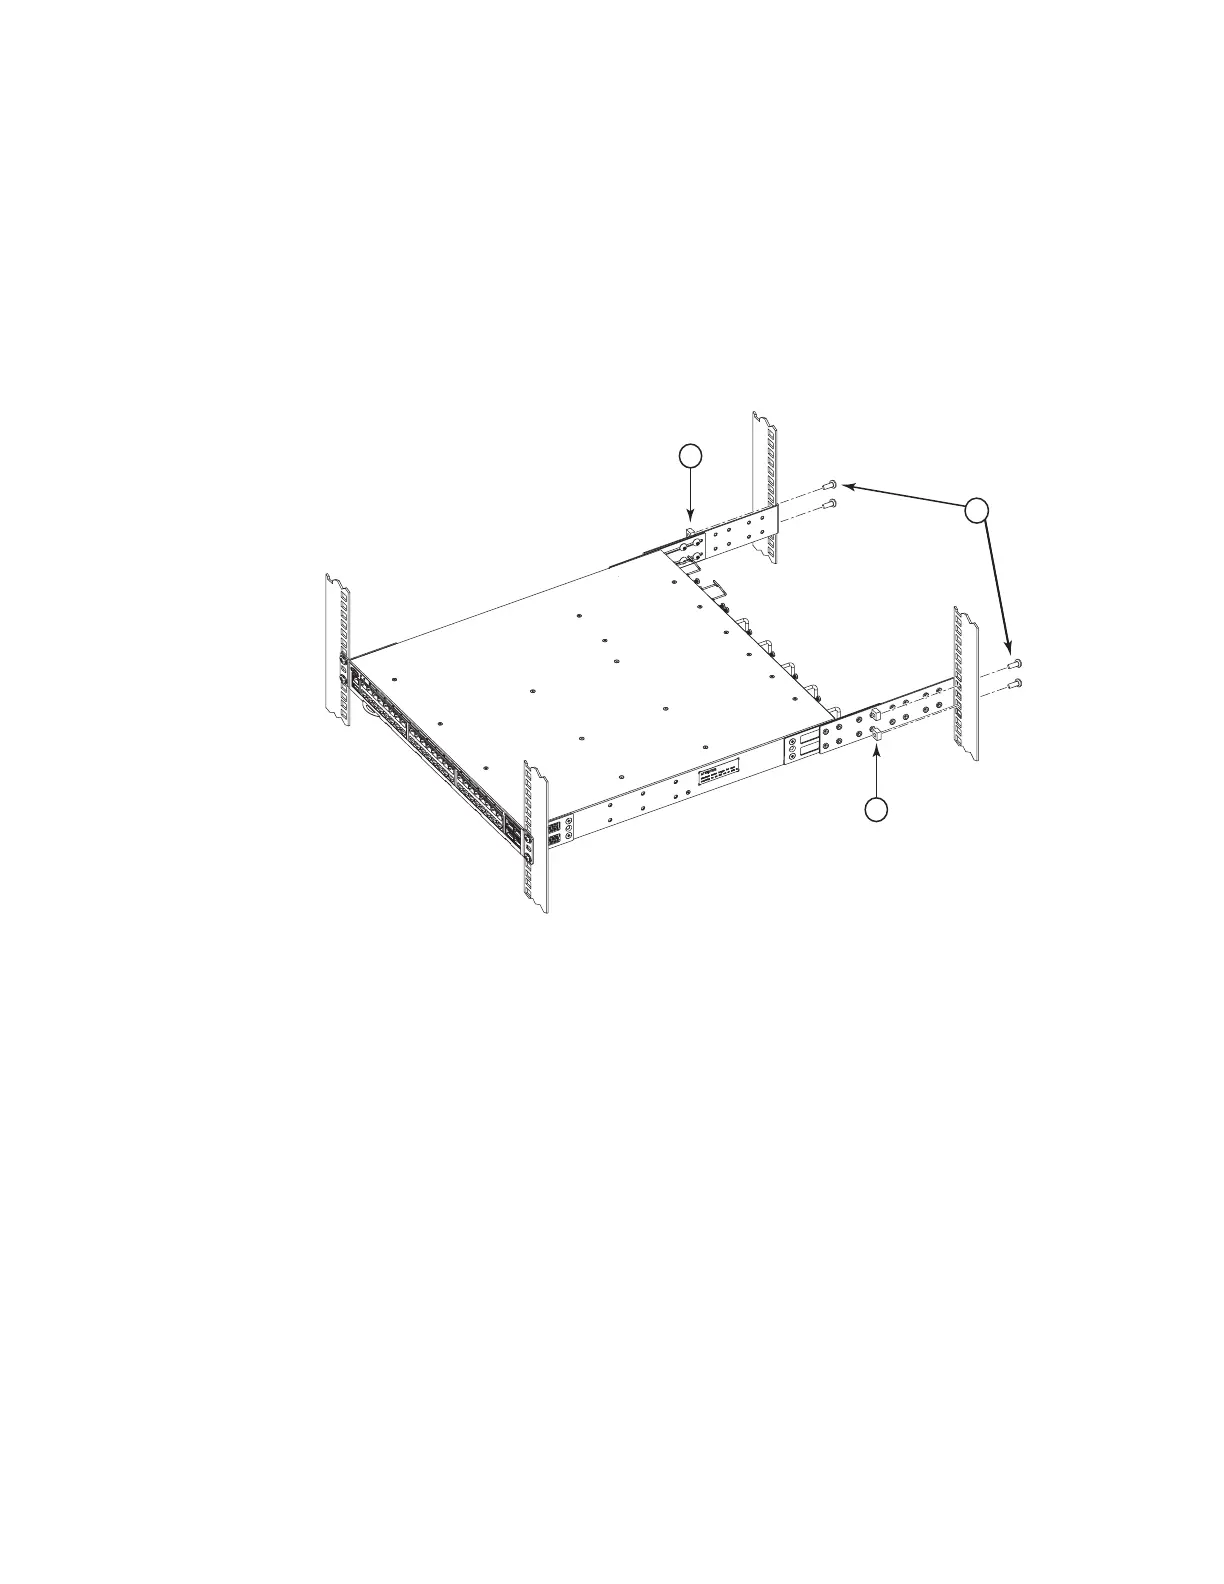
Attaching the rear brackets to the rack posts
Complete the following steps to attach the rear brackets to the rack posts. See
Figure 5 on page 11 for detailed illustrations of the parts.
1. Attach the right rear bracket to the right rear rack post using two 10-32 x
5/8-in. panhead screws (1) and two retainer nuts (2), as shown in
Figure 11. Use the upper and lower holes in the bracket.
1 - Screws, 10-32 x 5/8-in., panhead Phillips
2 - Retainer nuts, 10-32
2. Attach the left rear bracket to the left rear rack post using two 10-32 x 5/8-in.
panhead screws and two retainer nuts. Use the upper and lower holes in the
bracket.
3. Tighten all the 10-32 x 5/8-in. screws to a torque of 25 in-lbs (29 cm-kgs).
4. Remove any clamps or other temporary supports.
5. Continue to “Initial setup of the switch” on page 21.
Installation procedure for flush-rear (recessed) mounting
To install the switch in a cabinet with the switch mounted flush with the rear of
the rack (recessed), use the following instructions.
Note: In this installation, the brackets are named as called out in Figure 5 on page
11 even though the installation of the brackets is reversed from the flush-front
installation.
Attention: The switch must be turned off and disconnected from the fabric
during this procedure.
1
2
2
b42r011
Figure 11. Attaching the rear bracket to the rack post
16 SAN42B-R Installation, Service, and User Guide

 Loading...


