4
2
3
7
4
10
15
18
8
13
5
11
16
9
14
6
12
17
1
3
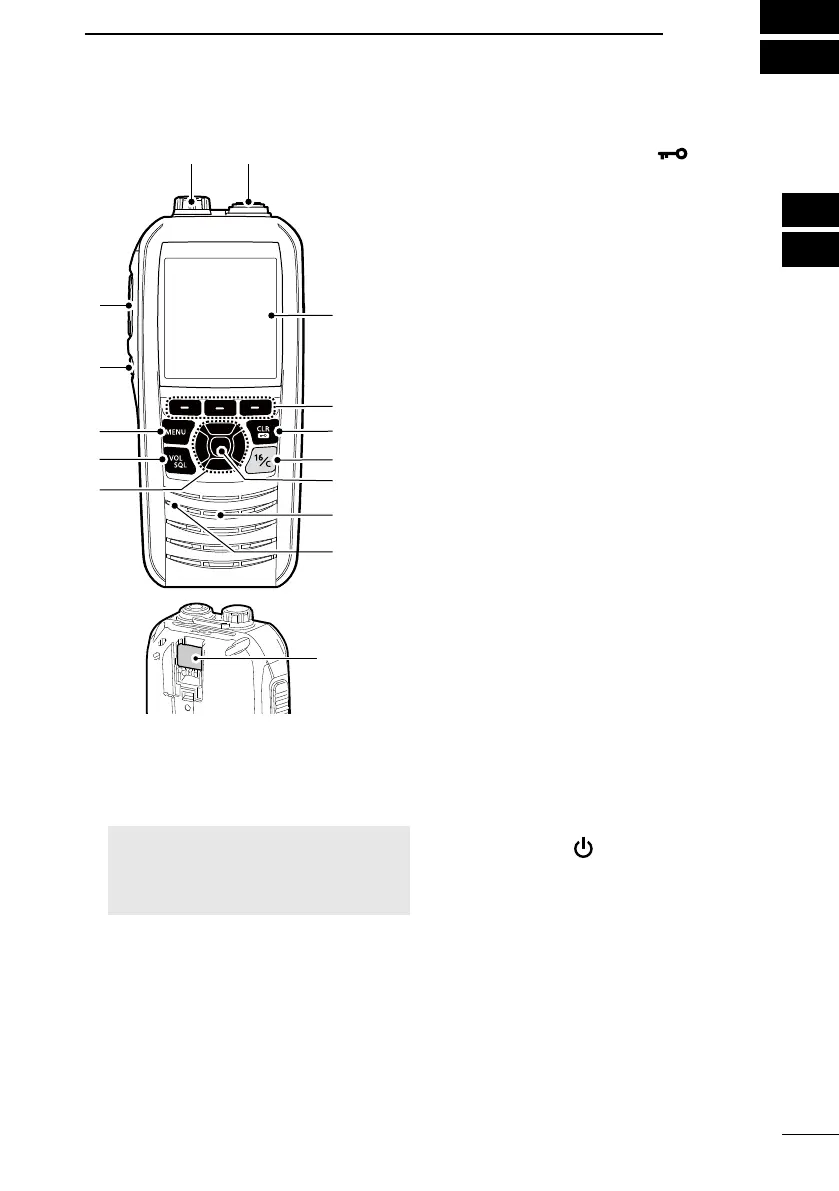
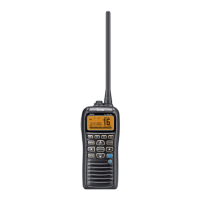
PANEL DESCRIPTION
■ Front panel
1 2
3
Display
4
9
5
8
6
Speaker
Microphone
7
1SPEAKER MICROPHONE JACK
(p. 71)
Connects the optional external speaker
microphone.
NOTE: Attach the jack cover when the
optional speaker microphone is not
used. Otherwise, water will get into
the transceiver.
2ANTENNA CONNECTOR (p. 2)
Connects the supplied antenna.
3SOFTWARE KEYS (p. 6)
Scroll the key functions by pushing
[◄] or [►], and then push either of the
3 software keys to select the function
displayed at the bottom of the display.
4CLEAR/LOCK KEY [CLR/
]
• Push to cancel the entered data, or to
return to the previous screen.
• Hold down for 1 second to turn the
Key Lock function ON or OFF.
(p. 17)
5CHANNEL 16 KEY [16/C]
• Push to select Channel 16. (p. 13)
• Hold down for 1 second to select the
Call channel. (p. 13)
6ENTER KEY
Push to set the entered data, selected
item, and so on.
7UP/DOWN/LEFT/RIGHT KEYS
[▲]/[▼]/[◄]/[►]
• Push [▲] or [▼] to select the
operating channel, Menu items, Menu
settings, and so on.
• Push [◄] or [►] to scroll the Software
key functions. (p. 6)
• Push to select a character or number
in the entry mode.
8VOLUME/SQUELCH/MONITOR KEY
[VOL/SQL]/[MONI]
• Push once to display the volume level
setting screen. (p. 15)
• Push twice to display the squelch level
setting screen. (p. 15)
• Hold down for 1 second to turn ON the
Monitor function. (p. 17)
9MENU KEY
Push to display or close the Menu
screen.
POWER KEY [
]
Hold down for 1 second to turn the
transceiver ON or OFF.
PTT SWITCH [PTT]
Hold down to transmit, release to
receive.
DISTRESS KEY [DISTRESS]
Hold down for 3 seconds to transmit a
Distress call.