56
11
OTHER FUNCTIONS
11
15
18
13
16
14
12
17
1
7
4
10
2
8
5
3
9
6
D Entering a waypoint
Position information that you want to memorize can be added as a waypoint.
TIP: You can also add your current position as a waypoint by pushing .
1. Open the “Waypoint” screen.
[MENU] > Navigation > Waypoint
2. Push
to add a waypoint.
• The “Waypoint” screen is displayed.
L If the waypoint memory is full, a popup screen is displayed.
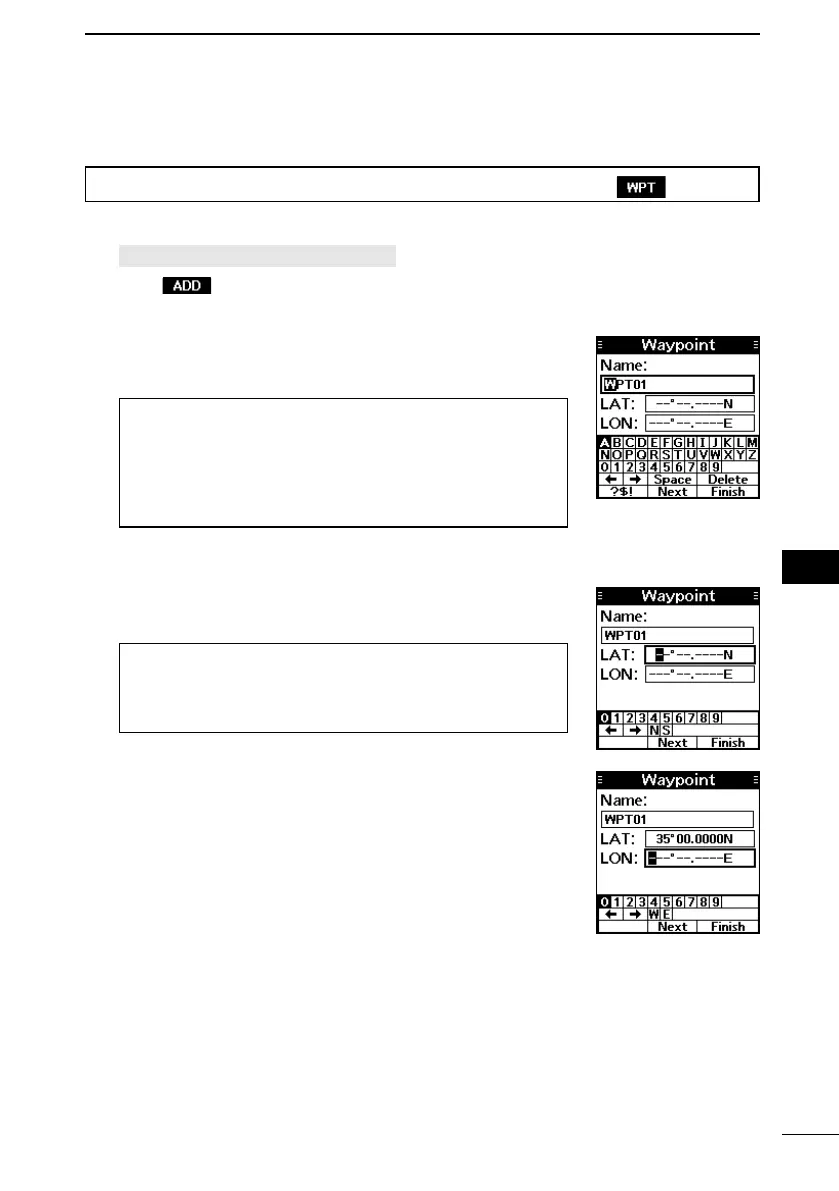
3. Enter a name.
L The “WPTXX” is entered as default. The 2 digits number is
entered instead of “XX.”
TIP:
• Select [? $ !] to enter symbols, and select [A1] to enter
numbers and letters.
• Select characters or space using [▲]/[▼]/[◄]/[►].
• Push [ENT] to enter the selected character.
• Select “←” or “→” on the screen to move the cursor.
4. Repeat step 3 to enter the name of up to 15 characters.
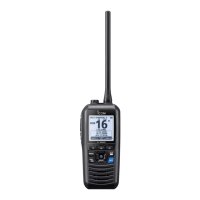
5. Select “Next,” and then push [ENT] to enter the latitude.
6. Enter the latitude.
L When GPS data is received or your position is entered, your
current position information is automatically displayed.
TIP:
• Select a number using [◄]/[►].
• Push [ENT] to set the selected number.
• Select “←” or “→” on the screen to move the cursor.
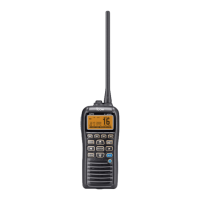
7. Select “Next,” and then push [ENT] to enter the longitude.
8. Enter a longitude.
L See the TIP in step 6 to enter.
L When GPS data is received or your position is entered, your
current position information is automatically displayed.
(p. 23)
9. Select “Finish,” and then push [ENT] to save the name,
latitude, and longitude.
• The waypoint is saved, and the transceiver returns to the
previous screen.
L You can set the waypoint when all items are correctly
entered.
L If you enter no name, or latitude or longitude that is out of
range, a beep sounds and a popup screen is displayed.
Push any key to return the previous screen.