11
PC INSTALLATION AND CONNECTION (CONTINUED)
4. Click I Accept to accept the License Agreement.
NOTE: On some versions of Windows, you will also
have an Automatically check for updates option at
the bottom left corner of the License agreement. It
is recommended to keep this checked.
5. The DisplayLink Core Software and the DisplayLink
Graphics driver will then be installed.
NOTES:
• The screen may flash or turn black temporarily
during installation.
• The Link™ USB Transmitter must remain
connected, even after installation is complete.
6. The Congratulations! window will appear.
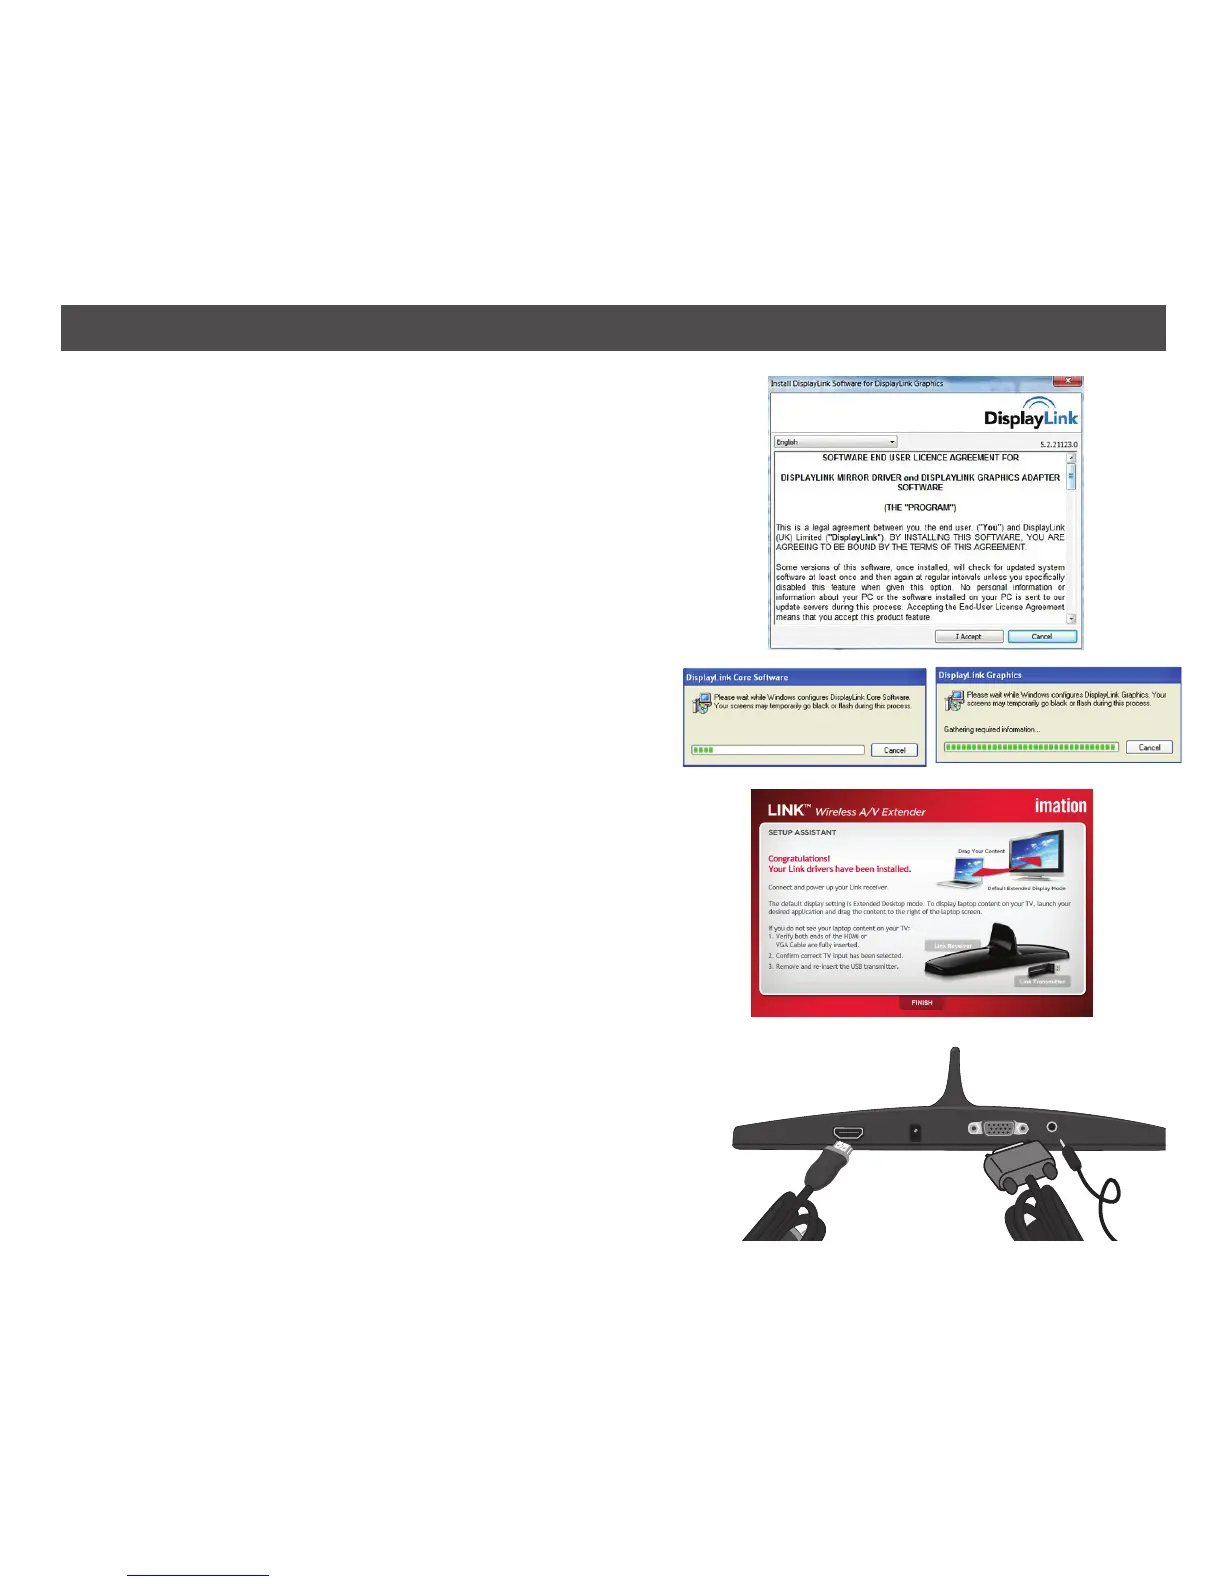
7. Connect the HMDI cable from the HDMI jack on
the Link™ Receiver to the TV, monitor or projector
or connect the VGA and audio cable from the Link
Receiver to the TV. Make sure to set the input of
the TV to the corresponding HDMI or VGA input.
NOTE: The HDMI connector provides audio and
video output so an external audio cable is not
needed. If using VGA, you must connect the VGA
cable and a separate audio cable. Video will not
display out of both the HDMI and VGA ports
simultaneously. If display devices are hooked
up to both ports, HDMI will be the default that is
displayed.
OR