InfiRay Outdoor • Z oom V 2 • User Manual www.infirayoutdoor.com
All rights reserved and shall not be copied and distributed in any form without written permission
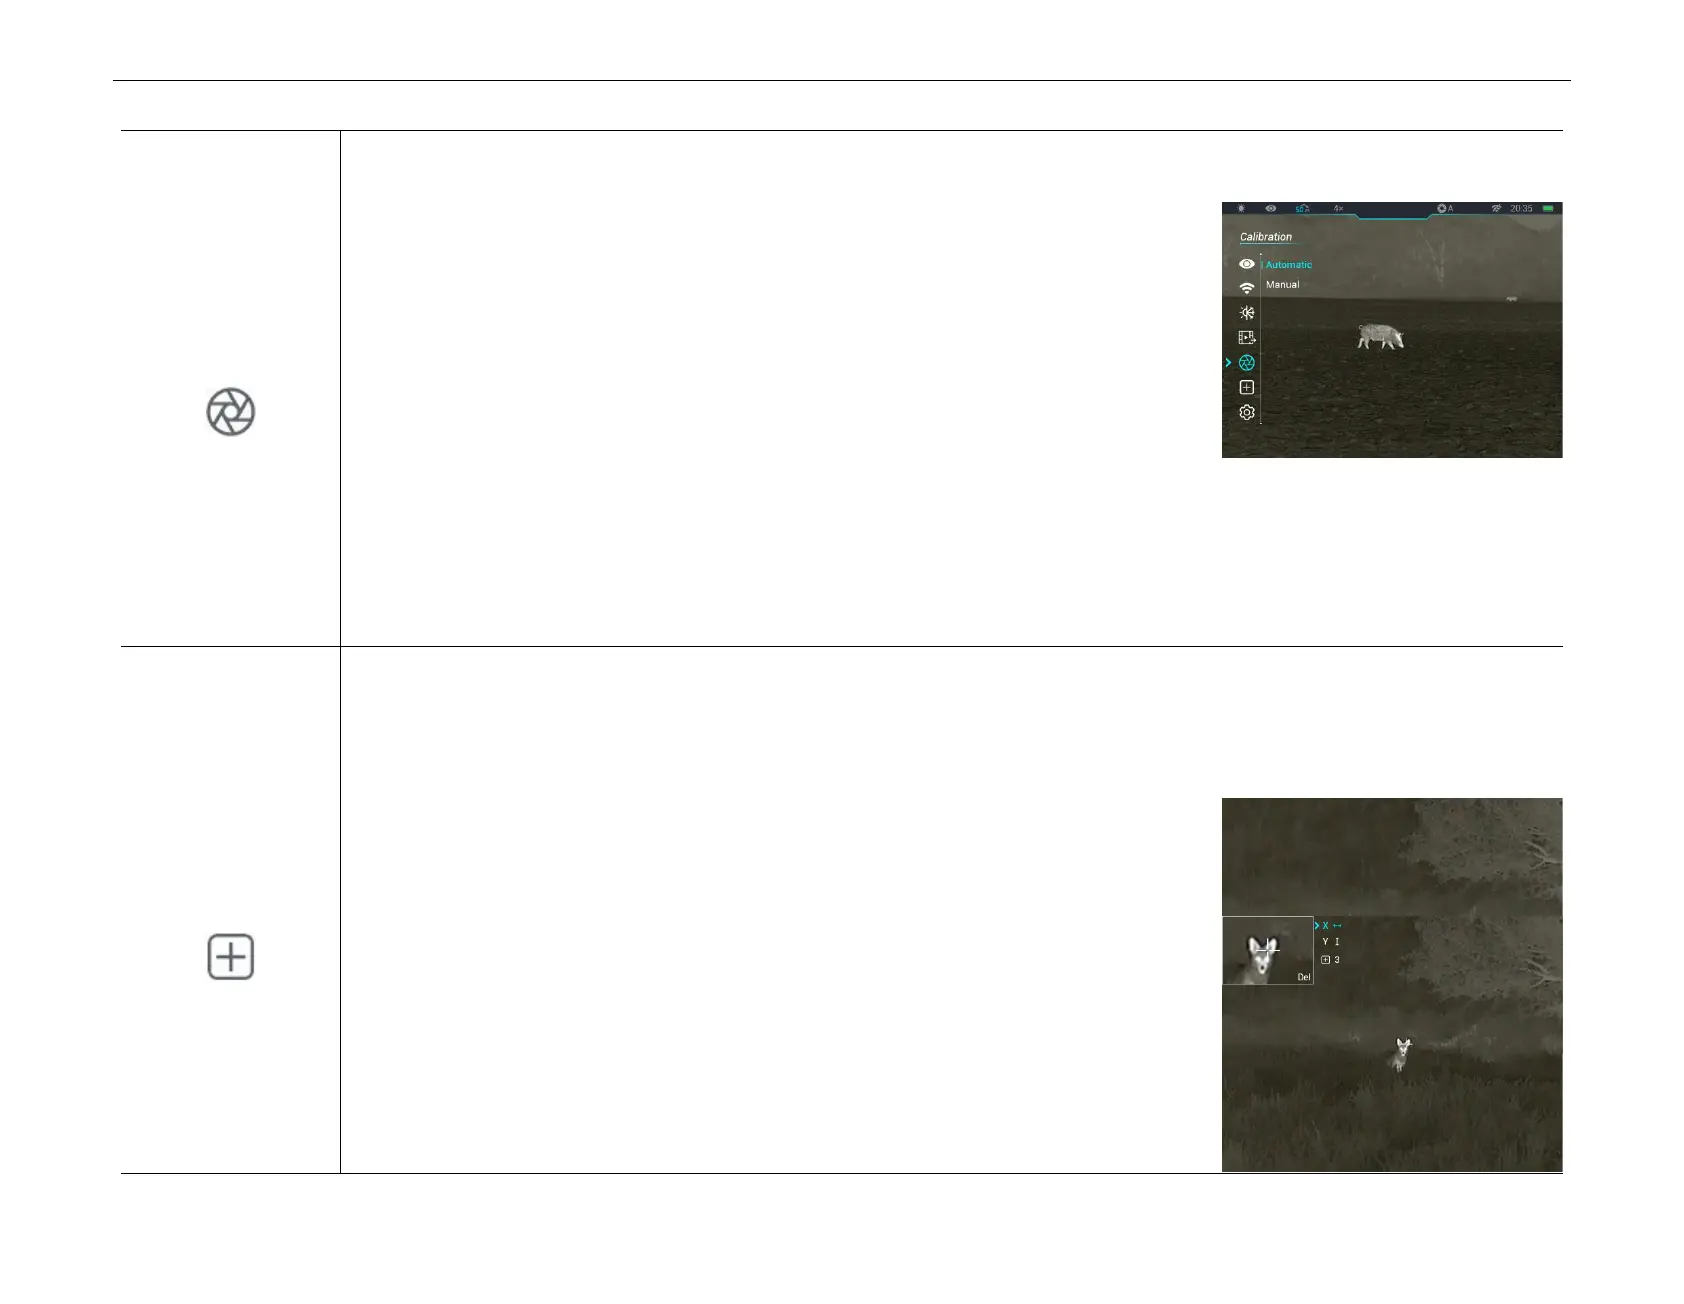
S et the calibration m ode
● Press and hold down the M (7) button to enter the main menu.
● Press the U p (6) / D o w n (8) button to select the C alib ra tio n option.
● Briefly press the M (7) button to enter the submenu of the C alibration function.
● Press the Up (6) / D o w n (8) button to switch the selection between Autom atic and
M anu al.
- Autom atic C alibration : It is defined by software algorithms. When the Image quality
deteriorates, it will be calibrated automatically in this mode.
- M an u a l C alibration: Images are calibrated by the user according to the image effect. You need to briefly press the U p
butto n (6) + D o w n butto n (8) at the same time to perform the calibration.
● Briefly press the M (7) button to confirm your selection. The icon on the status bar changes accordingly.
P ixels D e fec t
C o rrection
C o rrecting the defective p ixe ls
When using the thermal imaging monocular, you may see defective pixels, such as visible light spots or dark spots with stable
brightness. To address this problem, use the defective pixel correction function to remove the defective pixels.
● Press and hold down the M (7) button to enter the main menu.
● Press the U p (6) / D o w n (8) button to select the P ixels D efect C o rrection option.
● Press the M (7) button to enter the defective pixel correction interface. The PIP function is
automatically turned on, and displayed on the lower-left corner by default.
● The right side of the PIP window shows the cursor moving direction (X-axis, Y-axis), and
number of defective pixel correction.
● Press the M (7) button to change the moving direction, and press the U p (6) / D ow n (8)
button to move the cursor.

 Loading...