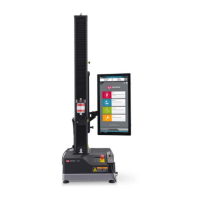
Chapter 3: Operation
56 M47-17027-EN
Insert specimen
Be sure to use a specimen of sufficient length to meet the minimum gripping requirements; see
“Specimen guidelines” on page 43. With this in mind, take the following steps to insert a specimen
into the grips:
1. Make sure both upper and lower grip jaws are open (unclamped).
2. Insert and center the specimen into the grip jaws of the upper grip assembly and clamp the grip jaws
firmly in contact with the specimen. Be sure that the specimen is inserted according to the minimum
gripping requirements outlined in “Specimen guidelines” on page 43. Let go of the specimen and
remove your hand from the frame.
3. Raise or lower the adjustable crosshead as necessary so that the specimen extends the proper
distance into the grip pocket of the adjustable crosshead. Be sure that the specimen is inserted
according to the minimum gripping requirements outlined in “Specimen guidelines” on page 43.
4. Clamp the grip jaws firmly in contact with the specimen.
5. For frames with G1-style crossheads: Remove the crank handle from both the upper and lower
pinions. If the crank handle is not removed, damage to the pinion and the rack teeth of the grip jaws
can occur.
6. The specimen is now ready for testing.
These grips are designed to grip specimens for testing. Therefore, an unavoidable pinching
hazard exists. Make sure to read and understand all installation, removal and operating
instructions before using the grips!
For frames with G7-style crossheads: When a specimen is gripped hydraulically, the gripping force at
each end often causes a compression load in the specimen. This load may be noticeable on the
indicator. If this is objectionable, we suggest either setting up and using the specimen protect feature in
the controlling software or using the JOG UP control button on the user control panel to move the
loading unit in the load direction as the grip jaws are closed on the specimen.
Be sure to keep fingers out of the frame while the crosshead is moving or a test is in
progress.
 Loading...