46
First Time Setup—Continued
Note:
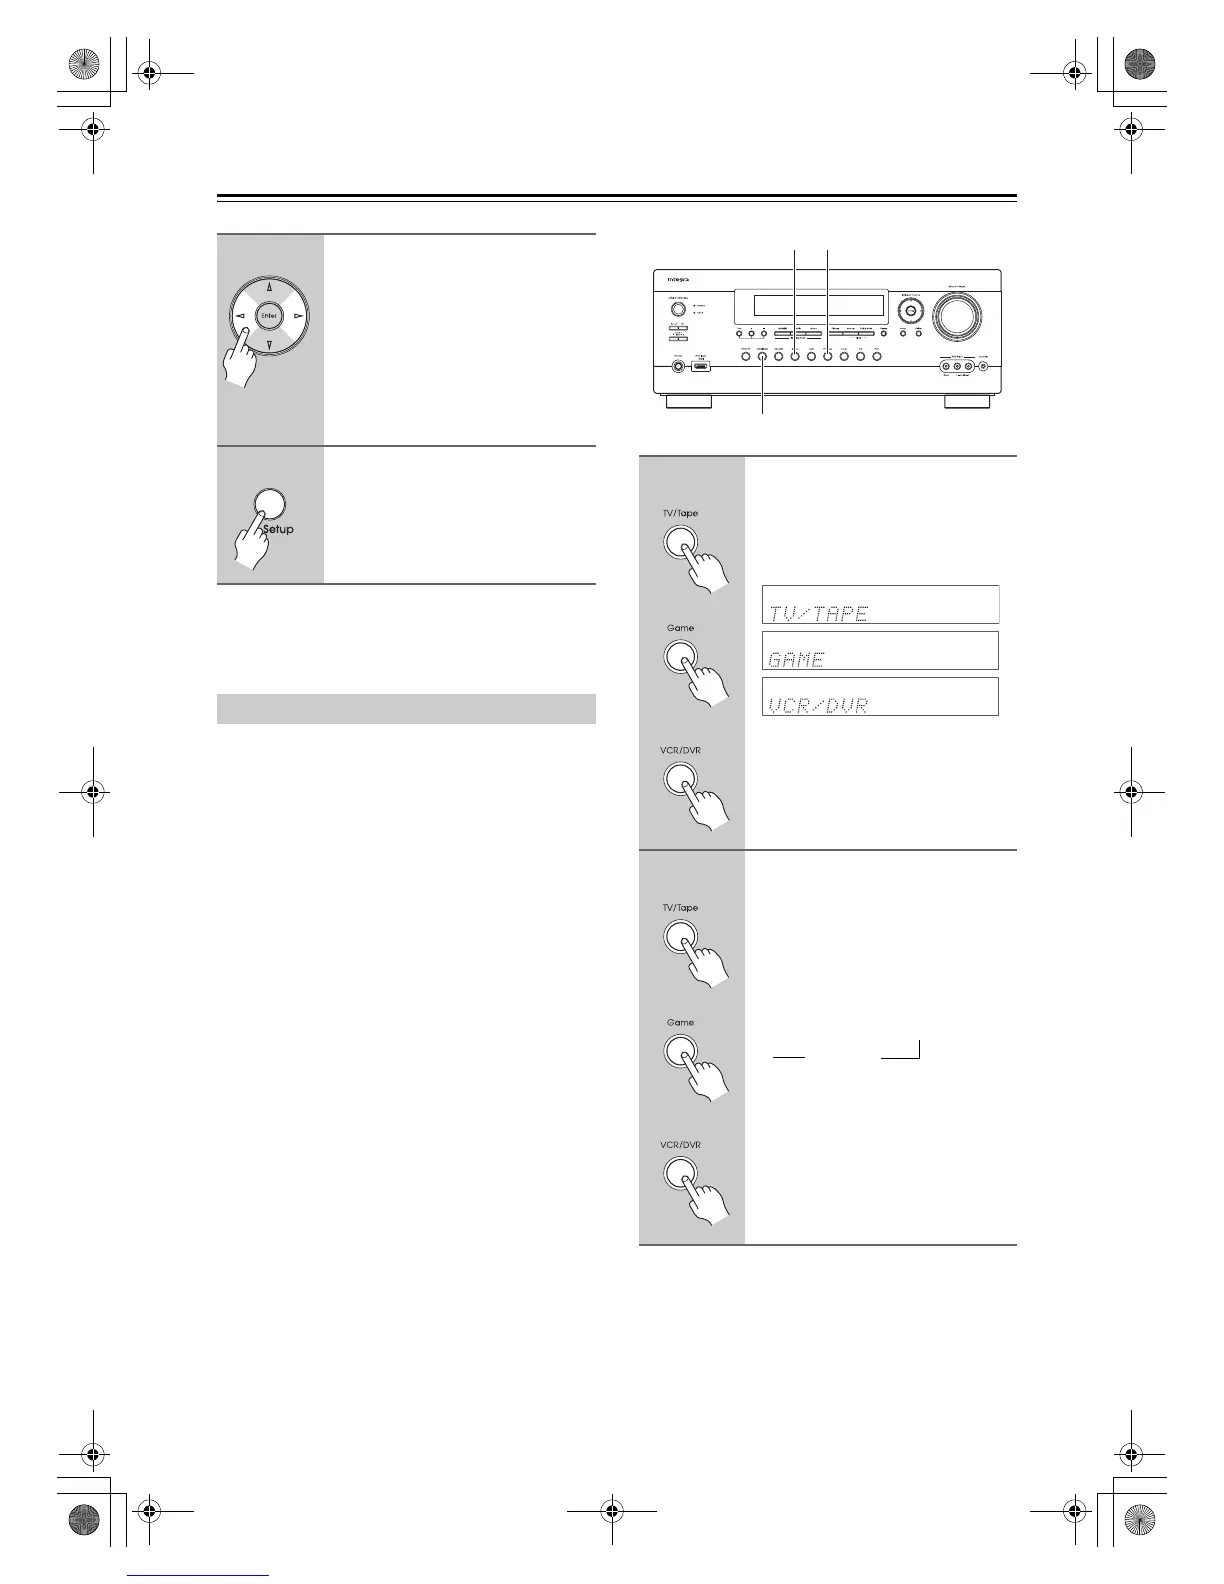
This procedure can also be performed on the AV receiver
by using its [Setup] button, arrow buttons, and [Enter]
button.
If you connect an u-capable Onkyo RI Dock to the
TV/TAPE IN, GAME IN or VCR/DVR IN jacks, for u
to work properly, you must change this setting.
This setting can only be changed on the AV receiver.
Notes:
• DOCK can be selected for the TV/Tape or Game or
VCR/DVR input selector, but not at the same time.
• Enter the appropriate remote control code before
using the AV receiver’s remote controller for the first
time (see page 105).
4
Use the Left and Right [e]/[r]
buttons to select:
200kHz/10kHz:
Select if 200 kHz/10 kHz steps are
used in your area.
50kHz/9kHz:
Select if 50 kHz/9 kHz steps are
used in your area.
5
Press the [Setup] button.
The setup menu closes.
Changing the Input Display
1
Press the [TV/Tape], [Game] or
[VCR/DVR] input selector button
so that “TV/TAPE”, “GAME” or
“VCR/DVR” appears on the
display.
2
Press and hold down the [TV/
Tape], [Game] or [VCR/DVR]
input selector button (about 3
seconds) to change the setting.
Repeat this step to select DOCK.
For the TV/Tape input selector, the
setting changes in this order:
For the Game input selector, the setting
changes in this order:
GAME
↔ DOCK
For the VCR/DVR input selector, the
setting changes in this order:
VCR/DVR
↔ DOCK
Game TV/Tape
VCR/DVR
oror
or
oror
or
TV/TAPE → MD → CDR
DOCK
→
→
DTR-30.1_En_A.book 46 ページ 2009年4月9日 木曜日 午後1時30分