27
Connecting the Power
• Before you plug in the DTR-7.4, confirm that all con-
nections have been made properly.
• Turning on the power may cause a momentary power
surge, which might interfere with other electrical
equipment on the same circuit, such as computers. If
this happens, use a wall outlet on a different circuit.
Plug the supplied power cord into this AC INLET.
• Do not use a power cord other than the one supplied
with the DTR-7.4. The power cord supplied is
designed for use with the DTR-7.4 and should not be
used with any other device.
• Never have the power cord disconnected from the
DTR-7.4 while the other end is plugged into the wall
outlet. Doing so may cause an electric shock. Always
connect by plugging into the wall outlet last and dis-
connect by unplugging from the wall outlet first.
Before you can use the remote controller, you must
perform steps 1 above and place the DTR-7.4 in the
standby state.
Note:
Any components connected via will also be turned
on when the remote controller’s On button is pressed.
Memory backup
The DTR-7.4 uses a battery-less memory backup sys-
tem in order to retain radio presets and other settings
when it is unplugged or in the case of a power failure.
Although no batteries are required, the DTR-7.4 must
be plugged into an AC outlet in order to charge the
backup system.
Once it has been charged, the DTR-7.4 will retain the
settings for several weeks, although this depends on the
environment and time will be shorter in humid climates.
Connecting the Supplied Power Cord
--
/
---
@.
-
'
/ ABC DEF
PQRS TUV WXYZ
GHI JKL MNO
TV CH
TV VOL
RC
-
550M
+
10 0
123
456
789
THX
DSP DSP
+
-
+
-
Direct Tuning
Caps Delete
Language Loca
t
ion
Album Ar
tist GenrePlaylist
Custom
Display
Dimmer
T
V
Input
Sleep
Muting
AngleSubtitleAudio
MemorySearchA
-
BRepeat
T
V
On Standby
A
u
d
i
o
A
D
J
E
x
i
t
G
u
i
d
e
Random
Step
/
Slow
Rec
Last Memory
Clear
Input
T
o
p
M
e
n
u
M
e
n
u
S
e
t
u
p
R
e
t
u
r
n
Zone
2
InputMode
Macro
CH
VOL
Disc
Test Tone
CH SEL
Pure A
Surround
Direct
Stereo
Re
-
EQ
All CH ST
Level
+
Level
-
L Night
Audio SEL
Enter
Master Volume
Standby/On
UpsamplingPure Audio
Audio
Selector
Tape
Tuner Phono Net AudioCD
Video 1
VCR 1
Video 3
Video 2
VCR 2
Video 4 Video 5
DVD
Zone 2
()
GRN
Rec
()
RED
A
-
FO
RM Listening Mode Memory
Video 5 Input
StereoDirect
/
Pure Audio
DSP
Surround THX
Clear
Rec Out
Zone 2 Of
f
Setup
Tuning
Preset
Enter
Return
DimmerDisplay
S Video
Audio
Video L R
Phones
Standby
Memory FM Mode
DTR
-
7. 4
Digital
On
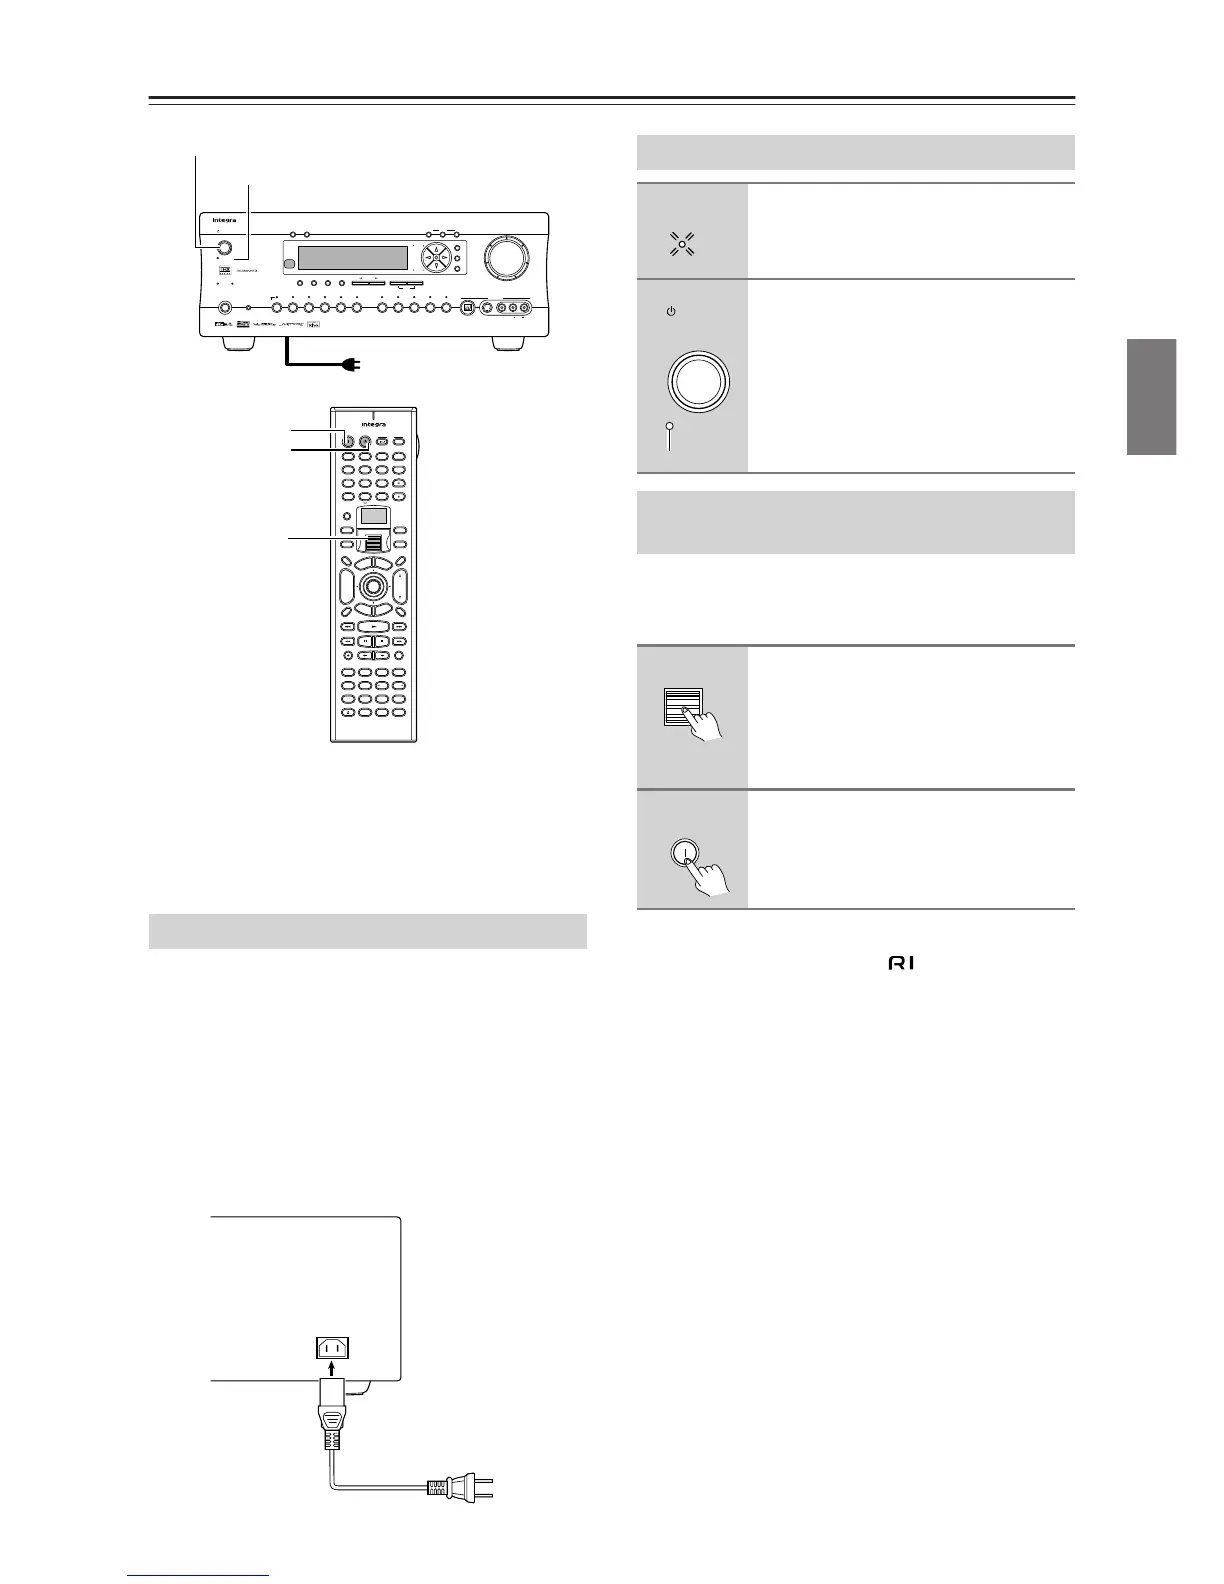
Standby
Standby/On
Standby indicator
Scroll Wheel
To wall outlet
AC
INLET
DO NOT con-
nect the
power cord at
this time.
Power cord
(supplied)
Turning on the Power
1
Plug the power cord into an AC
wall outlet.
The Standby indicator will light up.
2
Press the Standby/On button to
turn on the DTR-7.4.
The display will light up and the Standby
indicator will turn off.
If you press the Standby/On button
again, the DTR-7.4 returns to the standby
state.
Turning on the Power from the
Remote Controller
1
Press the scroll wheel.
“AMP” appears on the remote control-
ler’s display. This is the mode for con-
trolling the DTR-7.4.
2
Press the On button to turn on the
DTR-7.4.
To set the DTR-7.4 to Standby, press the
Standby button.
Standby