Intel Desktop Board D845PEBT2 Product Guide
40
The RAID Configuration Utility
1. During POST, the following message will appear for a few seconds:
Press <Ctrl+S or F4> to enter RAID utility
✏
NOTE
If you are unable to see the message above because the “splash” screen is displayed, disable the
Silent Boot option in the BIOS Setup program. See the heading above, Configuring BIOS for
Serial ATA RAID, step 4.
When the message above appears on the screen, press the <Ctrl> and <S> keys simultaneously to
enter the RAID Configuration Utility.
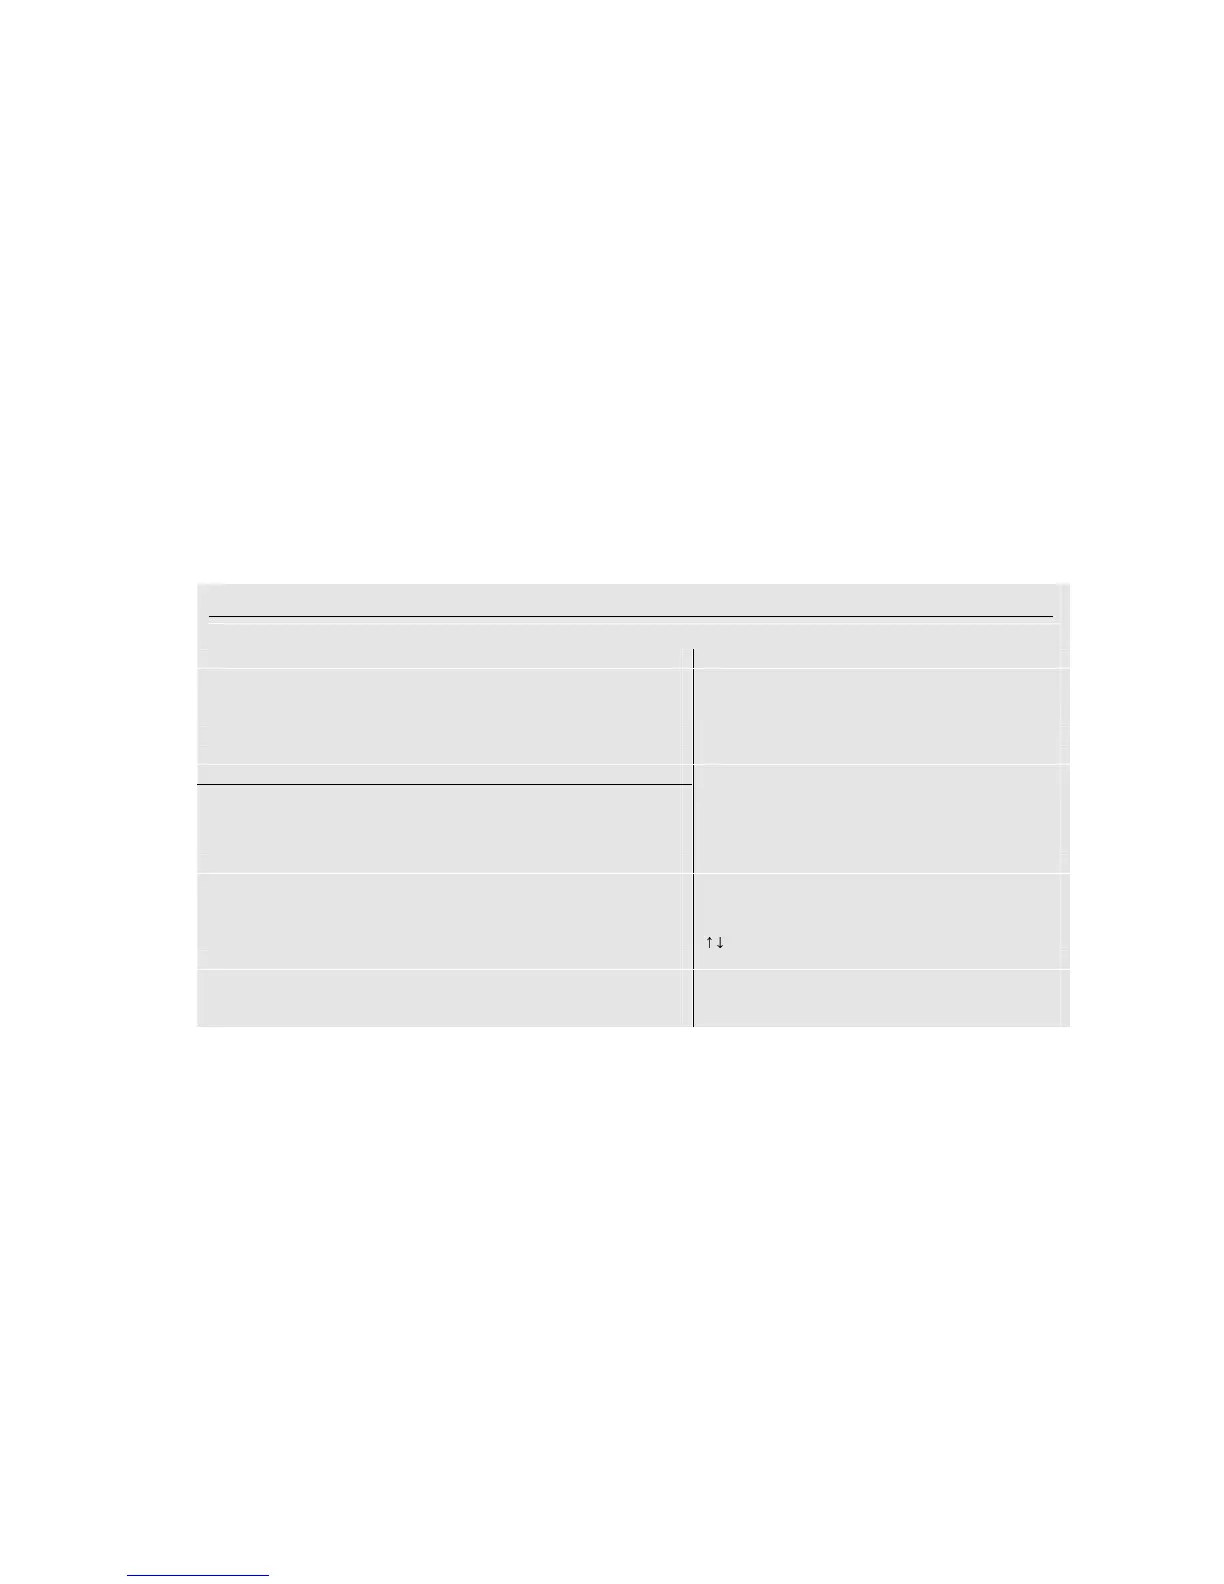
After entering the RAID Configuration Utility, the drives will be listed on the screen as individual
drives, similar to the following screen image:
RAID Configuration Utility - Silicon Image Inc. Copyright © 2002
Create RAID set Press <Enter> to create RAID
Delete RAID set set
Rebuild Mirrored set
Resolve Conflicts
*0 PM Manufacturer Model XXXXXMB
1 SM Manufacturer Model XXXXXMB
6HOHFW0HQX
ESC Previous Menu
Enter Select
Ctrl-E Exit
* First HDD
2. Highlight the Create RAID set option using the up-down arrow keys and press <Enter>.
3. Choose which type of RAID set to create, Striped or Mirrored:
• If a Striped set (RAID 0) is required, proceed with the instructions in the next heading,
Creating a Striped Set (RAID 0).
• If a Mirrored set (RAID 1) is required, then go to the Creating a Mirrored Set (RAID 1)
heading.