Getting Started for Admins
Intel® Education Content Access Point
User Manual January 2015
14 Document Number: 331819-001EN
2.9 Upload content
TIP! See Section 5.11.2 (Manage preloaded content database) for advanced methods of uploading content.
CAUTION:
Uploading to the Preloaded Content database will erase existing teacher-uploaded content in the My
Uploaded Content space.
The device will reboot as part of the content upload process. This will temporarily disrupt network and
content access for users, who will see a “503 – Service Not Available” message during the process.
To upload content, do the following:
Create a package containing the content to upload:
a. Zip the content into a file called content_xyz.zip (also known as the package), where “xyz” can be any
combination of letters and numbers (for example, content_123.zip, content_abc.zip,
content_a1b2c3.zip, etc.).
b. Do not include subfolders.
c. Do not encrypt or password-protect the zipped file.
d. Total size must not exceed 2 GB.
Upload through the Admin console:
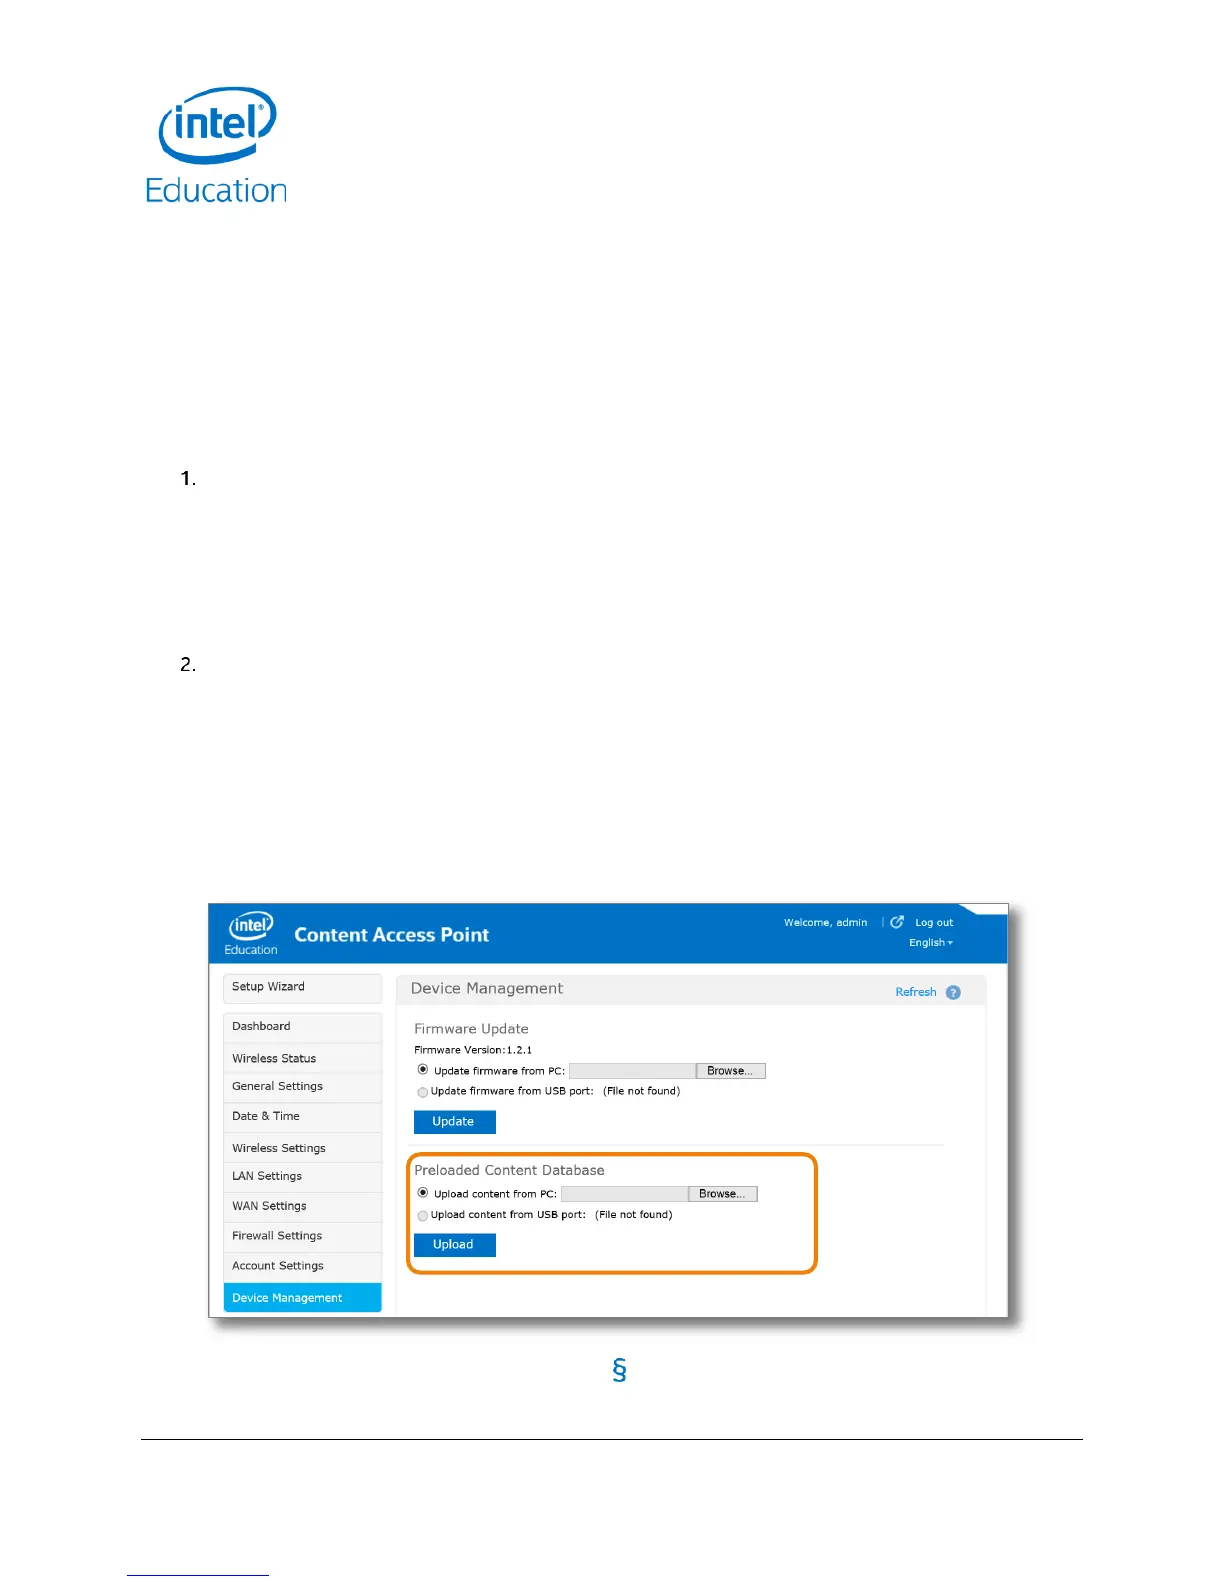
a. Go to Device Management > Preloaded Content Database. (See Figure 9.)
b. Specify the location of the package (a local computer or a storage device connected to the USB port in
the Intel® Education Content Access Point).
TIP! If you are uploading from a USB drive connected directly to the device, put the package in the
root directory and plug in the drive. The package file will display after you refresh the admin screen.
c. Click Upload.
Figure 9: Admin - Upload content